Scoped Views
Tutorial - Scoped Views for users with "Regular User" role
Tutorial - Scoped Views for users with "Owner" role (administrators)
It's often the case you want to create and persist a well defined view of your cloud costs. Perhaps the view is at a line of business, product line or team level composed of Ternary custom labels or vendor defined labels. You then want to apply views to one or more users in your organization and you want the views to persist, but give the users flexibility to disable the view or apply a different view. And there are times when you want to empower users to create their own personal views. We hear you, and very excited to bring you Scoped Views. As a Ternary organization administrator or regular Ternary user, creating and managing Scoped Views is easy, powerful and flexible.
As a Ternary administrator, you will find a new Scoped Views admin feature in the Admin page.
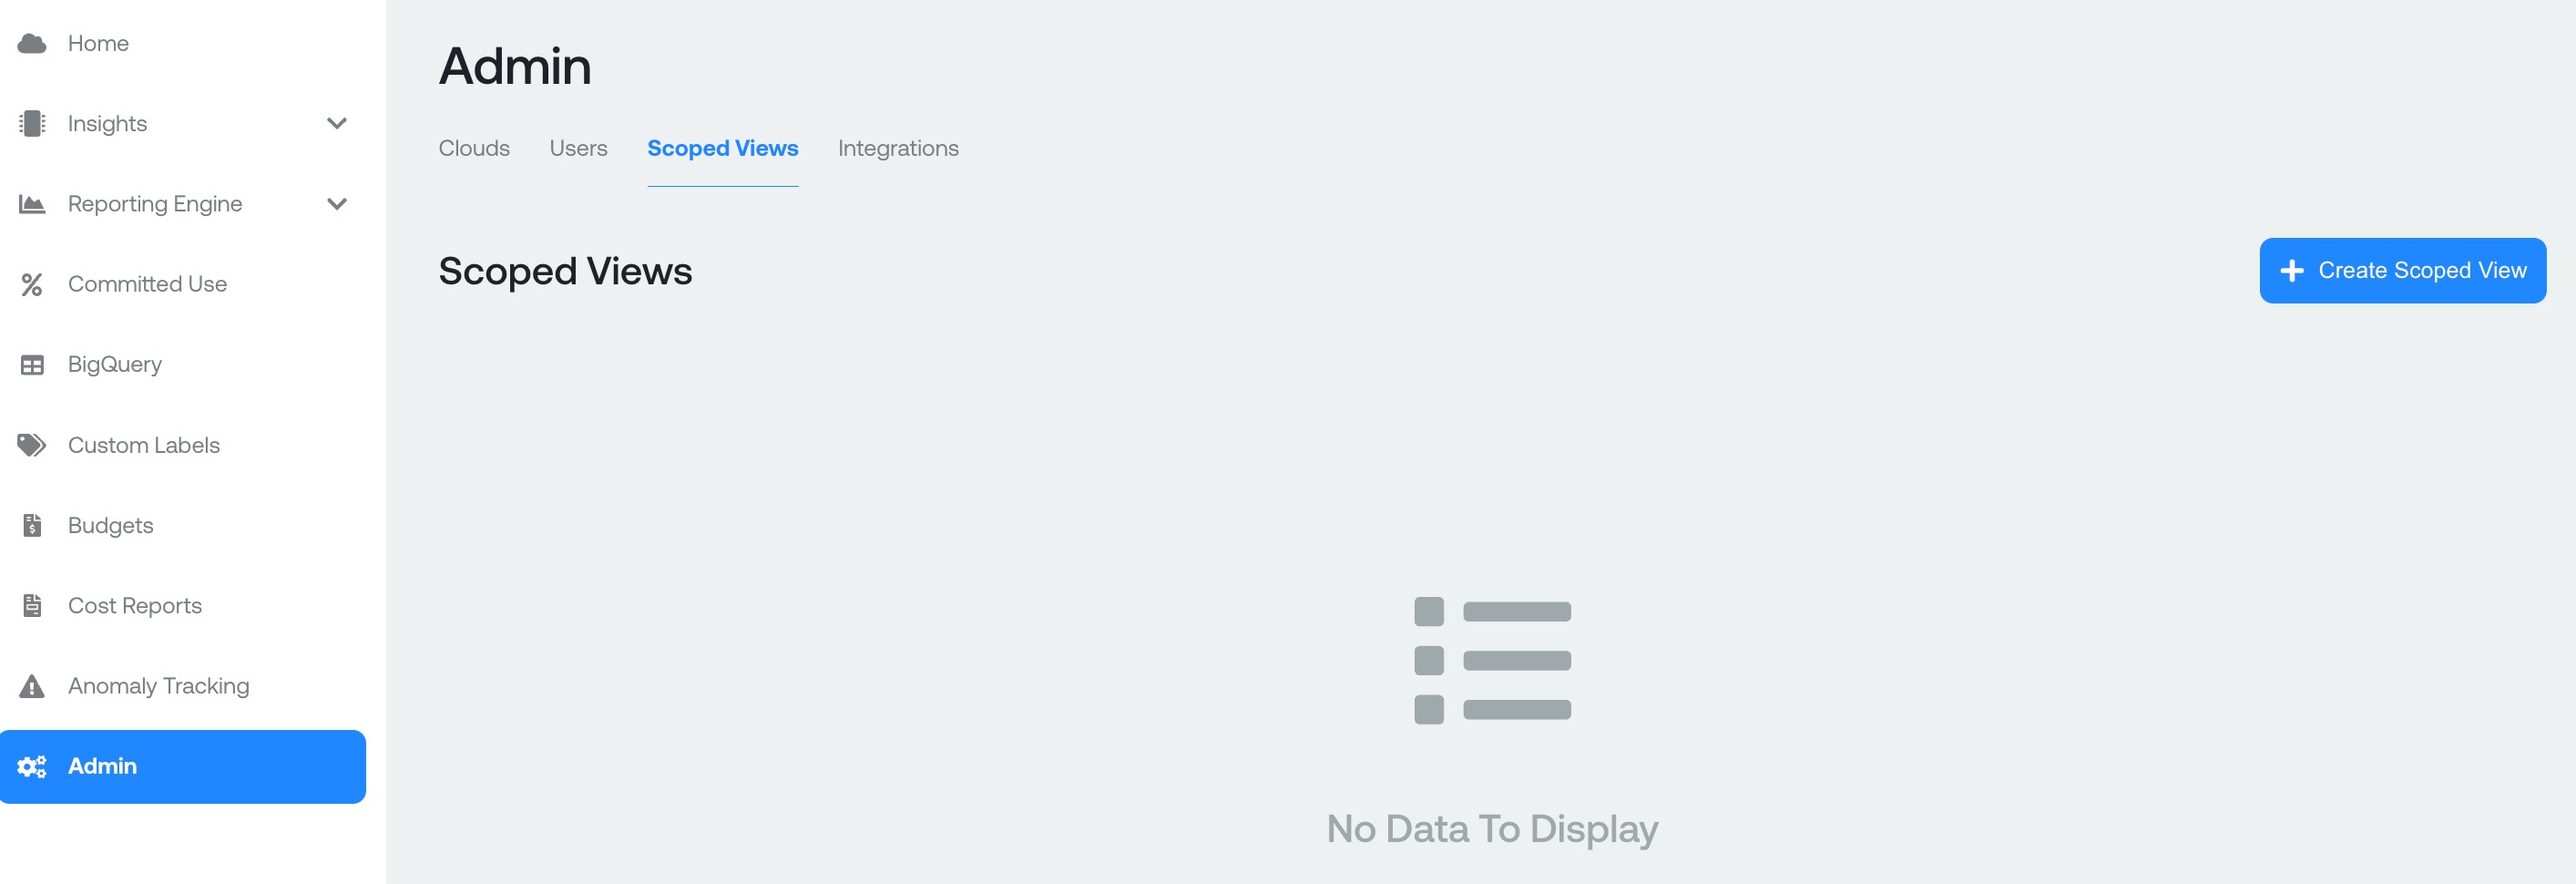
Click the 'Create Scoped View' button to build your first Scoped View
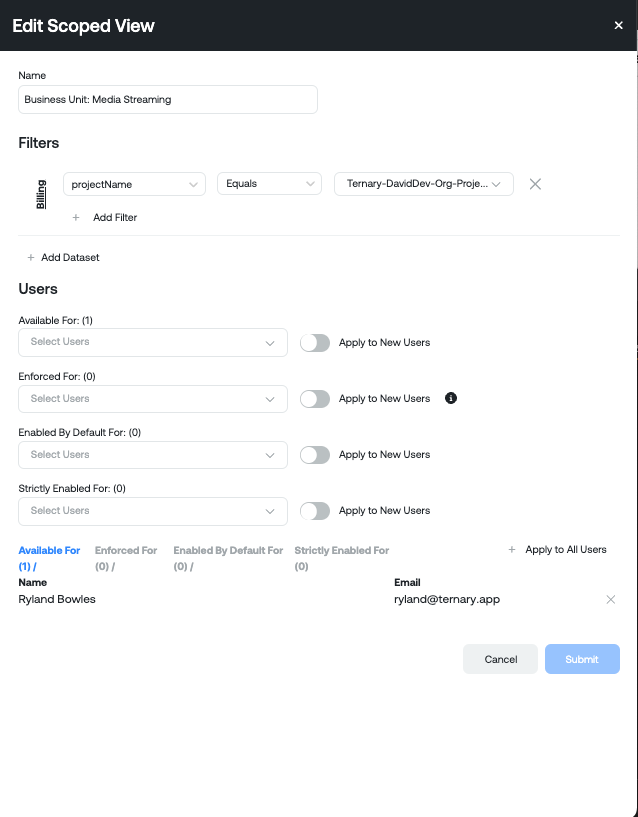
Give your scoped view a name that your users will see (and understand), define your scoped view filter/s based on one or more Ternary custom labels or cloud vendor billing labels/dimensions. Note, these filters will be evaluated as 'AND' logic.
You have 3 options, for applying scoped views to users within your organization. All 3 have slightly different behavior and use-cases outlined below:
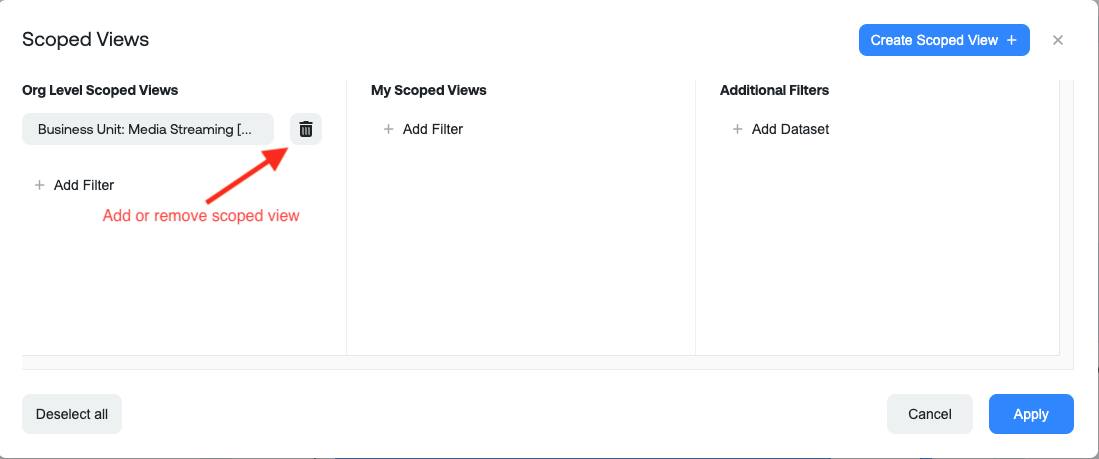
- "Available For": Adding a user to this list, they will see the scoped view available to them in their "Org Level Scoped Views" on any page that currently supports scoped views. The scoped view will not be applied when they log in but they can apply or remove the scoped view at their discretion
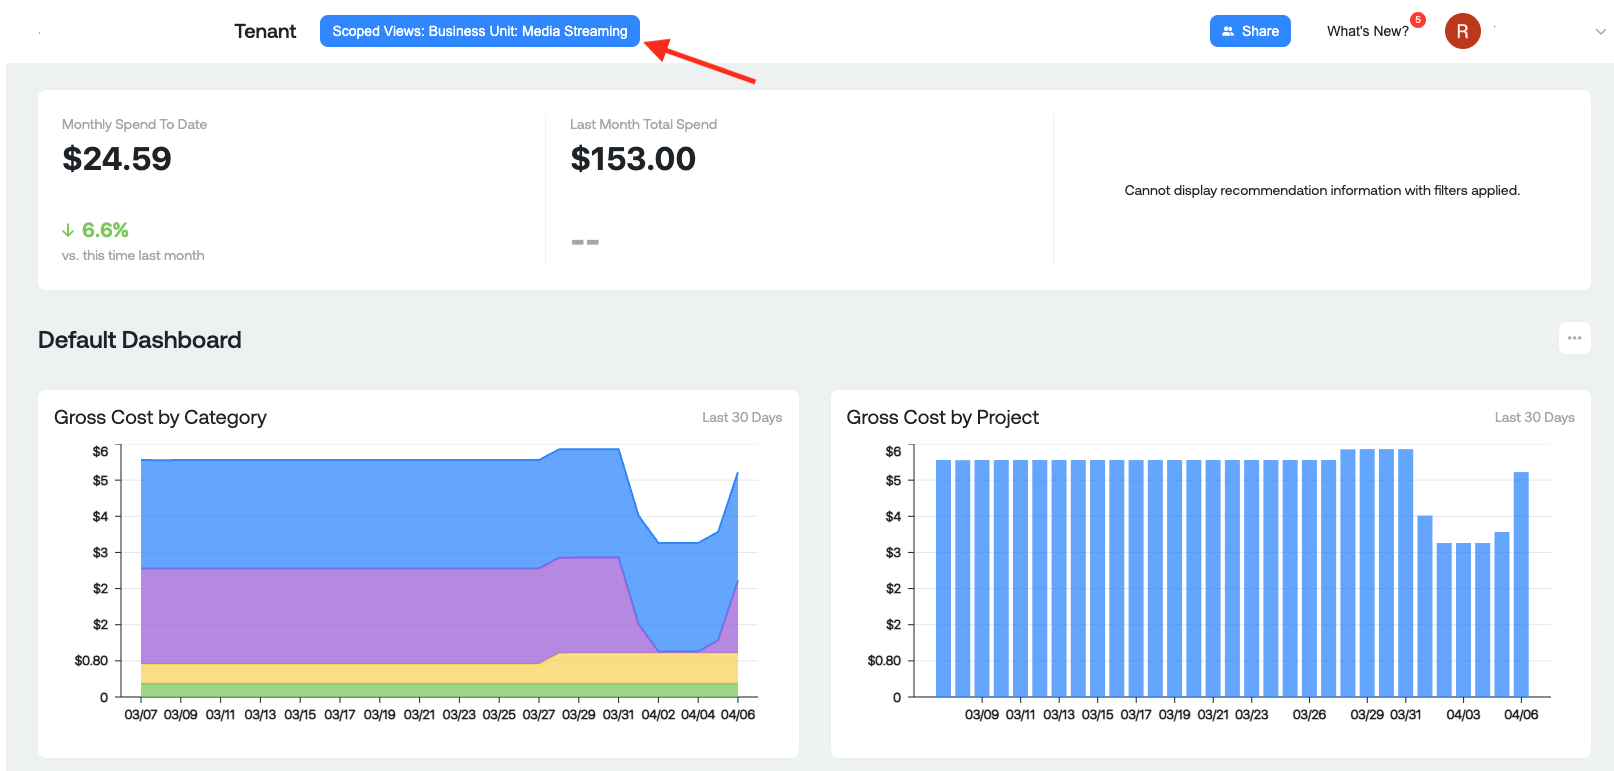
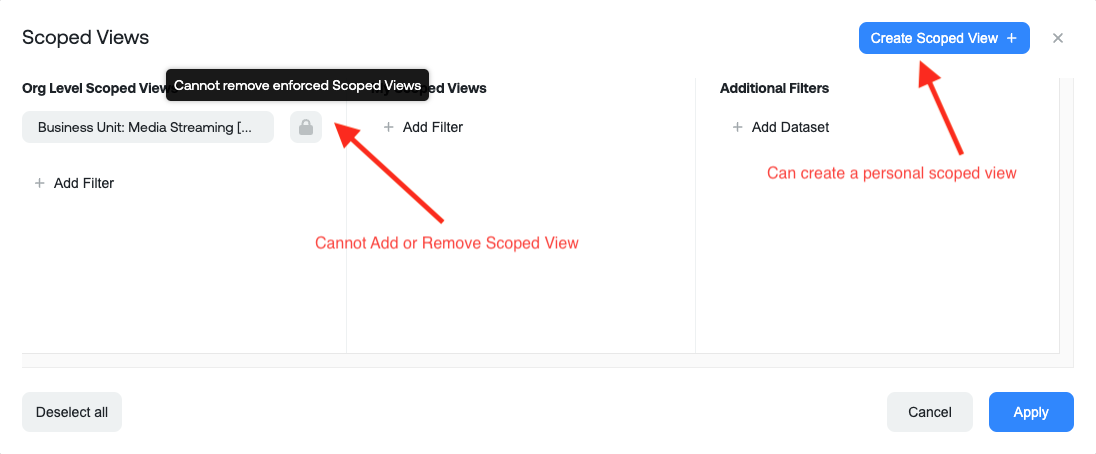
- "Enforced For": Adding a user to this list will force the scoped view to be applied and the user cannot remove it. They will still be able to create personal scoped views but it will not go outside the boundaries of the scoped view filters you created and enforced for the user.
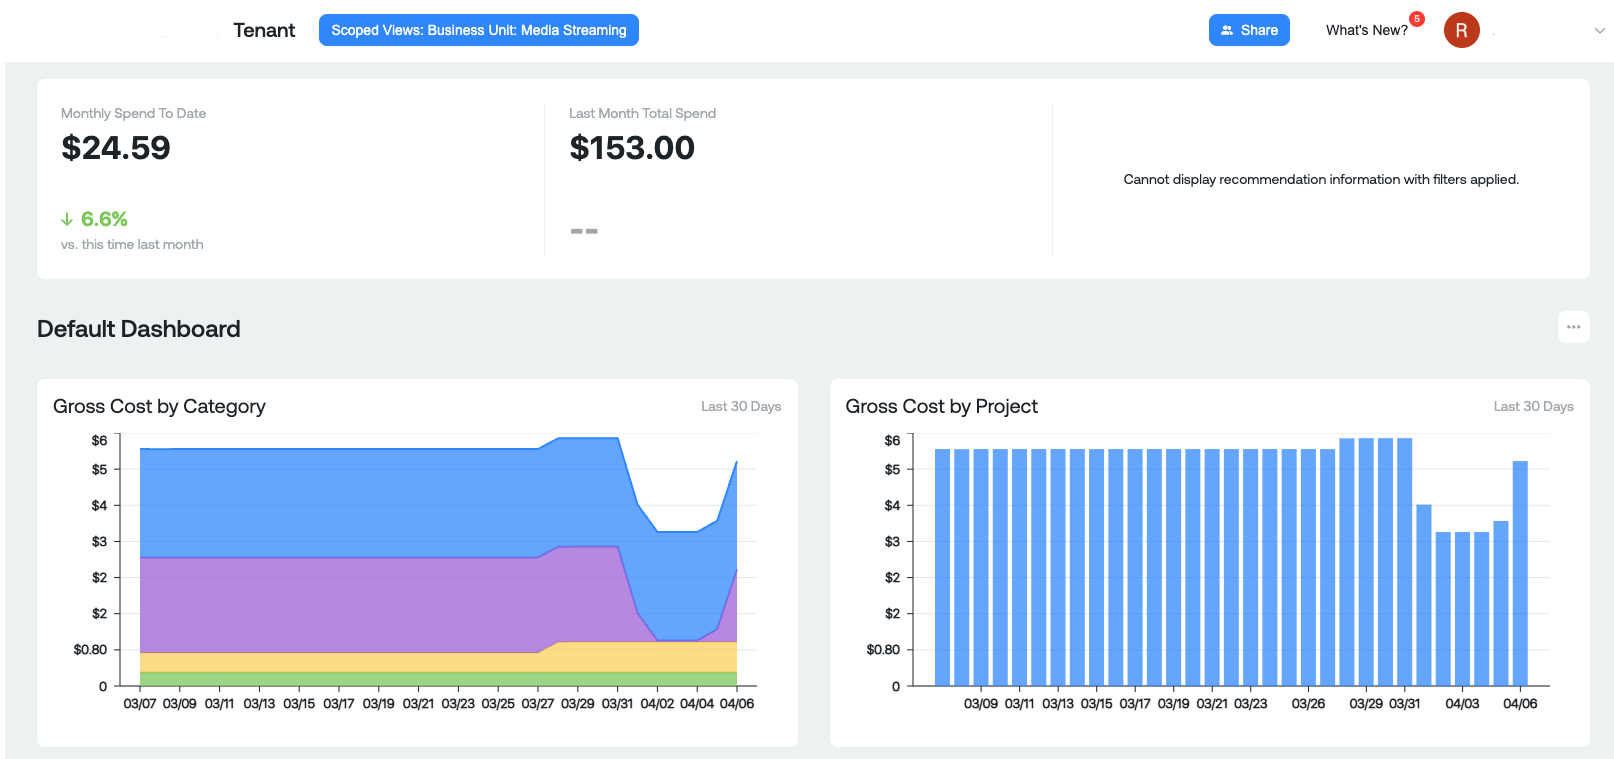
- "Enabled by Default For": Adding a user to this list will apply the scoped view, by default, any time the user logs into the Ternary platform. In contrast to enforced scoped views, where the user cannot remove the scoped view, a user is able to toggle the default scoped view on and off.
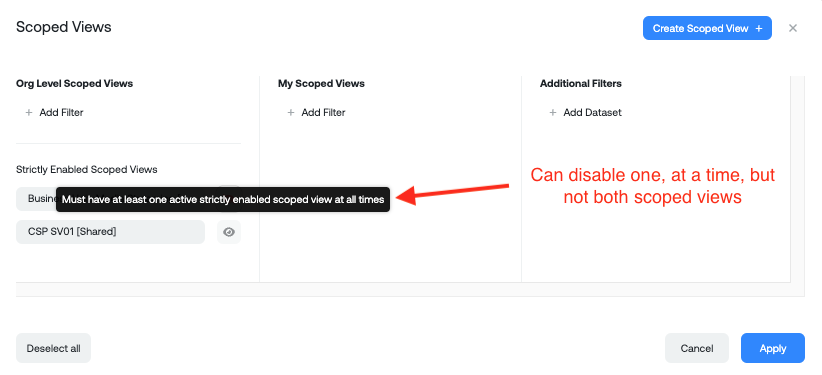
- "Strictly Enabled For": Adding a user to this list is similar to Enforced For but will use OR logic when 2 Scoped Views are applied. For example, if a user has Scoped View 1 and Scoped View 2 applied they will see data for both SV1 and SV2 with the ability to toggle off SV1 or SV2 to see just spend for either Scoped View in isolation. This is slightly different than Enforced For which would use AND logic.
You can select individual users from the associated drop-down list to assign a particular view to each user. Once you assign a user, to one of the 3 options, they will be removed from subsequent lists for assignment.
To review a comprehensive list of users assigned to each option you can navigate to the options table at the bottom. You can also remove users from each list via the X icon.

There are 2 additional options that are important to understand when assigning users to scoped views:
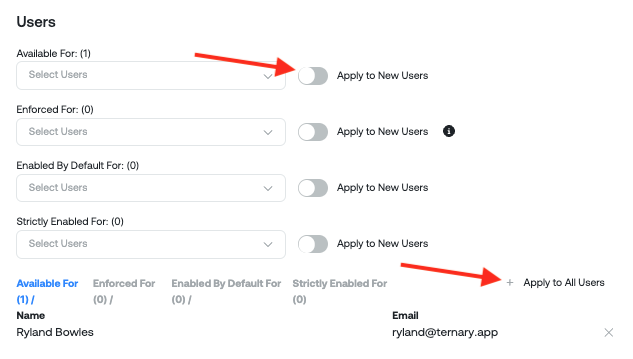
- Apply to New Users: By enabling this, any new user created in the Ternary platform will have the scoped view either Available, Enforced or Enabled by Default.
- Apply to All Users: By selecting this, all current users in the Ternary platform will have the scoped view either Available, Enforced or Enabled by Default.
Once you have created the scoped view, and applied it to users in your organization, you can see how each behaves for the assigned user below.
Available For:
Enhanced For:
Enabled by Default For:
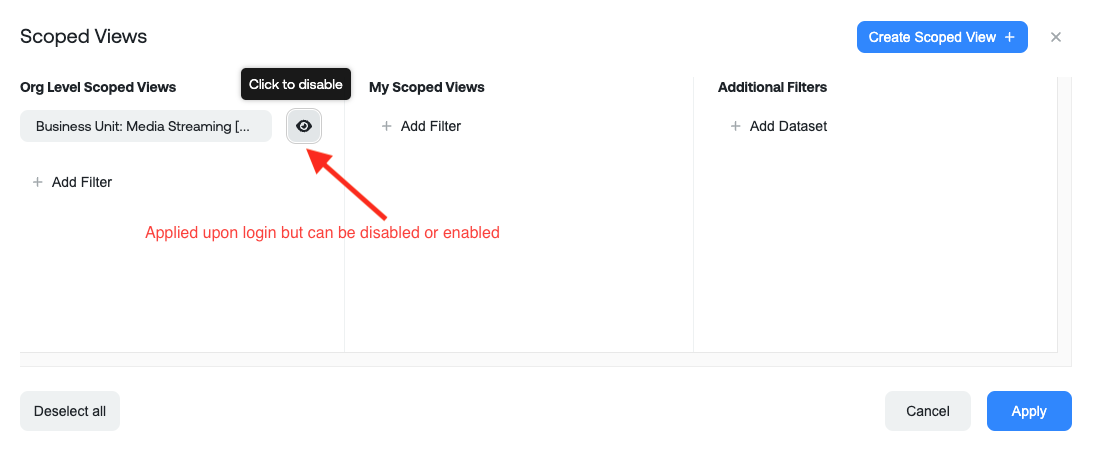
Strictly Enabled For:
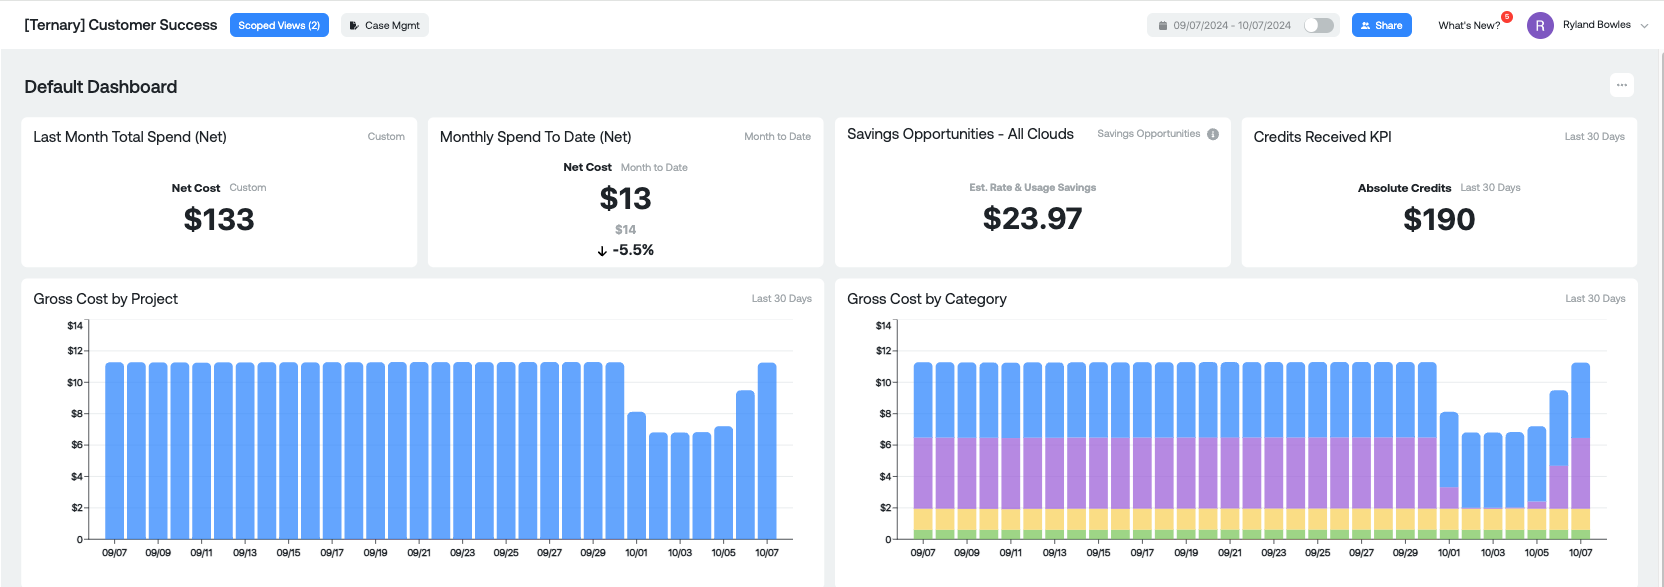
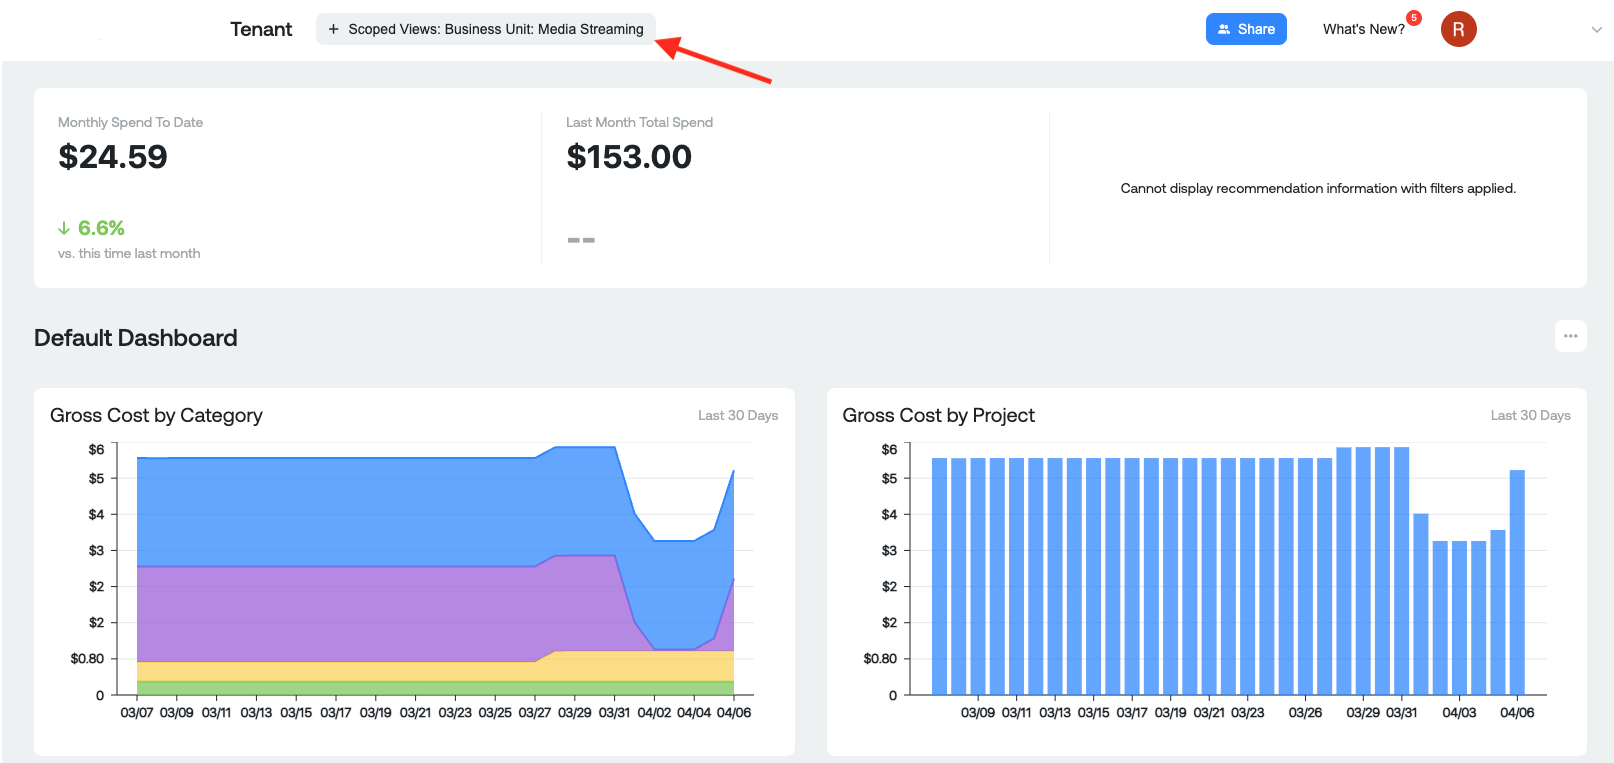
Your scoped view indicator will change color based on views enabled or disabled
No Scoped view applied (grey)

Organization or Personal scoped views applied (blue)

Organization or Personal scoped views disabled or muted (red)

Similar to organization scoped views, you can create a personal scoped view. Swing over to your Ternary profile 'Settings' page to build your first personal scoped view.
Scoped Views Applicability
Today, you can apply scoped views to these Ternary features
- Home
- Reporting Engine Dashboards
- Reporting Engine Reports
- Cost Reports
We will add support for other features in follow-on scoped views releases.
Use Cases
Creating flexible aggregations of projects, services, or labels
You would like to flexibly build include/exclude logic to incorporate multiple dimensions into a single collection. The example shown below excludes a cloud label indicating shared services, includes a label of ‘cluster’ contains ‘bigco’, and also includes a set of specific projects
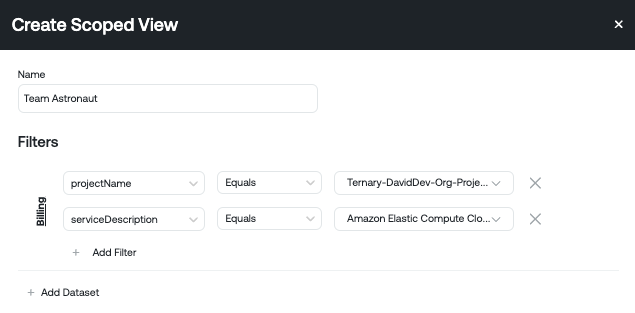
Steps: Once you enter a name for a new Scoped View, the process is simply one of building the criteria you want to consider. It is possible to build combinations that result in a ‘null’ set, in which case you will see ‘No Data to Display’ in reports and dashboards when the view is applied.
Enabling re-use of ‘generic’ dashboards and reports by application of Scoped Views
You would like to build a layout of data for each of my DevOps leaders that focuses on the projects they control. I don’t want to have to re-build the dashboard for each, rather I would like to master one, and have it show different data based on the user who is logged in.
Steps
- Build the report templates using no filters other than those that will apply to all users. Keep them generic like ‘Compute Costs by Family’, ‘Spending by Category Before Credits’, etc. You don’t want to apply filters at this point because that will be accomplished via the Scoped Views
- Now add in your scoped views for things which will span all of those reporting categories. These can be based on account or project id’s, labels on cloud assets, or even labels defined in Ternary.
Make sure that they can work in tandem with your reports. For example, this would make a good combination: “Cost by Project” with a Scoped View of “Projects for Team A”. A bad example would be: “Cost by Project” with a Scoped View of “Services with Credits”. The latter would likely produce no results since credits typically don’t get applied to individual projects.
Example of a Default Dashboard with no Scoped View Applied
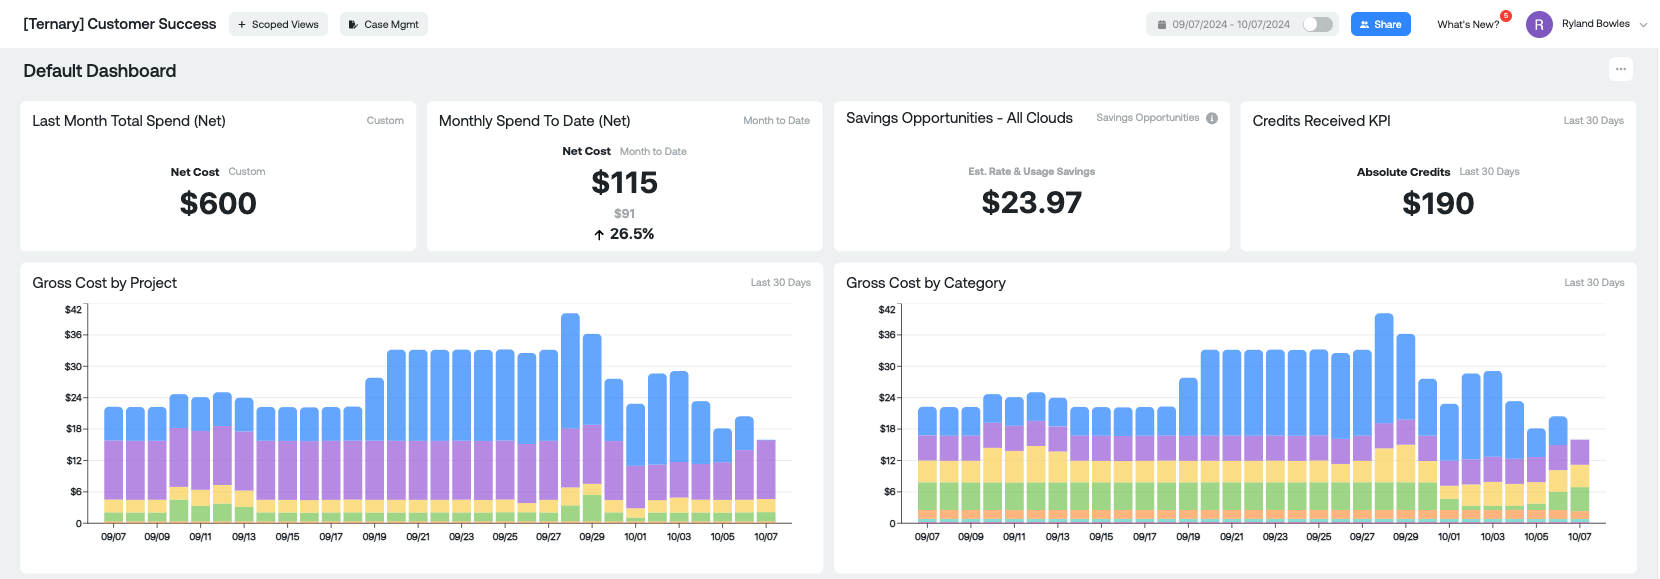
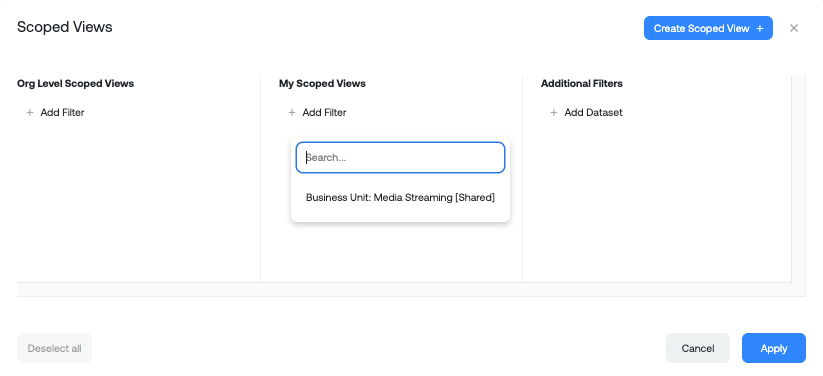
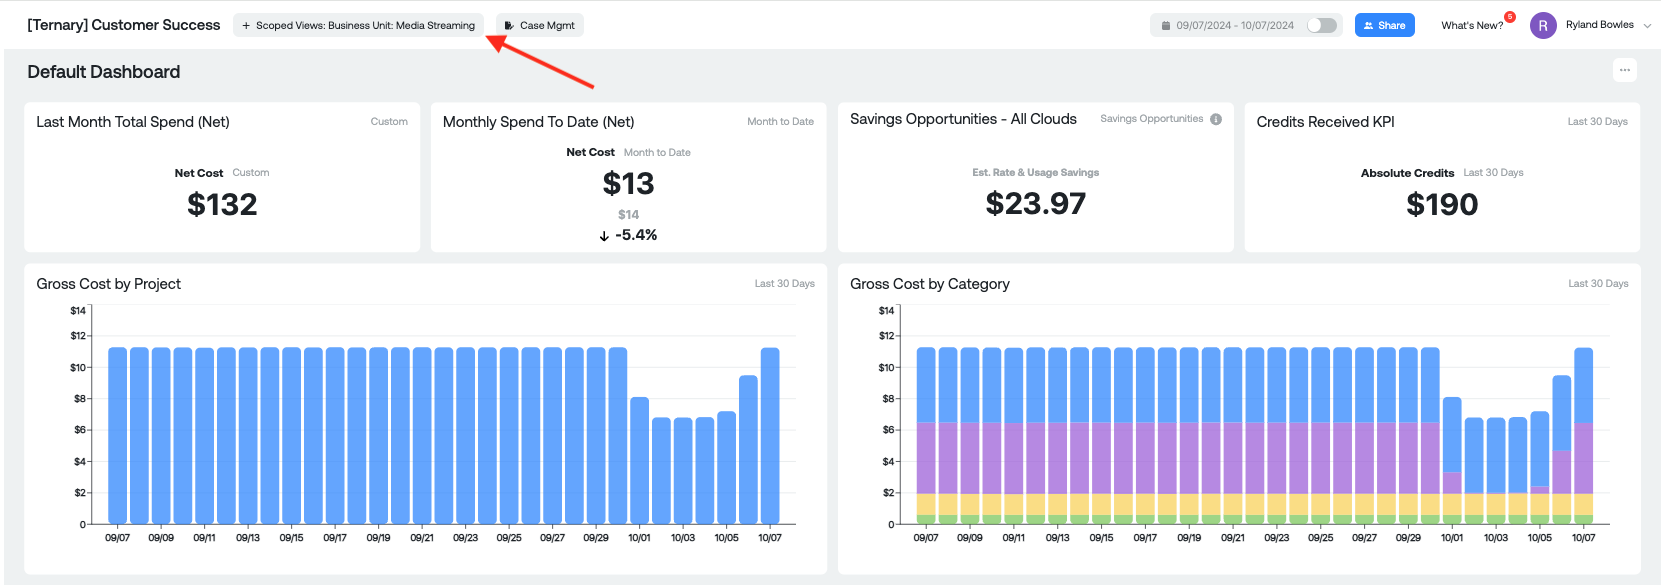
Now, by applying one of the Scoped Views, by clicking the + Scoped Views icon you can focus that generic Default Dashboard dashboard for just the Media Streaming business unit, which accounts for around half of the overall spend.
Blending costs across cloud providers
Sometimes you would like to consider costs across multiple cloud providers without getting hung up on the specifics of each of their bills - projects in GCP vs accounts in AWS, a resource label in GCP vs an asset tag in AWS. Ternary can help with that.
Once your billing data has been loaded into the platform, check to see what native dimensions are in the data. You will certainly have project ids and account numbers. But will you have labels or tags? That will depend on your current DevOps practices.
Often the labeling will be less than perfect. For example, your AWS standard might be to use camelcase tags like ClientBillingRollup, while your standard on GCP might be lowercase acronyms like cbr or client_billing_rollup. In order to show those costs together, I would like to normalize on one standard without having to go back and re-label everything
Steps
Each Cloud in your data will have its own unique identifier. For each cloud, you will want to take the ‘native’ dimension - perhaps a GCP label in Cloud 1 and an AWS tag in Cloud 2 - and map them to the same key/value pair.
- Choose the cloud to which you will be applying the label
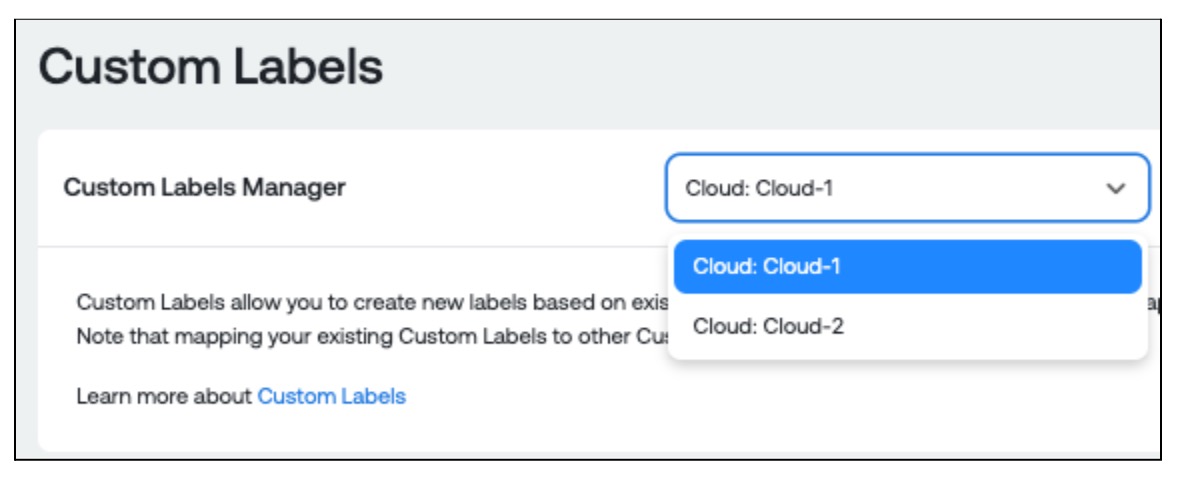
- Select the existing label key and value, map to the custom label and value in Cloud 1

- Now do the same for Cloud 2, being careful to use the same custom label key and value

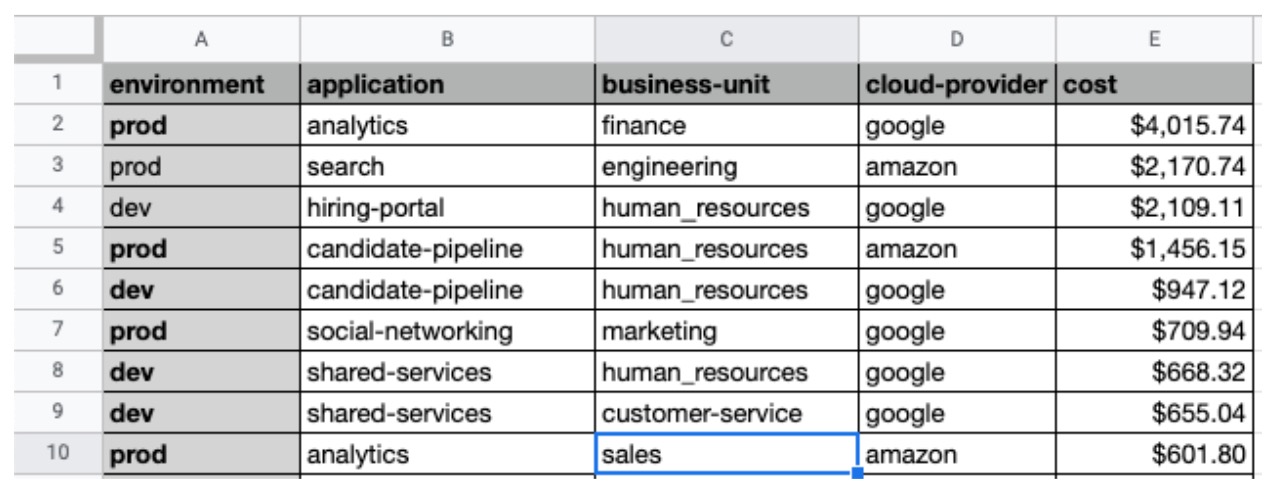
As long as they match exactly, your data can be stitched together as you see below. Notice that the cloud-provider column (another custom label, created in the same way) makes it clear where the particular applications were running.
SSO Driven Assignment of Scoped Views
Our SSO integration allows you to configure users to be assigned an appropriate set of Scoped Views when they access Ternary for the first time or when their IdP group changes.
To begin the process of setting up groups in Ternary to assign appropriate Scoped Views to users, you must have SSO through your IdP configured with Ternary. This allows us to receive the Group names from your IdP token which is what enables assigning the appropriate Scoped Views through Groups in Ternary.
Prerequisites
- A user with the Admin role in Ternary
- Have already created Scoped Views that align to your user groups to provide users the appropriate data. Documentation and explanations on creating Scoped views can be found here
- You must have SSO configured and set up with Ternary. If you have not done this, you can find the steps to do so in our documentationhere
Gotchas
- If a group name already exists in Ternary an error will be returned by the system when attempting to create the Group.
- If you delete a group the users assigned Scoped Views will be removed and they will have access to all data. You can create a separate Scoped View that filters out all data and assign it to the user to ensure they do not have access to do data that they should not have.
- Instead of making Edits directly in an existing Group, to do testing, we recommend making a Copy of the Group to make changes to test.
- Changes are instantaneous. Meaning, if a user was not in a Group before and had access to all data, as soon as they are assigned to a Group the Scoped Views will be available/enforced/enabled by default.
- You cannot change the name of an existing group, at present, you must make a Copy and change the name. This is to prevent an issue of an already working Group being modified and breaking the integration.
- If a user has existing Scoped Views assigned, they will be overwritten by the Group assigned Scoped Views.
- If you make changes to an underlying Scoped View, for a particular user manually, those changes will decouple the SSO assigned Group and Ternary. For example, if a Scoped View was assigned to a user as "Enforced For" and you change it to "Available For" for that user it will decouple the two.
Step 1 - Set up Groups in Ternary
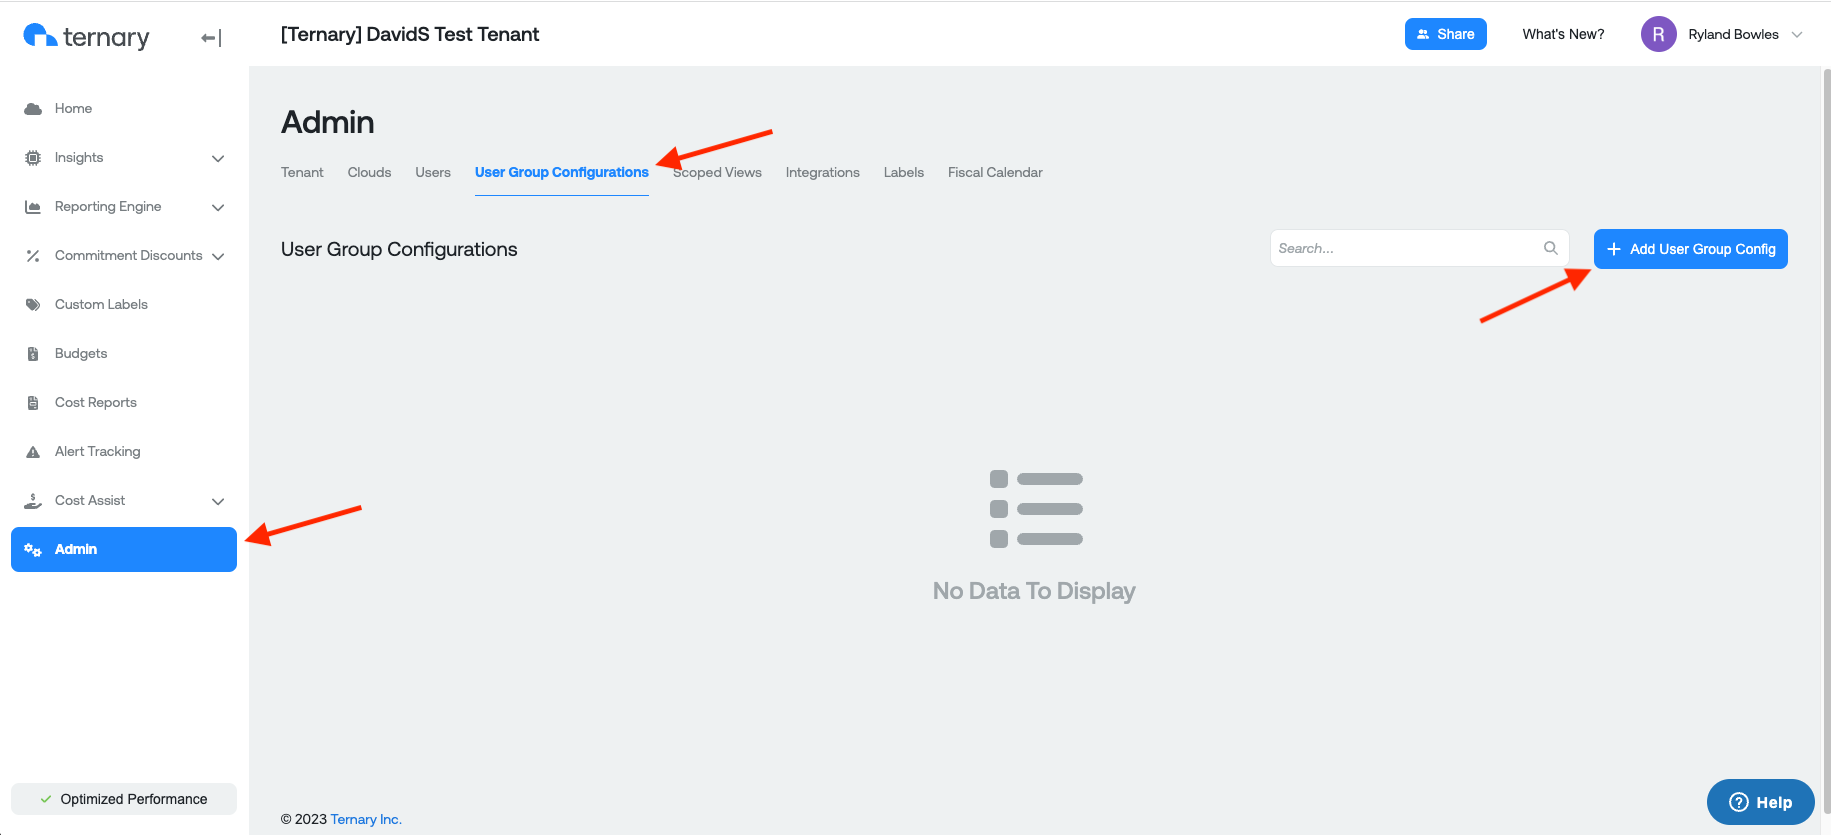
- Navigate to Admin -> User Group configurations
- Click "Add User Group Config"
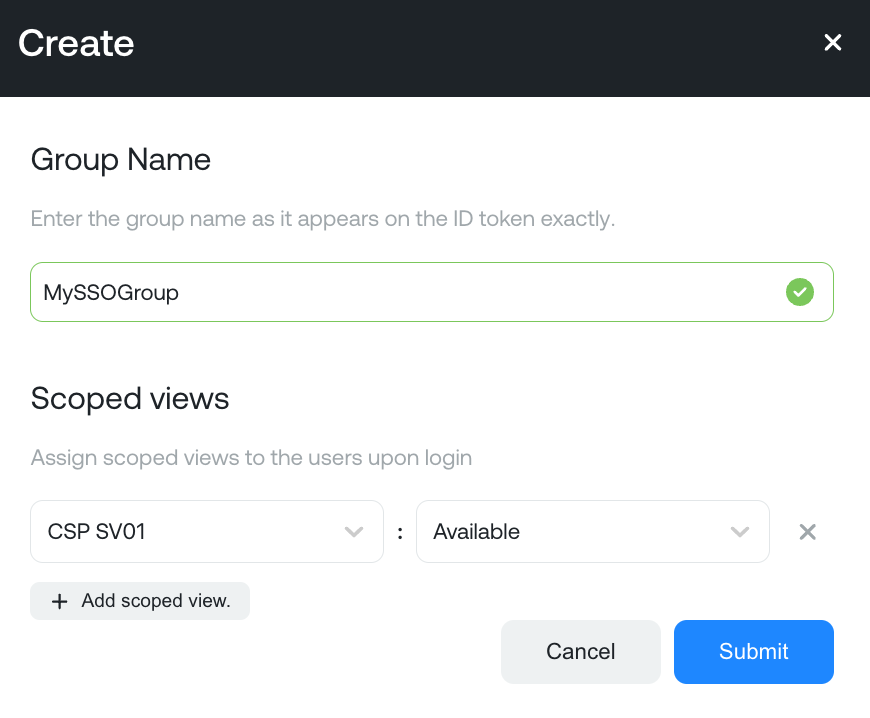
- Enter the Group Name (The name of the Group must be EXACTLY as it appears in the ID token and it is case sensitive)
- Select the Scoped Views you want any user in the Group to have when logging into Ternary
Admin Page:
Configuring Group with Name and associated Scoped Views:
Once completed, you will see the new Group in the User Group Configurations table.
Updated 7 months ago