Administrator Quick Start
Get started as a Ternary administrator by logging in, connecting cloud billing data, configuring access, and preparing the platform for day-one use.
This Administrator Quick Start provides a guided path for setting up a new Ternary tenant. It covers the essential actions required to begin using the platform effectively, including:
- Accessing the Ternary application
- Understanding the core capabilities available within a tenant
- Configuring initial cloud integrations to enable multi-cloud cost visibility
- Inviting users and defining access levels
- Identifying which features to configure next based on organizational needs
This guide is intended for users assigned the Administrator role in a newly provisioned Ternary tenant. Completion of the steps assumes access to required cloud permissions, including the ability to create billing exports, provision storage buckets, and assign roles or service accounts across supported cloud providers.
How do administrators log in to Ternary?
When a tenant is provisioned, an account invitation is sent with the subject “Finish your Ternary account setup.” After completing password setup, access is available at: https://my.ternary.app or https://my.eu.ternary.app/ for European tenants.
Login requires the same email address used during account provisioning.
In some environments, access may be provided through a tenant-specific URL. If a custom URL is supplied, that URL should be used instead of the default login endpoint.
What can be done once logged in to Ternary?
Ternary functions as a centralized FinOps platform for normalizing, attributing, and analyzing multi-cloud and technology spend. After cloud billing exports are configured and the required API permissions are assigned, Ternary ingests cost and usage data across all connected providers and makes it available through a consistent reporting model.
Once data ingestion is complete, the platform supports:
- Custom reports and dashboards for analyzing spend across providers, services, accounts, and custom groupings
- Feature-specific views that surface service-level behavior, pricing constructs, and billing nuances
- Usage and rate optimization recommendations derived from both cloud provider data and Ternary algorithms
- Collaboration workflows that allow reports, views, and findings to be shared for review and decision-making
- Integrations with external systems such as Jira and Slack to support operational follow-up
These capabilities become available as soon as billing data is flowing and permissions are correctly configured, enabling continuous cost visibility and optimization without additional setup.
How are cloud providers configured in Ternary?
Cloud providers are integrated from the Integrations tab within the Admin section of the Ternary platform. This is where all cloud billing and data connections are created and managed.
To add a cloud integration:
- Navigate to Admin → Integrations from the left-hand navigation
- Select New Integration to view the list of supported providers
- Choose the integration provider to integrate or select bring your own
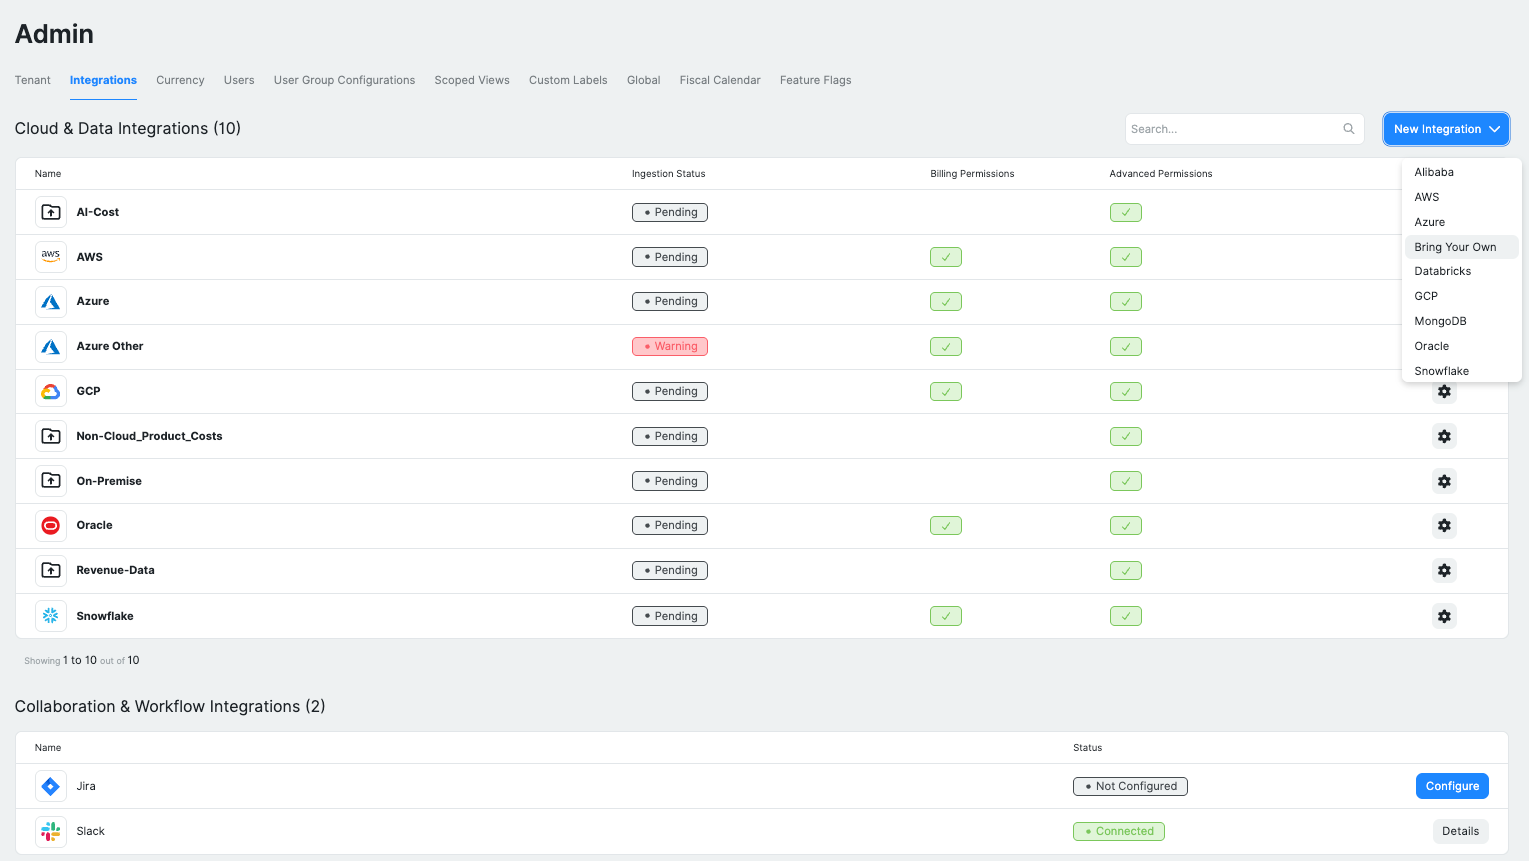
After selecting a provider, save the configuration and follow the provider-specific setup documentation to complete the integration. Each integration requires billing exports and the appropriate permissions to be configured outside of Ternary before data can be ingested.
Supported providers include:
- Amazon Web Services
- Alibaba Cloud
- Bring Your Own Data (BYOD)
- Databricks
- Google Cloud
- Jira Cloud
- Microsoft Azure
- MongoDB Atlas
- Oracle Cloud Infrastructure
- Slack
- Snowflake
Once all required permissions are in place and no integration warnings remain, billing data begins ingesting automatically. Initial cost data typically appears within 24 hours.
When daily costs start populating on the Home dashboard, the environment is ready for reporting, analysis, and team collaboration.
How are users invited and managed in Ternary?
User access is managed from the Users tab within the Admin section. This area provides visibility into all users with access to the tenant and is used to invite new users or revoke existing access.
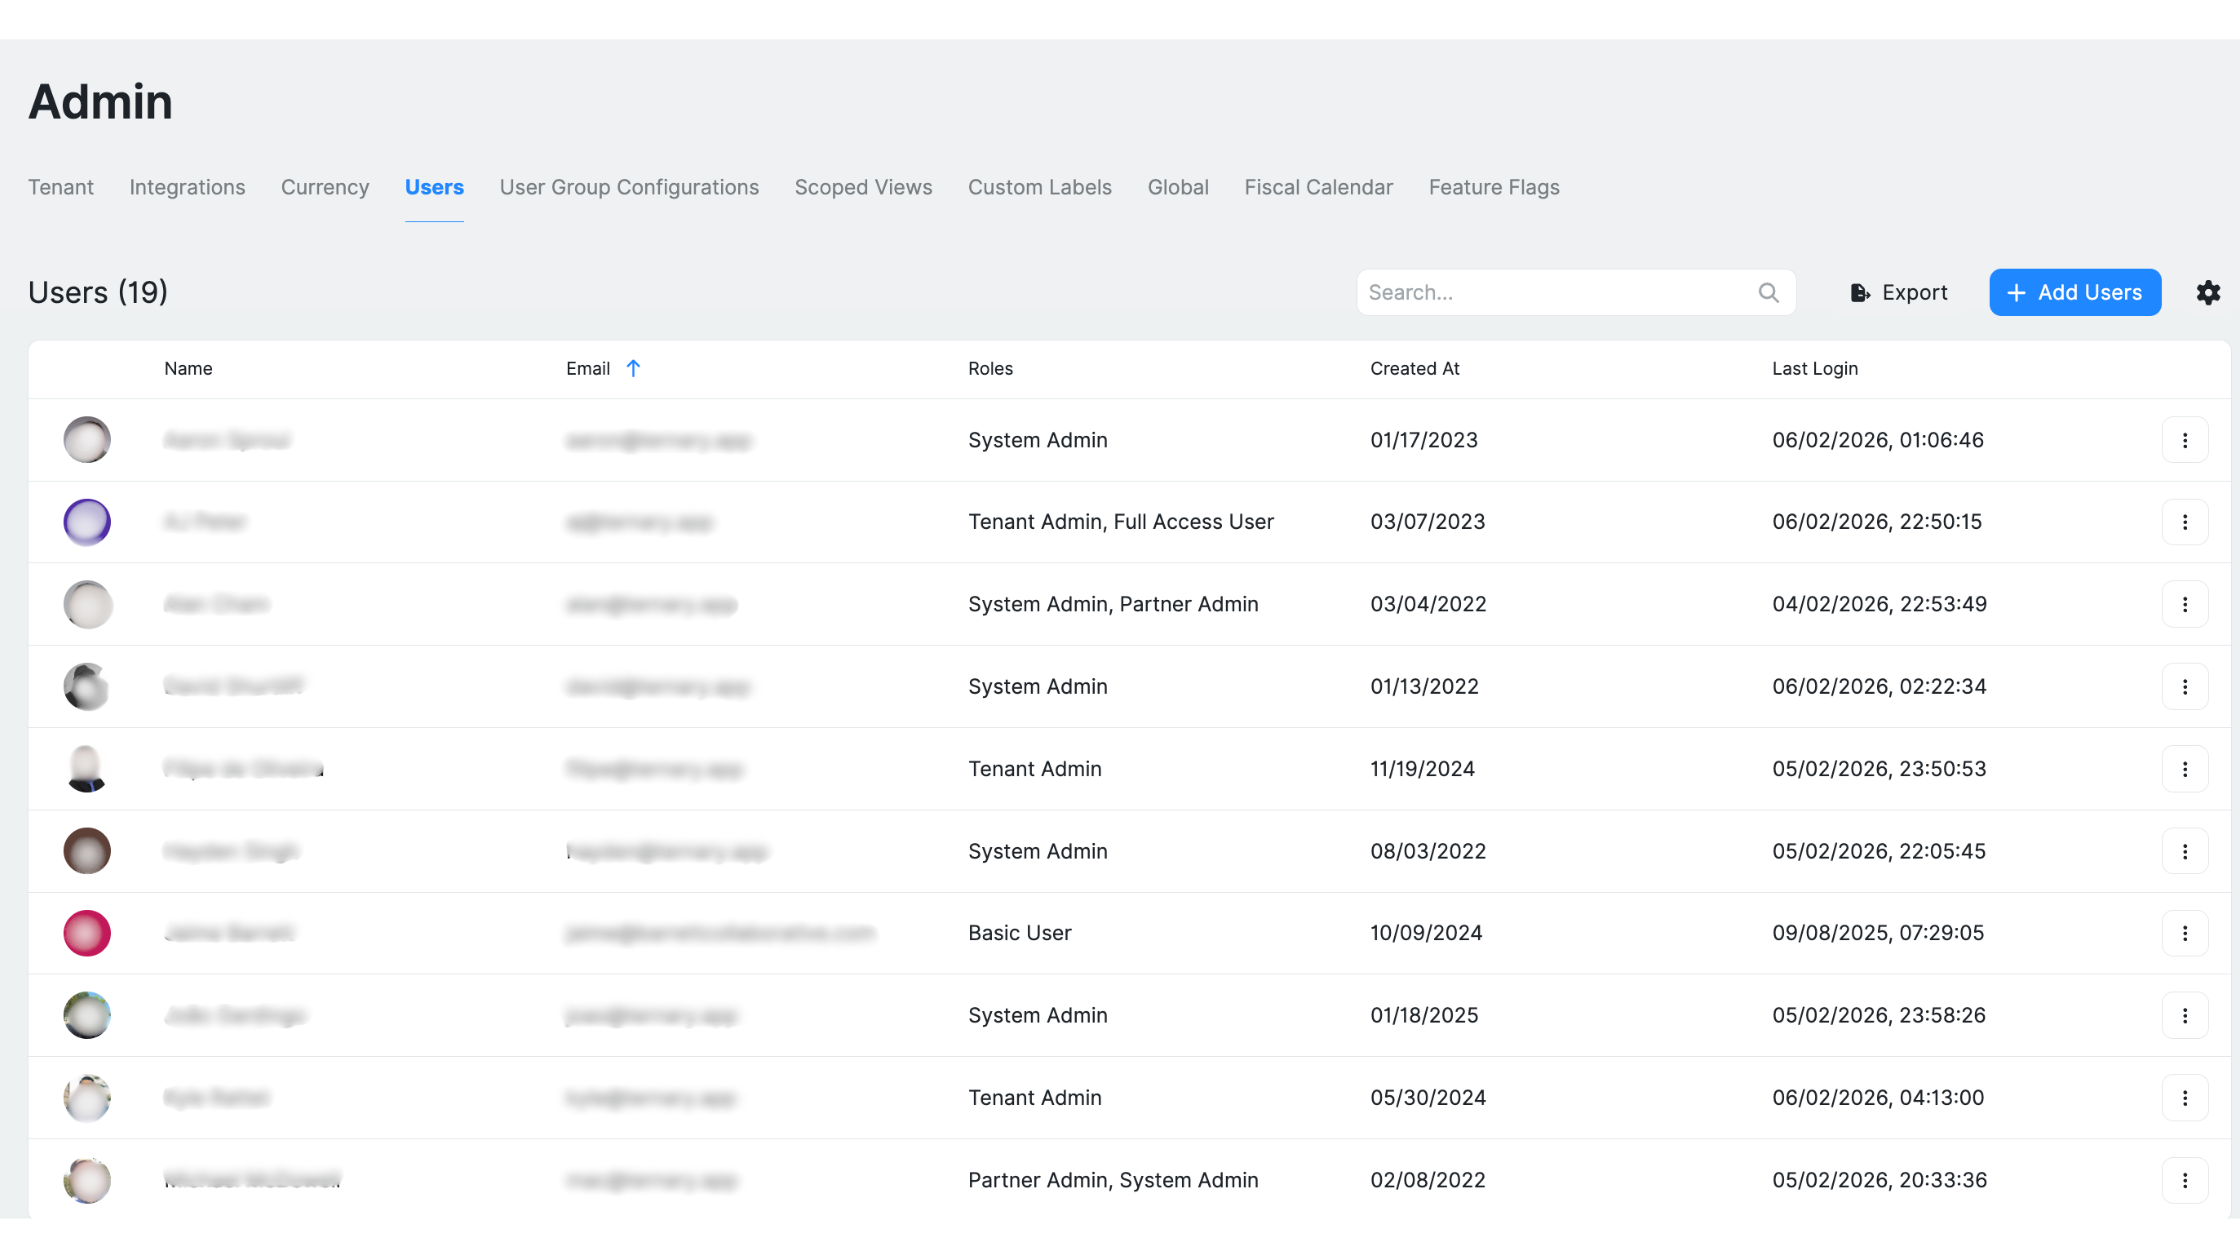
When adding users, multiple email addresses can be entered at once and a role is assigned to define access scope and permissions.
Available roles include:
- Tenant Admin: Full administrative access. This role can manage cloud integrations, user access, and tenant-level configuration. Intended for platform administrators only.
- Full Access User: Broad access to dashboards and reports across the tenant without permission to manage integrations or user access. Commonly assigned to FinOps analysts or platform power users.
- Basic User: Default role with access to most platform features. This role can create and manage personal dashboards, reports, configure budgets, and view integrations. Suitable for engineers and managers.
- Limited Access User: Read-only access limited to dashboards and reports explicitly shared with the user. This role cannot view the user list, cloud integrations, or make configuration changes. Intended for stakeholders or external reviewers.
By default, invited users can view all billing data within the tenant, subject to the features available to their role. Data visibility can be restricted using Scoped Views, which allow administrators to limit users to specific subsets of cost and usage data. Scoped Views are configured separately and apply across dashboards, reports, and feature pages.
Ternary also supports enterprise Single Sign-On (SSO) for centralized authentication. SSO enablement is handled through the Ternary Success team and is not available as a self-service configuration.
Ternary is ready to assist!
With cloud data connected and users onboarded, the tenant is ready for day-to-day FinOps workflows. Reporting, cost analysis, budgeting, and optimization features are now available across the platform.
From here, continue exploring the documentation to complete advanced setup, configure governance controls, and deepen cost visibility across teams and services.
Updated 5 months ago