Amazon Web Services
Learn how to configure AWS integration in Ternary to connect cost and usage data exports, and required IAM roles.
Ternary ingests AWS Cost and Usage Reports (CUR), CloudWatch metrics, and commitment data such as Reserved Instances and Savings Plans to provide detailed cost and utilization visibility across AWS services.
This data enables analysis of spend across accounts, services, and resource types, along with visibility into usage patterns and cost drivers.
Once configured, AWS data becomes available in Ternary dashboards, the Reporting Engine, and service-level views for reporting, and optimization across EC2, S3, Redshift, and many other AWS services. Data is refreshed automatically at regular intervals, with no manual intervention required unless permissions are disrupted.
Managed Service Providers configuring AWS should begin with the MSP billing configuration documentation.
Prerequisites for Ternary's AWS Integration
The following requirements must be met before configuring the AWS integration:
- Access to create an IAM role, policy, and configure Cost and Usage Reports (CUR) in each payer account to be enabled
- Access to enable and configure AWS Cost Explorer
- A Ternary user with the Tenant Admin role to create a new AWS integration
To ingest EKS metrics, Container Insights must be enabled in your AWS environment, as Ternary uses these metrics for the EKS Insights view.
How to configure the AWS integration in Ternary
The AWS configuration process consists of setting up billing data access, enabling cost insights, configuring IAM roles, and completing the connection in Ternary.
Step 1: Configure AWS Cost and Usage Report (CUR)
Create or validate an AWS Cost and Usage Report that Ternary will use to ingest billing data. Ternary supports multiple CUR formats, including original CUR, CUR 2.0, and FOCUS.
For best results, use CUR or CUR 2.0, as these formats include additional AWS billing fields that are not fully available in FOCUS. Ensure the following settings are enabled:
- Include resource IDs
- Automatically refresh the report
- Use GZIP compression
- If a CUR is not already configured, follow this AWS documentation to create one.
During CUR configuration, designate a new S3 bucket or select an existing one as the destination for billing exports. Record the selected bucket, as it will be used later to grant Ternary read access.
Refer to the below video tutorial for a better walkthrough of this step:
If your organization has not yet configured an AWS Cost and Usage Report (CUR) that Ternary will use to ingest your AWS spend, we recommend following the AWS Creating Cost and Usage Reports documentation. For the best results, we recommend selecting the following CUR options:
- Include resource IDs: Yes
- Automatically refresh your Cost & Usage Report: Yes
- Compression type: GZIP
Step 2: Enable AWS Cost Explorer
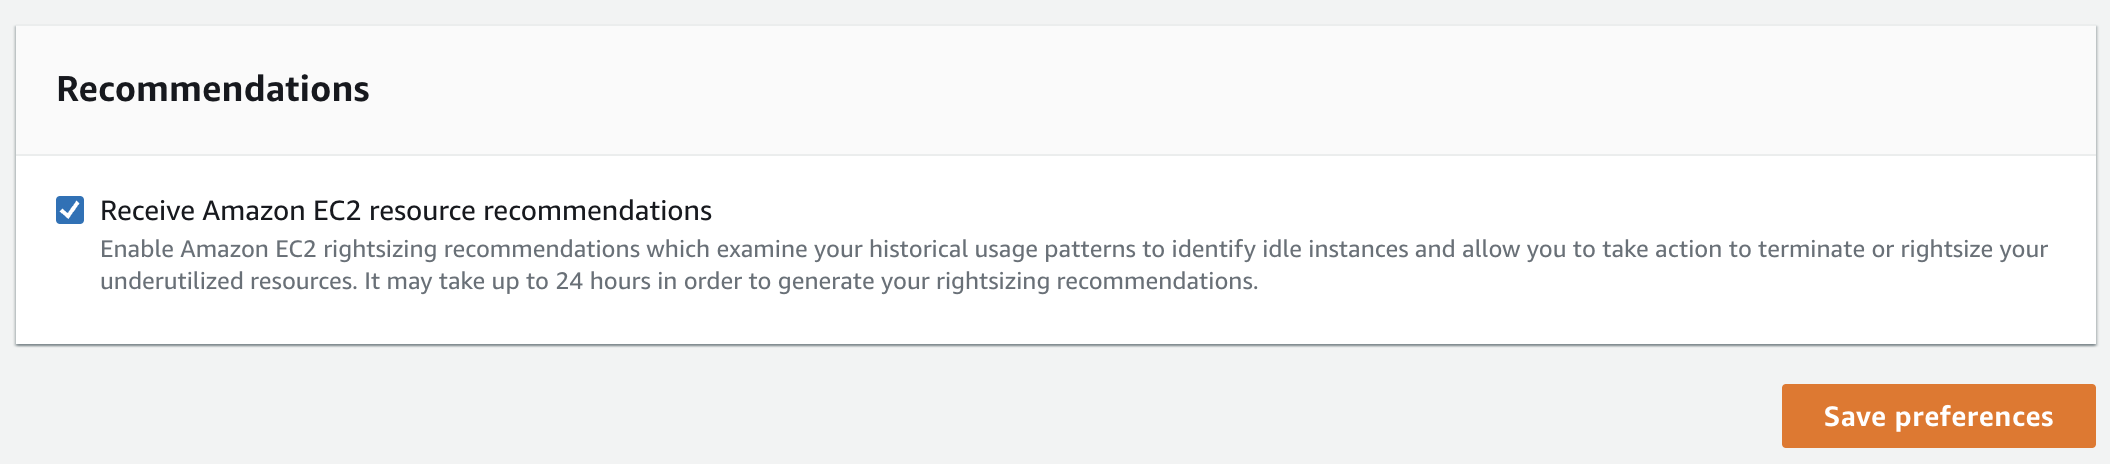
Enable AWS Cost Explorer and activate the preference to receive EC2 resource recommendations. This allows Ternary to surface rightsizing recommendations based on AWS data.
Step 3: Configure IAM role for CUR access
Ternary accesses CUR data by assuming an IAM role in the account where the CUR and S3 bucket are hosted.
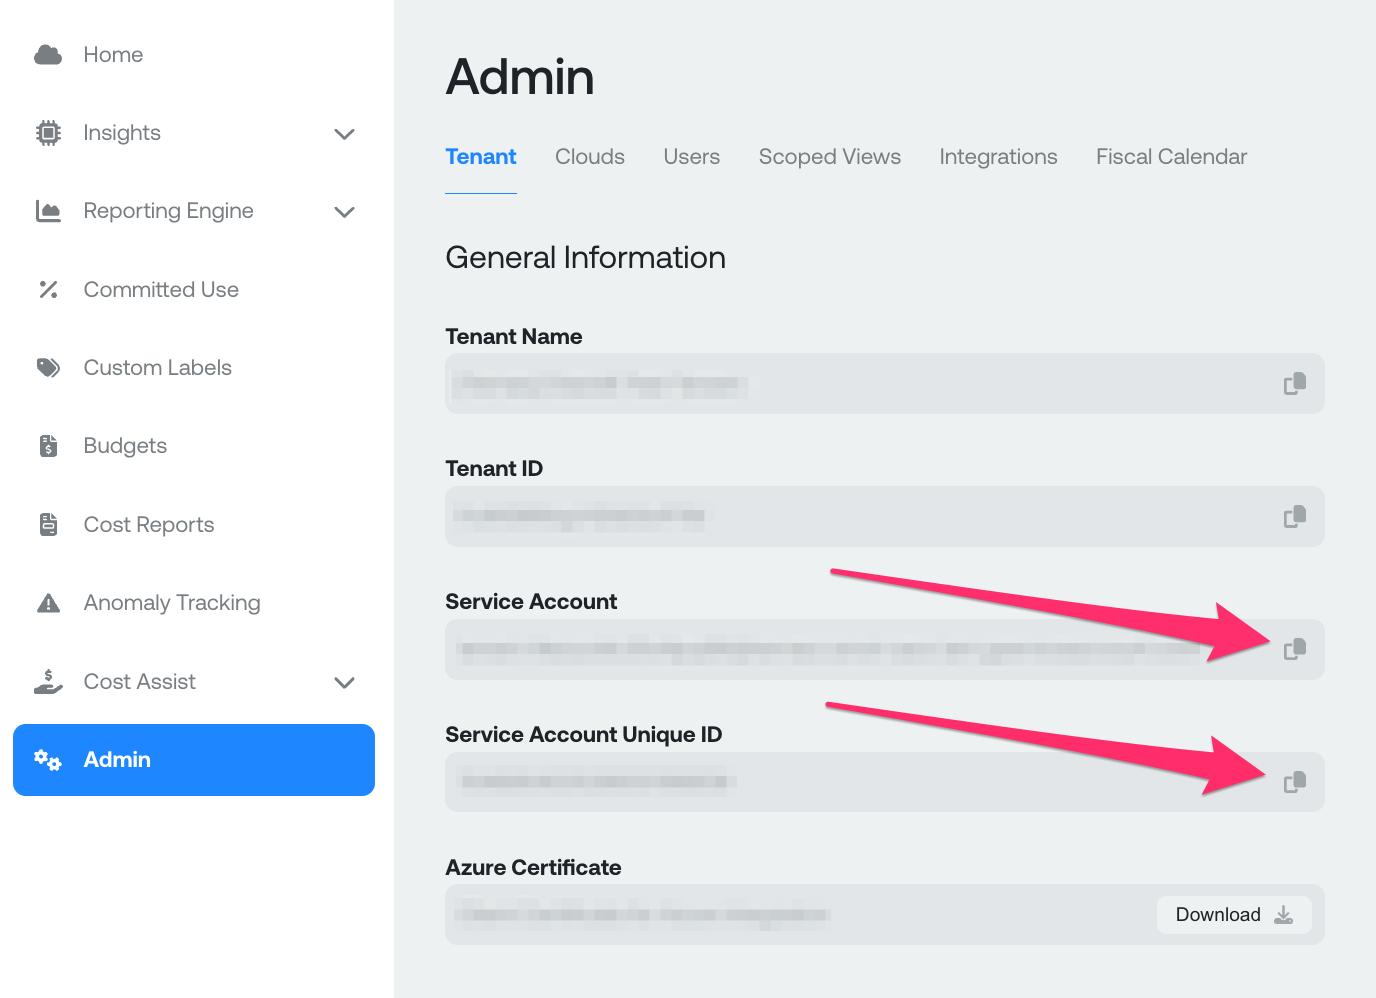
Start by retrieving the Ternary Service Account and Service Account Unique ID from the Ternary Admin page.
Create the IAM role using either the provided CloudFormation template or Terraform script. These templates define the required permissions and allow you to review access before deployment. Manual role creation is not covered in this guide. For custom configurations, replicate the permissions defined in the provided templates.
For Terraform, populate the required values at the top of the script:
- S3 CUR bucket ARN (for example
arn:aws:s3:::ternarycurbucket) for a bucket namedternarycurbucket - Ternary service account email
- Ternary service account unique ID
For CloudFormation, these values are entered during stack creation.
For CloudFormation setup:
-
Log in to the AWS account where the CUR and S3 bucket are configured
-
Navigate to the CloudFormation service
-
Click Create stack and choose Upload a template file
-
Upload the
ternary-payer-account-cfn.jsontemplate -
Provide the required parameters:
- Stack name: any name (recommended: Ternary Service Agent Role)
- CurBucketArnParameter: S3 bucket ARN (for example
arn:aws:s3:::ternarycurbucket) - ServiceAccountParameter: Ternary service account
- ServiceAccountUniqueIDParameter: Ternary service account unique ID
Other settings can remain default or be adjusted based on organizational standards.
Once the stack is created, navigate to IAM → Roles, locate the newly created role, and copy its Role ARN for use in Ternary.

Step 4: Configure roles for linked accounts
In AWS Organizations, certain data is only available within individual member accounts, namely Metrics and Reserved Instance Details. These details must be accessed from the specific accounts where they were purchased. It is important for Ternary to have access to these member accounts to provide the fullest picture of cloud usage.
To enable this, create roles in each relevant member account using the provided Terraform or CloudFormation templates.
It's most important to apply these templates to all accounts that own Reserved Instances, including but not limited to:
- EC2 Reserved Instances
- ElastiCache Reserved Cache Nodes
- Redshift Reserved Nodes
- OpenSearch Reserved Instances
Any other account with heavy usage visible in CloudWatch is also encouraged. As roles are created, record the corresponding Role ARNs for configuration with Ternary.
If there are too many accounts to configure, consider proceeding to Step 5 below; in this step, only accounts with Reserved Instances need to be added as Linked Accounts, rather than all accounts.
Step 5: (Optional) Configure global CloudWatch metrics access
This step may be skipped if all relevant AWS accounts have already been configured as Linked Accounts in Step 4.
By default, Ternary can only access CloudWatch usage data from the account where the CUR and IAM role were created. In multi-account environments, this limits visibility into usage and prevents accurate recommendations across services such as EC2 and RDS.
To enable full visibility, CloudWatch metrics from all accounts must be aggregated into a centralized monitoring account.
Start by choosing the account that will act as the metrics aggregation account:
- If the same account where the CUR is configured is used, the Role ARN from Step 3 can also be used as the Metrics Collection Role ARN
- If a separate account is preferred for centralized monitoring, deploy the CloudFormation or Terraform template from here to that account using the same parameters as Step 3
After provisioning the role, record the resulting Metrics Collection Role ARN.
Next, deploy the centralized monitoring script here to aggregate metrics from all AWS accounts into the selected account. This setup supports organization-wide visibility and remains effective as new accounts are added.
Keep the Metrics Collection Role ARN available for use during Ternary configuration.
Step 6: Create the AWS connection in Ternary
- Navigate to Admin → Integrations in Ternary and create a new AWS integration.
- Enter the required details: Role ARN from Step 3, Metrics Collection Role ARN from Step 4 and a display name for the connection.
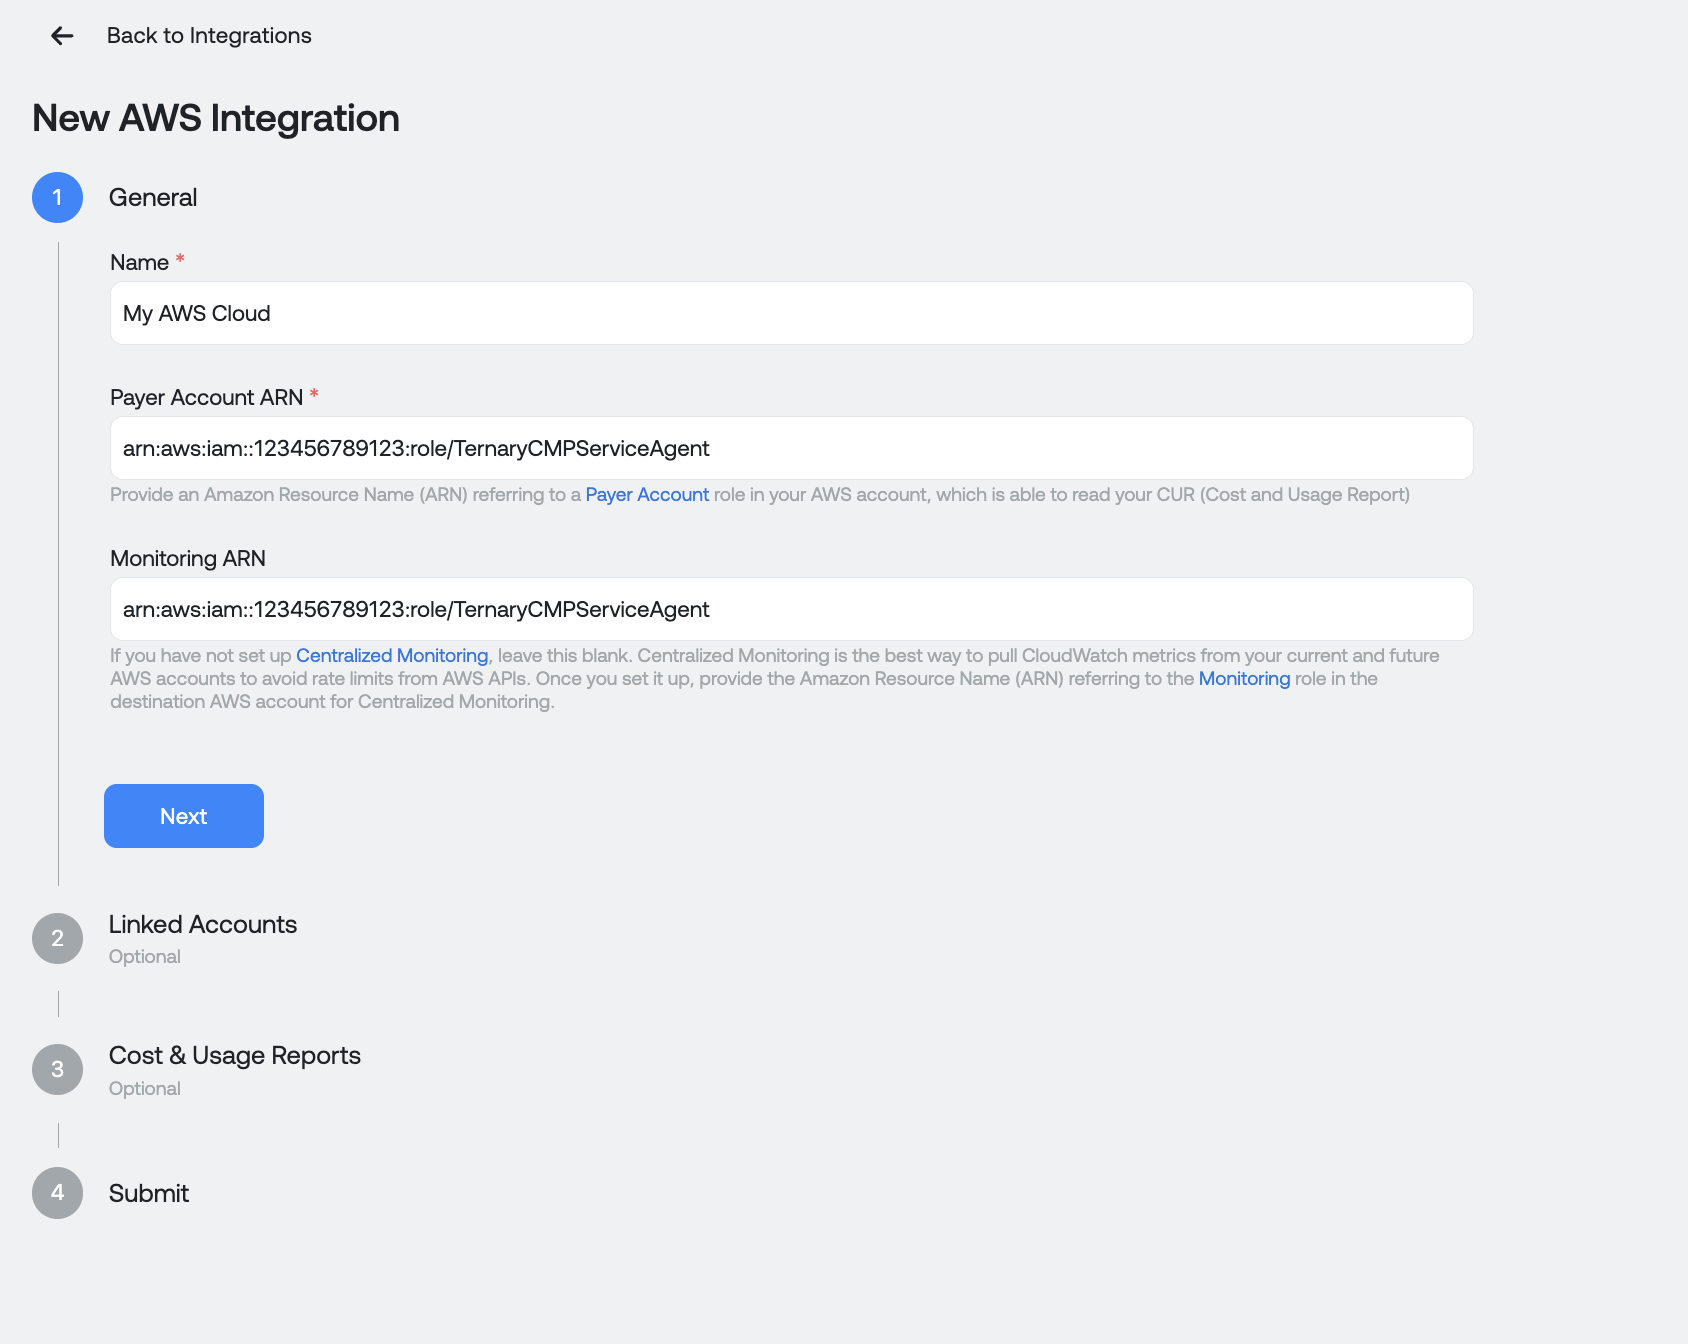
Proceed to the Cost and Usage Reports section and provide:
- CUR report name
- S3 bucket name
- Report path prefix
- AWS region of the bucket

- An S3 reference can also be added to automatically populate these fields. To do this, locate your billing report in the S3 console (such as a manifest.json or CSV file) and copy its reference. An ARN, S3 URI, or object URL can be used and pasted into the S3 Reference field. For more details about S3 buckets, reference the AWS documentation.
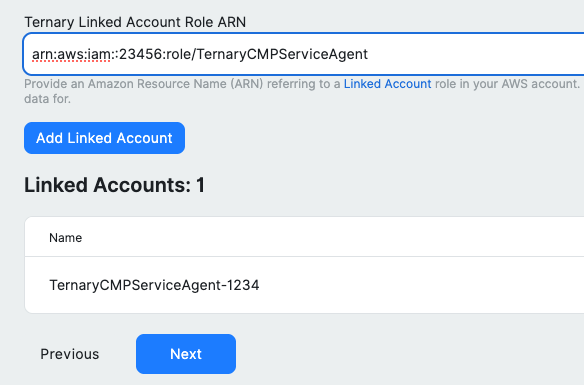
- Continue to the Linked Accounts step. If you performed Step 5, click "Use Centralized Monitoring" and provide the ARN from that step. Otherwise, in the bottom section, input all your Linked Account ARNs from Step 4. After providing all the ARNs, click Next to save and proceed.
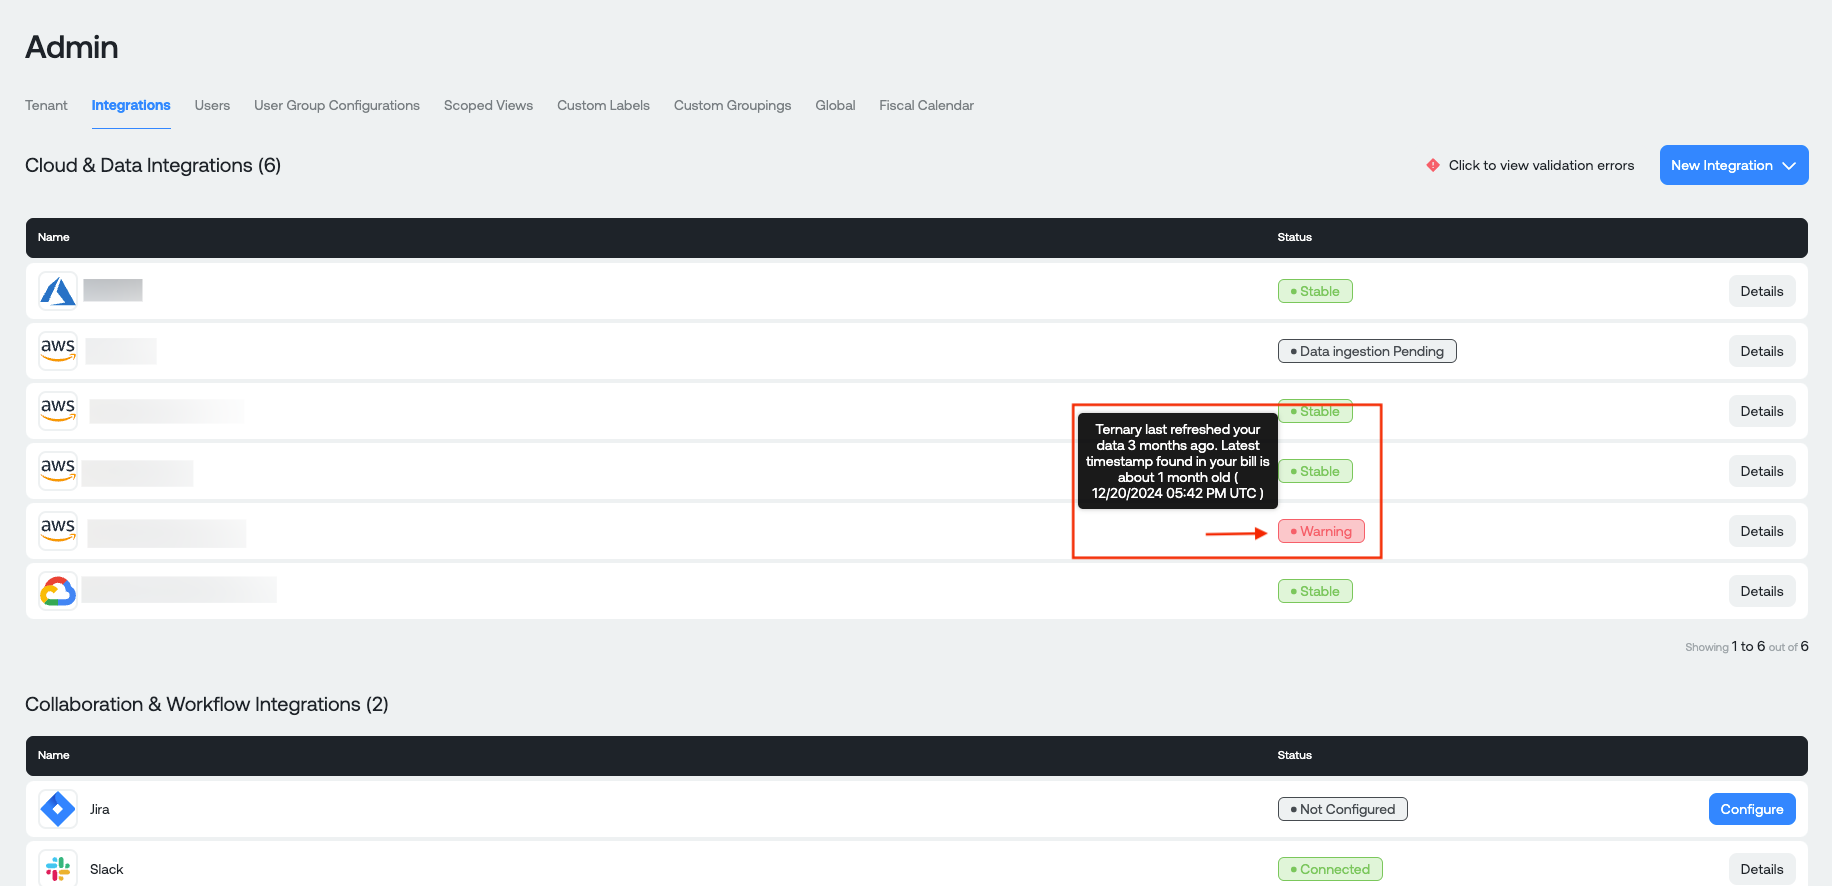
Press the Submit button to save all your configuration. Once validated, the AWS integration will appear in the Integrations list. If validation fails, review the error from the Details view and update the configuration.
Final note
After submission, Ternary begins ingesting AWS data. If needed, configuration can be updated or extended later, including metrics aggregation and linked account access.
Optional features
Additional AWS capabilities supported by Ternary include:
- Enhanced Kubernetes visibility:
AWS provides granular cost visibility for Amazon Elastic Kubernetes Service (EKS) through split cost allocation data in Cost and Usage Reports (CUR). This enables detailed cost attribution across Kubernetes workloads. Ternary ingests this data and makes it available in the Reporting Engine for Kubernetes cost analysis.
To enable it, follow this AWS guide for configuring split cost allocation data for EKS.
- AWS Multi Account Onboarding:
Centralized CloudWatch monitoring can be configured across multiple AWS accounts to enable organization-wide visibility in Ternary. For setup instructions, refer to the Multi-Account Onboarding guide.