MSP Bill Splitting
Learn how MSP Bill Splitting in Ternary separates shared cloud billing data by customer using dimensions and subaccounts for accurate reporting.
MSP Bill Splitting enables a managed service provider (MSP) to separate shared cloud billing data across individual customer (child) tenants when operating in an integrated billing model. Cloud integrations are maintained at the MSP parent tenant, while billing data is segmented and delivered to each child tenant based on defined billing boundaries.
This approach allows MSPs to manage a single set of cloud integrations while ensuring each child tenant receives only its relevant cost and usage data. Billing separation is defined using provider-specific dimensions such as subaccounts, invoice sections, or organizational hierarchies, depending on the cloud provider.
Access to MSP Bill Splitting requires the Partner Admin role. If the Partner Admin is unknown, contact the assigned Customer Success Manager or open a Ternary Support Request.
What are the key benefits of MSP Bill Splitting
- Reduces operational overhead for MSPs by centralizing billing configuration and tenant mapping.
- Prevents unallocated or missing billing data by explicitly associating cloud accounts with customer tenants.
- Automatically adapts to customer environment changes, including newly added accounts or projects under supported billing dimensions.
- Supports multiple cloud providers within a single, unified bill-splitting workflow.
- Aligns with native cloud billing structures, preserving provider-specific hierarchy and ownership models.
How MSP Bill Splitting Works
Step 1: Access Bill Splitting for a Child Tenant
- Navigate to MSP Customer Management from the left-hand navigation
- Locate the target child tenant
- Open the ellipsis menu next to the tenant and select Manage Tenant
- This opens the billing configuration workspace for the selected customer.

Step 2: Define Billing Boundaries for the Tenant
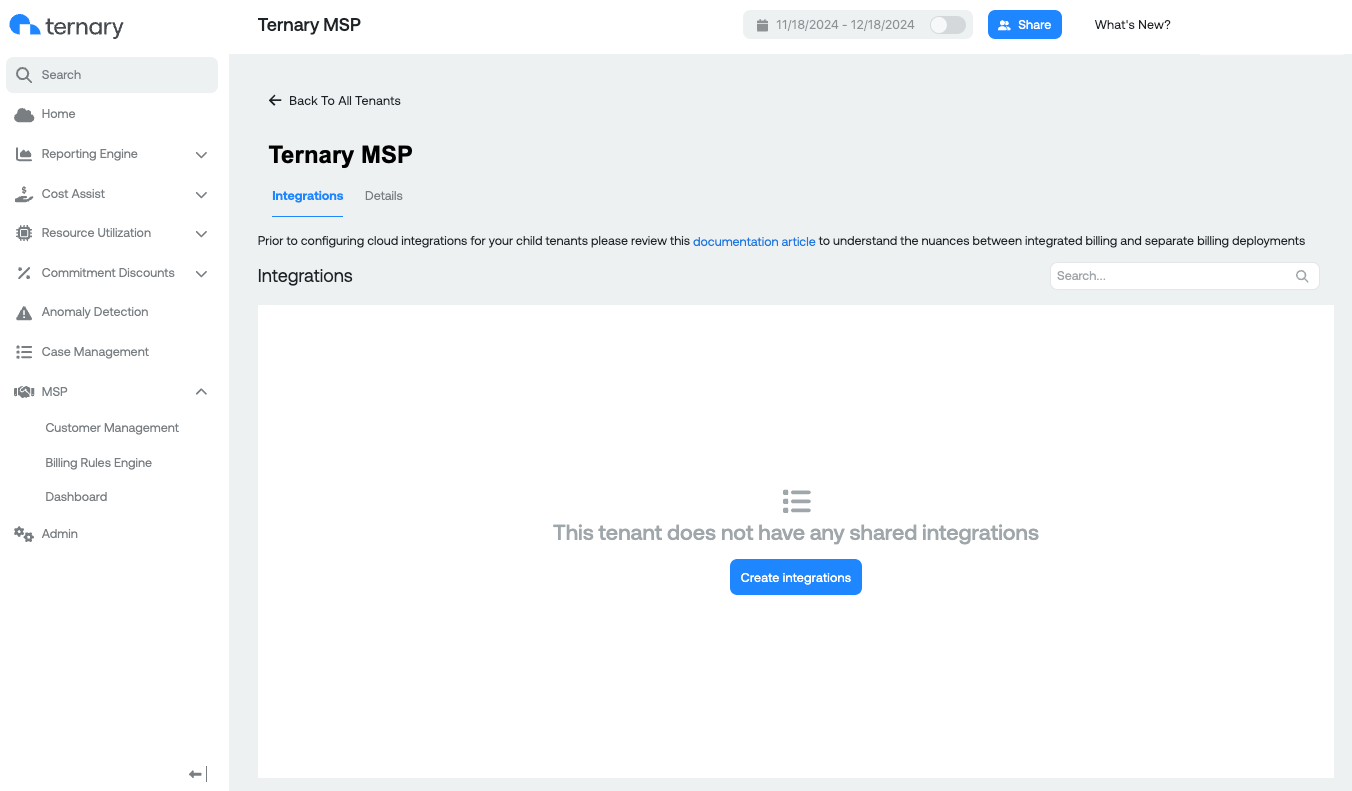
Step 2a: Create Integrations
- Select Create Integrations to begin configuring shared billing for the tenant
- Existing shared integrations, if any, are displayed on this page
Step 2b: Select a Billing Dimension
A billing dimension defines how cloud accounts are grouped and assigned to the customer tenant. Available dimensions vary by cloud provider and reflect the structure present in the billing export.
| Cloud provider | Dimensions | Description |
|---|---|---|
| AWS | Sub Account ID, Sub Account Name | AWS Linked Accounts must be selected individually at this time. No higher-level grouping is currently supported. |
| Azure | Sub Account ID, Sub Account Name, Invoice Section Name, Invoice Section ID | If Invoice Section fields are present in your billing data, selecting them will automatically include all Sub Accounts belonging to that Invoice Section. |
| GCP | Sub Account ID, Sub Account Name, Folder / Ancestry Path, Folder / Ancestry ID | Higher-level grouping appears only if organizational hierarchy metadata is included in the billing export. |
| OCI | Sub Account ID, Sub Account Name | OCI compartments/tenancies must be assigned individually at this time. No higher-level grouping is currently supported. |
| Snowflake | Sub Account ID, Sub Account Name | Assign Snowflake accounts individually. Hierarchical billing structures are not currently supported |
Selecting a higher-level dimension (such as an Azure Invoice Section or GCP Folder) automatically includes all current and future subaccounts under that grouping. Selecting a lower-level dimension (such as Sub Account ID) requires manual updates as environments grow.

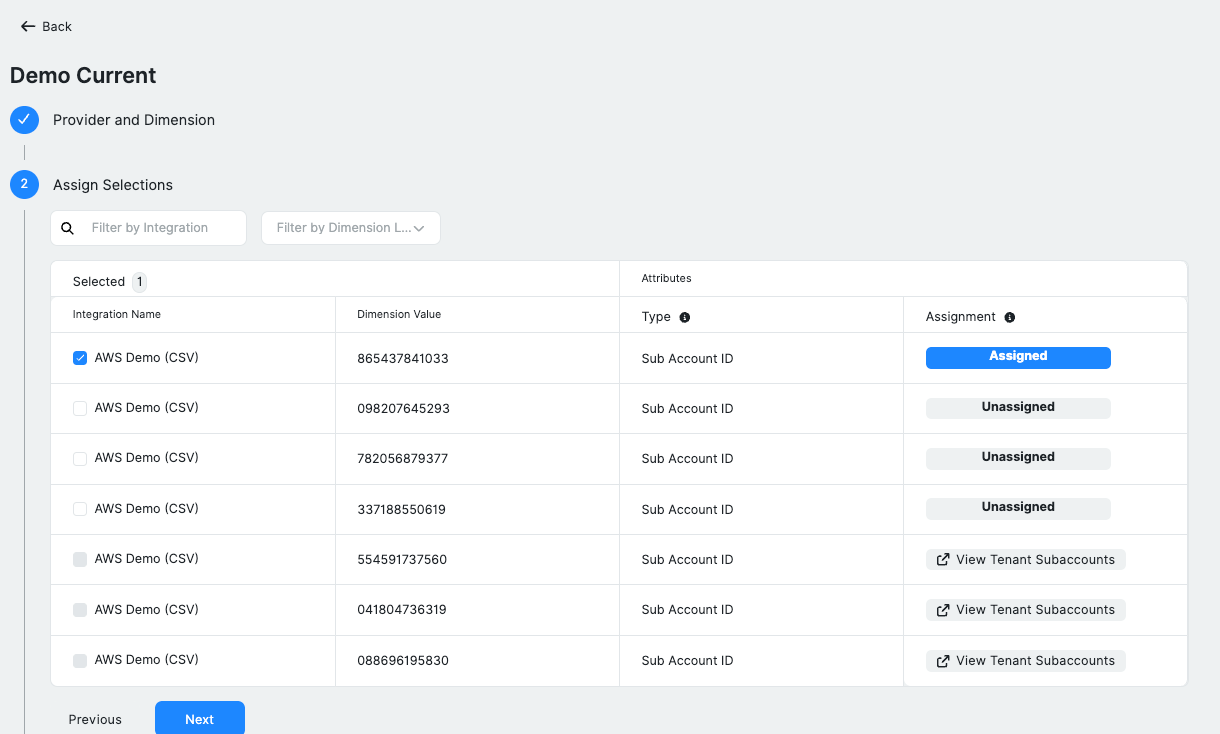
Step 2c: Assign Sub Accounts
- Review all eligible subaccounts available at the MSP parent level
- Search and filter by provider, dimension value, or account identifier
- Select the subaccounts that belong to the child tenant
Assignments determine which billing data is surfaced in the child tenant.
Step 2d: Review and Save
- Review the selected provider, dimension, and subaccounts
- Confirm the billing scope for the tenant
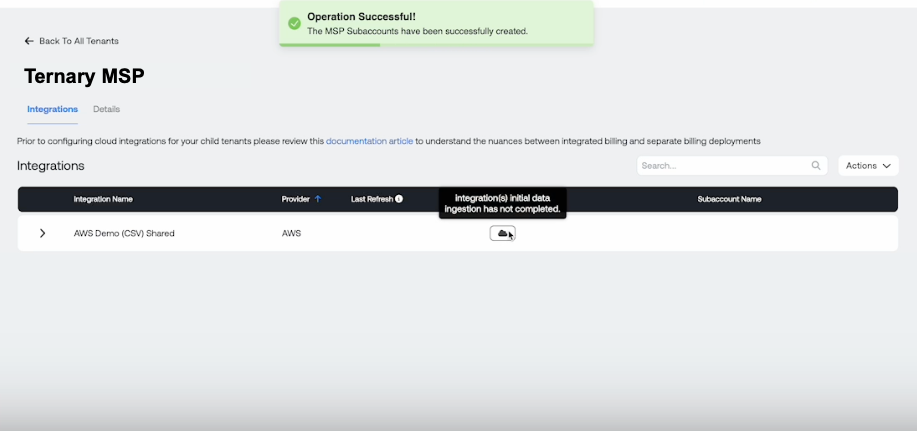
- Save the configuration to activate billing separation
After saving, the Manage Tenants page displays integration status and last refresh details.
Step 3: Update and apply integrations
When updating an existing integration, all cloud integrations currently associated with the selected child tenant are displayed. This workflow is used to modify which subaccounts are included in the tenant’s billing scope.
Available actions include:
- Selecting or deselecting subaccounts assigned to the tenant.
- Reviewing currently assigned subaccounts, shown in the Selected section at the top.
- Browsing all eligible subaccounts based on the chosen cloud provider and billing dimension.
The following constraints apply:
- At least one subaccount must remain selected. If no subaccounts are selected, the Submit action is disabled.
- Integrations cannot be deleted from this workflow. To fully remove an integration, navigate to the child tenant and delete the cloud integration from the Clouds tab within the Admin section.
- If a subaccount is already linked to a different child tenant, the View Tenant Subaccounts option redirects to the associated tenant for review.
After updating selections:
- Review the configured cloud provider, billing dimension, and assigned subaccounts.
- Submit the configuration to apply changes.
- Upon submission, the workflow returns to the Manage Tenants page.
Billing data for updated integrations typically becomes available within one business day. If data does not appear within this timeframe, a support request should be submitted for further investigation.
Updated 5 months ago