Jira Cloud
Learn how to configure the Jira Cloud integration in Ternary to synchronize Case Management tasks with Jira issues and enable bi directional updates between both platforms.
The Jira integration of Ternary connects Ternary Case Management with Jira projects to synchronize cases and issues across both platforms.
Ternary Case Management enables teams to track, investigate, and remediate cost anomalies and other billing-related observations identified within cloud usage data. It extends collaboration beyond predefined alerts and recommendations, allowing teams to create cases from any relevant data point, assign ownership, and manage resolution workflows in a structured manner.
Through the Jira integration, Cases created in Ternary can be linked directly to Jira issues, providing a unified workflow for cross-functional teams. Comments, status updates, and workflow transitions are synchronized between both platforms, ensuring consistency in tracking and resolution. This bi-directional integration supports coordination across engineering, operations, and finance teams within existing Jira workflows.
How is the Jira Cloud integration configured in Ternary?
Prerequisites
The following access is required before configuring the Jira Cloud integration.
- A Regular User or Admin account in the Ternary tenant.
- A Jira user account with Jira Administrator permissions.
A dedicated system user is recommended for this integration rather than an individual Jira user account. Refer to this documentation to set up a system user.
Step 1: Gather required information from Jira
Before configuring the integration, gather the required configuration values from Jira.
Three values are required for the integration. A fourth value is required only if the Jira project uses custom workflow transitions. Confirm with the internal Jira administrator whether custom transitions are used. Jira Documentation on custom transitions can be found here.
- Project ID: The Jira project where Ternary cases will create corresponding Jira issues. Jira documentation on finding Project ID.
- Email: The email address of the Jira user account used to authenticate with the Jira API.
- API Token: The API token associated with the Jira user account. Jira Documentation on generating API tokens.
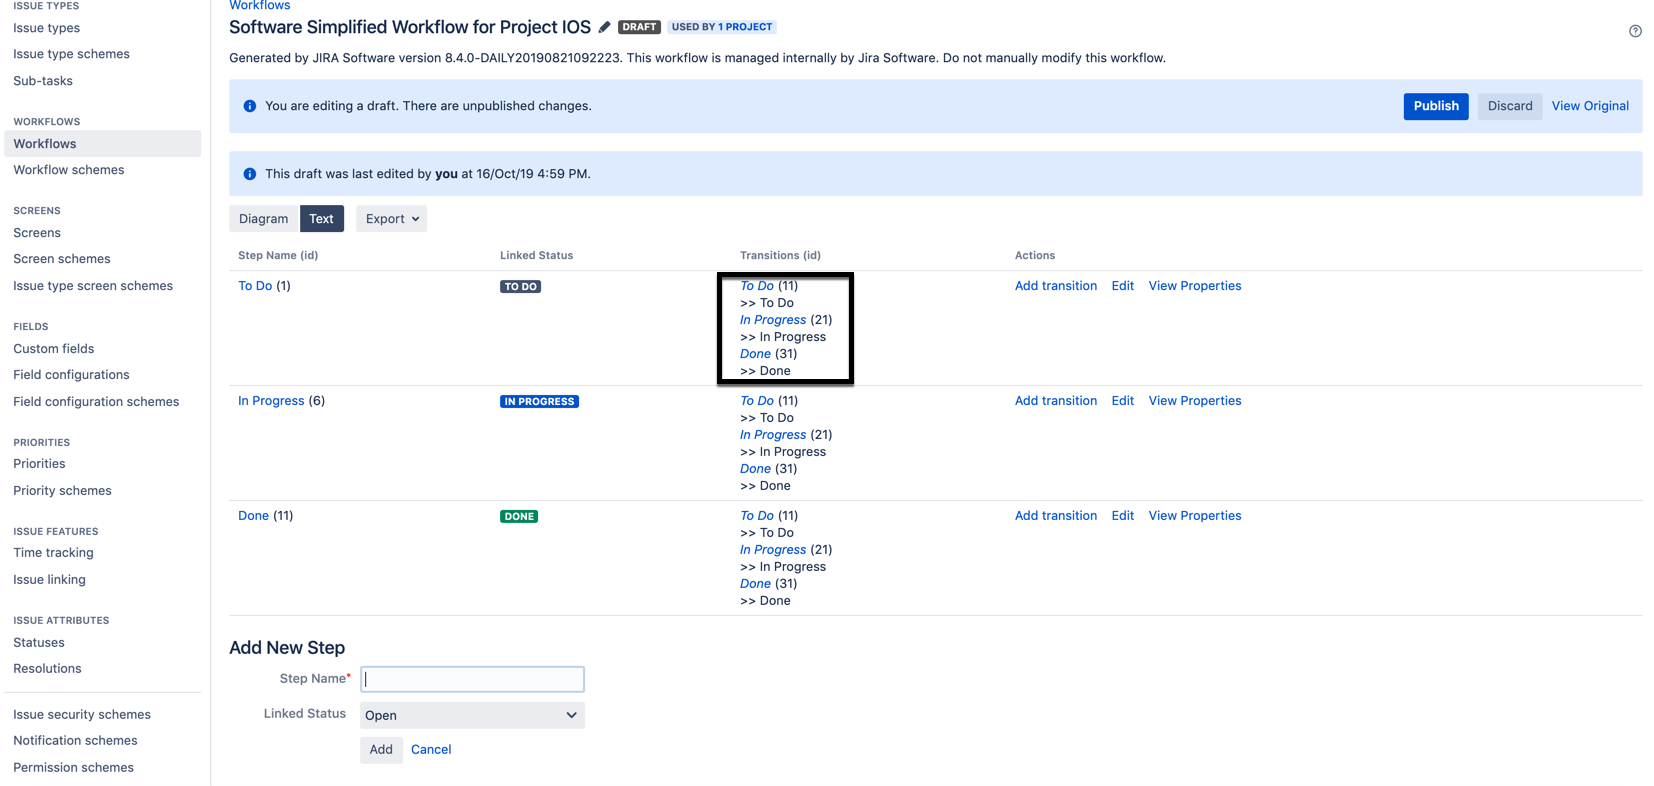
- Custom Transition ID: Required only when the Jira project uses custom transitions instead of the default Jira workflow transitions. Jira Documentation on using workflow editor to find transition IDs.
Transition ID text field example in Jira Workflow Editor:
Step 2: Configure the Jira integration in Ternary
After gathering the required Jira details, configure the integration in Ternary.
- Sign in to the Ternary instance at https://my.ternary.app.
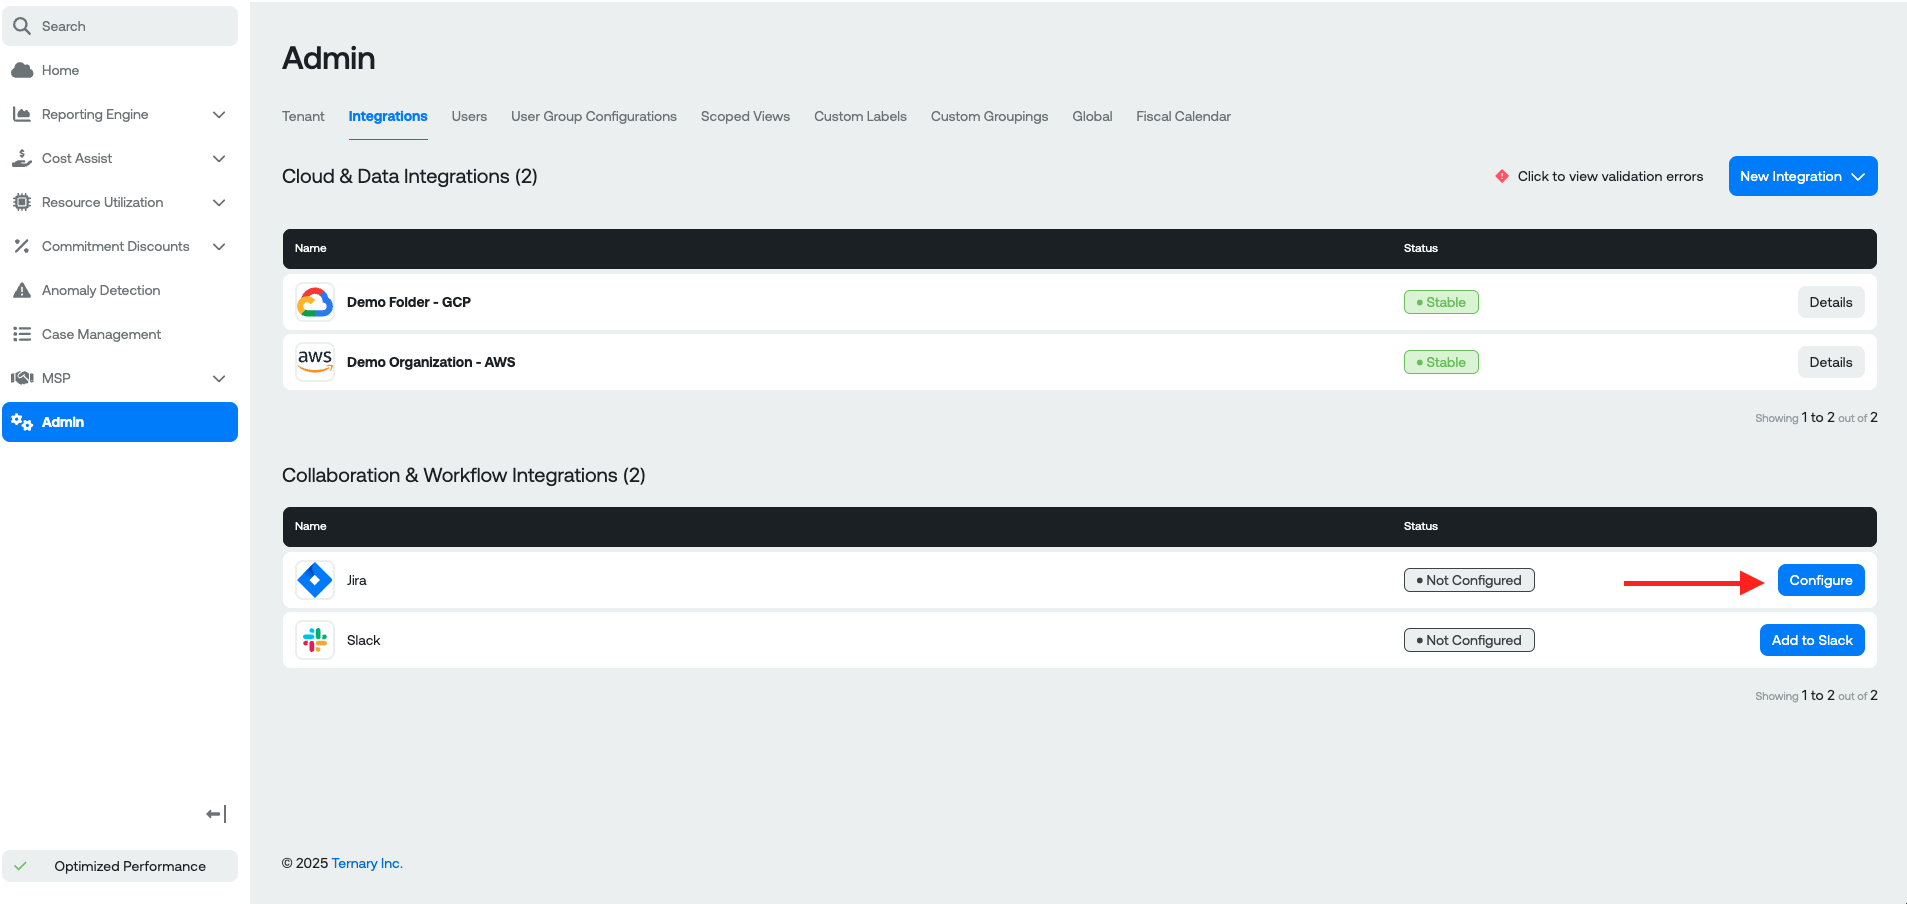
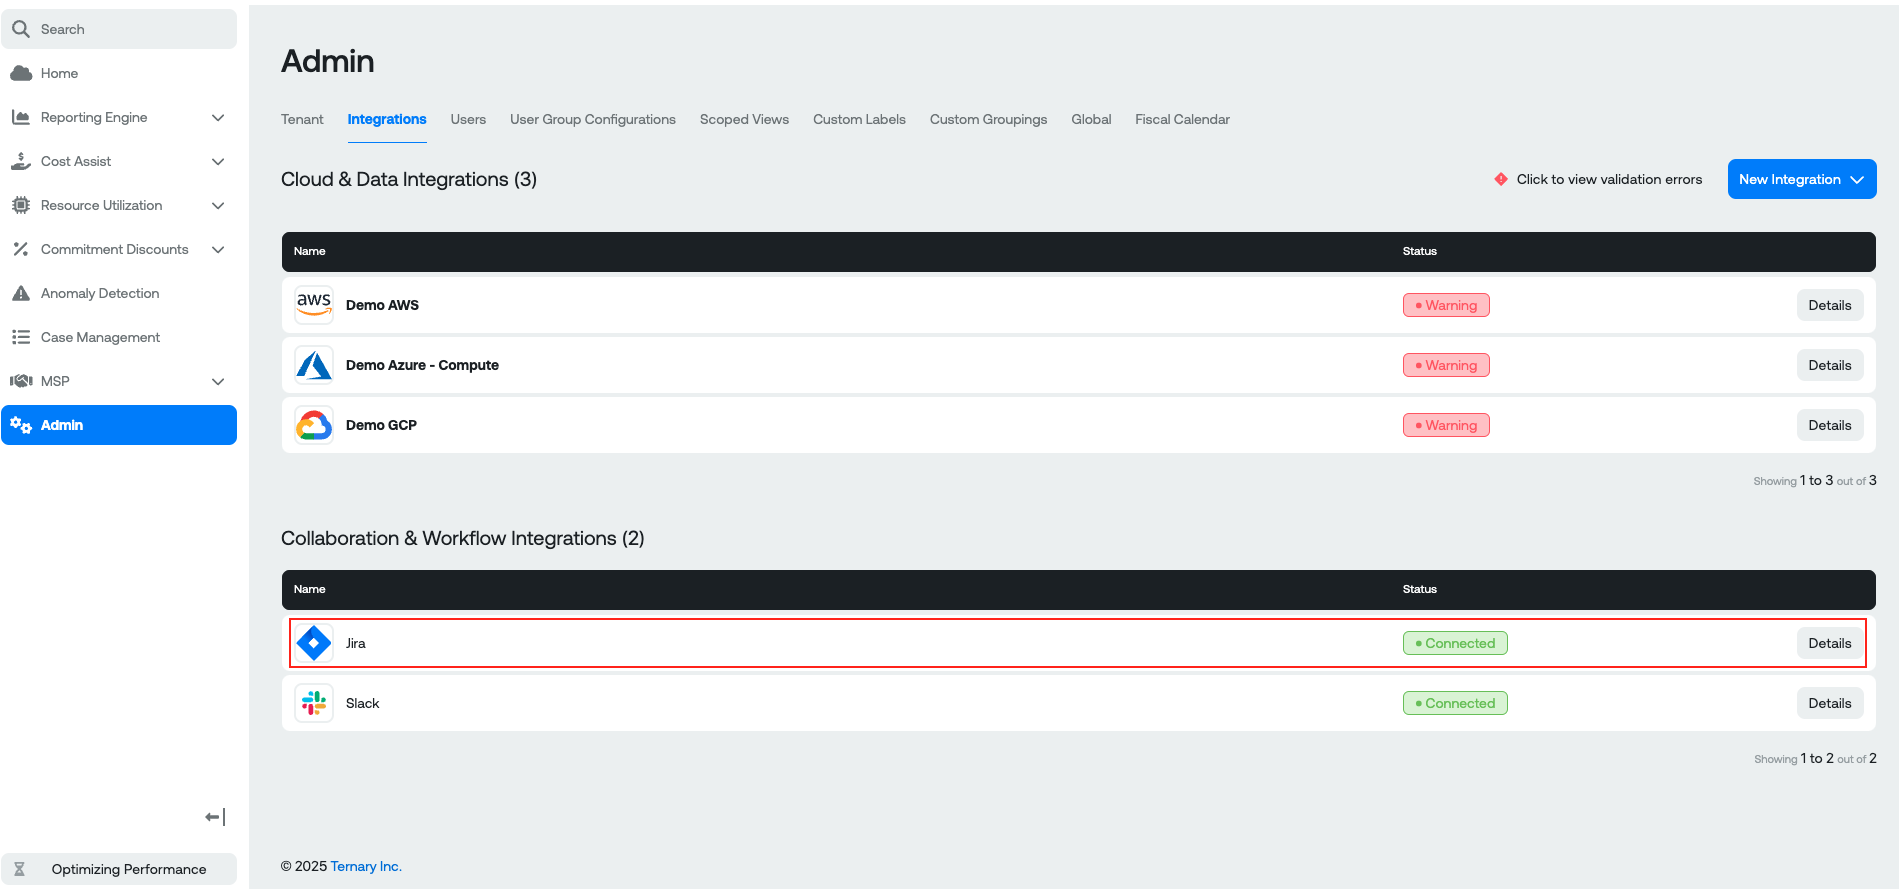
- Open Admin from the left navigation menu.
- Select the Integrations tab.
- Select Configure.
- Enter the following values in the configuration fields:
- Project ID
- API Token
- Custom Transition ID (if applicable)
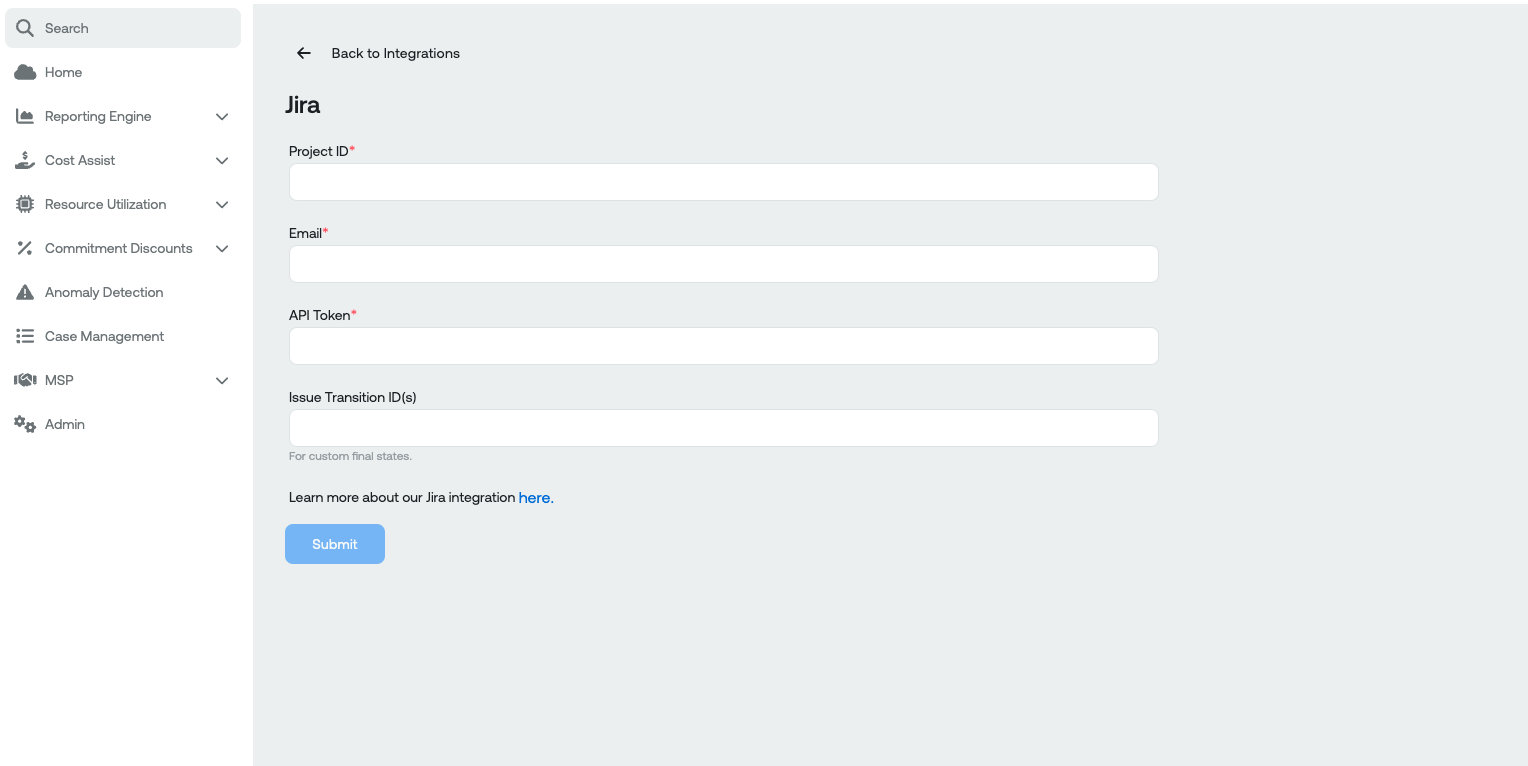
- Select Configure to submit the integration.
Jira displays an authorization prompt to connect the Atlassian account and select the Jira site that contains the configured project. Only one Ternary integration can be configured per Jira project.

Select Accept to authorize the connection. After authorization completes, the integration redirects back to Ternary and the Jira configuration appears on the Admin → Integrations page.
Step 3: Use the Jira integration in Ternary
After configuration is complete, Ternary cases can be linked to Jira issues.
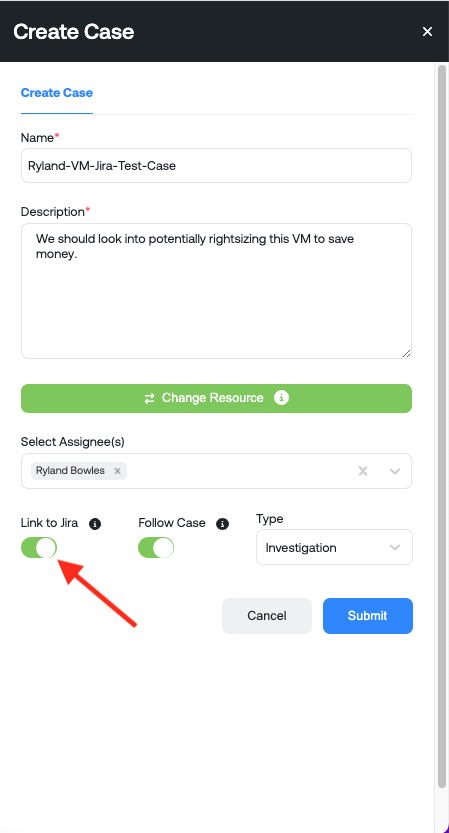
- Navigate to any page that supports Ternary Case Management case creation and select the case creation icon on the right side of the interface.
- The case creation window includes a Link to Jira option that creates a corresponding Jira issue.
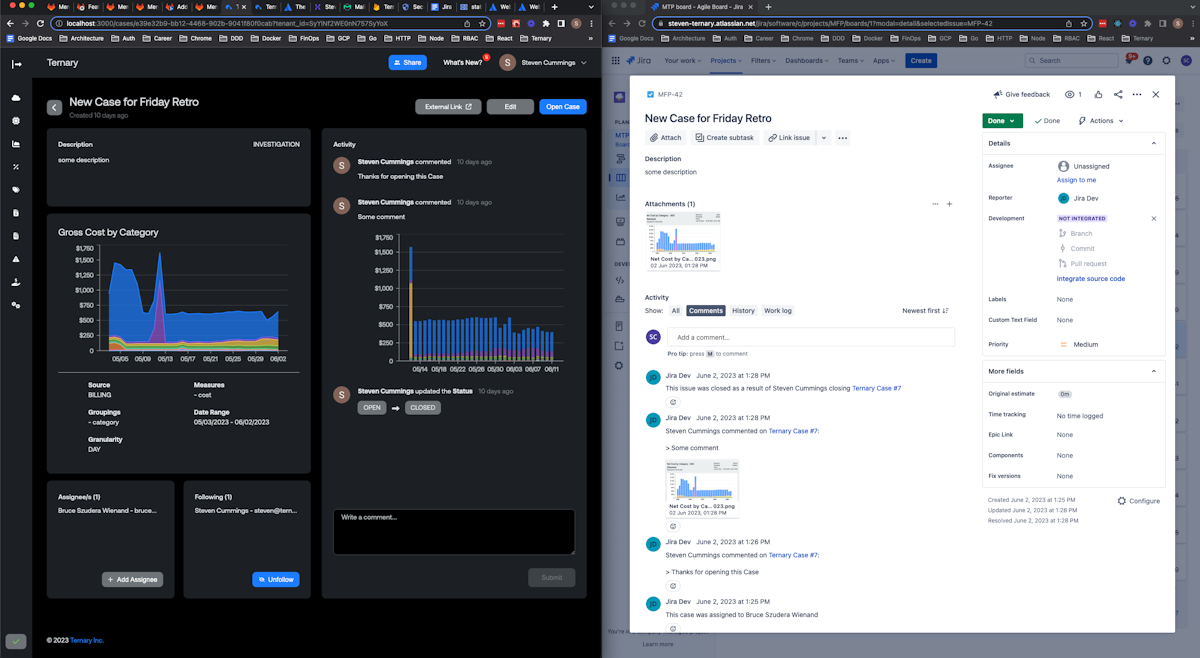
- Once a case is linked, updates remain synchronized between Ternary and Jira. Comments created in either platform appear in the other after a short delay of 15-30 seconds.
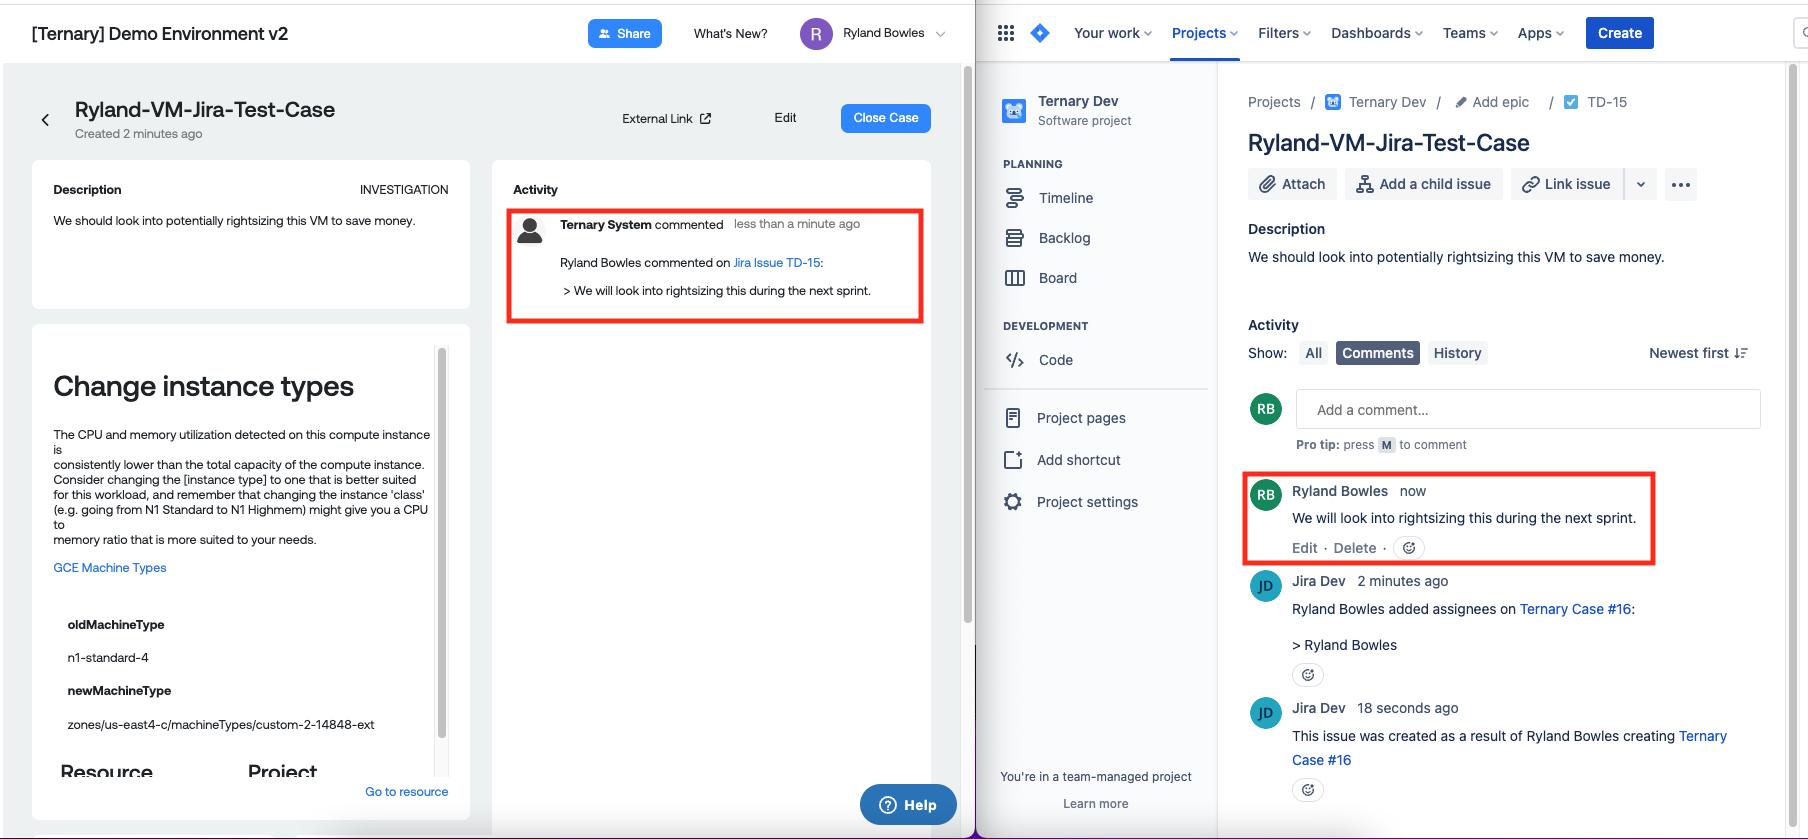
- Linked cases display an External Link icon that opens the corresponding Jira issue, and the Jira issue includes a link back to the Ternary case.
Workflow status is also synchronized. When the Jira issue transitions to Done, the linked case closes in Ternary. Closing the case in Ternary transitions the Jira issue to Done.
Updated 4 months ago