Carbon Footprint Report
Learn how Ternary integrates Google Cloud Carbon Footprint data to support emissions reporting, analysis, and sustainability tracking across Google Cloud environments.
Carbon Footprint reporting in Ternary enables analysis of emissions data sourced from Google Cloud and ingested through BigQuery. This allows carbon impact metrics to be analyzed alongside cost and usage data within the Ternary Reporting Engine.
Once configured, emissions data can be broken down by service, project, and other supported dimensions, supporting ongoing environmental impact tracking and sustainability reporting.
How to enable Carbon Footprint reporting in Ternary
Step 1: Ensure required access and permissions
Currently, Ternary offers Carbon Footprint reporting only for Google Cloud. Before configuring carbon data ingestion, the following access is required:
- A Google Cloud engineer or project owner with the following IAM permissions
resourcemanager.projects.update
serviceusage.services.enable
bigquery.transfers.updateSetup
billing.accounts.getCarbonInformation (On the billing account) - A Ternary user assigned the System Admin role to edit an existing Google Cloud integration
Step 2: Verify existing Carbon Footprint exports (if applicable)
If carbon data is already visible in the Google Cloud Console but not updating in Ternary, the BigQuery data transfer may be misconfigured or inactive.
Verification options:
- Run the following query against the carbon footprint dataset to check the latest available month:
SELECT MAX(usage_month) AS usage_month
FROM `your_project_id.your_dataset_id.your_carbon_footprint_table`- Review the Data Transfers tab in BigQuery to confirm the export job is configured, scheduled, and succeeding.
Step 3: Configure Carbon Footprint export to BigQuery
Google Cloud generates carbon footprint data and exports it to BigQuery using the BigQuery Data Transfer Service. Ternary requires this export to be enabled before ingestion can begin.
The export creates a monthly partitioned table, typically named carbon_footprint, and runs on the 15th of each month.
Option A: Configure via Google Cloud Console
- Open the Google Cloud Carbon Footprint console.
- From the billing account selector in the top right, choose the Cloud Billing account to export data from.
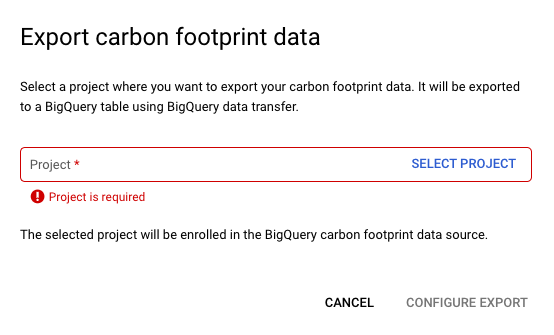
- Select Export, then choose the project where the carbon footprint data should be sent.
- Click Configure Export.
- This redirects to the BigQuery Data Transfer setup page.
- Configure the transfer with the following values:
- Source: Google Cloud Carbon Footprint Exports
- Transfer configuration name: Any descriptive name
- Destination dataset: Dataset where the carbon footprint table will be created
- Click Save, then approve the permissions request by selecting Allow.
Once configured, Google Cloud automatically exports carbon footprint data into BigQuery on the 15th of every month.
Option B: Configure via Terraform
The same configuration can be created using this Terraform snippet:
resource "google_bigquery_data_transfer_config" "carbon_footprint_transfer" {
  display_name           = "Carbon Footprint BigQuery Transfer" // can be anything
  location               = "US" // or "EU"
  data_source_id         = "61cede5a-0000-2440-ad42-883d24f8f7b8" // set by Google, do not change
  destination_dataset_id = "YOUR_EXPORT_DATASET_ID_HERE"
  params = {
    billing_accounts     = "YOUR_BILLING_ACCOUNT_ID_HERE"
  }
}
Step 4: Backfill historical carbon data
New export configurations do not automatically backfill historical data. To avoid waiting for the next scheduled export, a manual backfill is recommended.
Steps:
- Open the details page for the newly created transfer
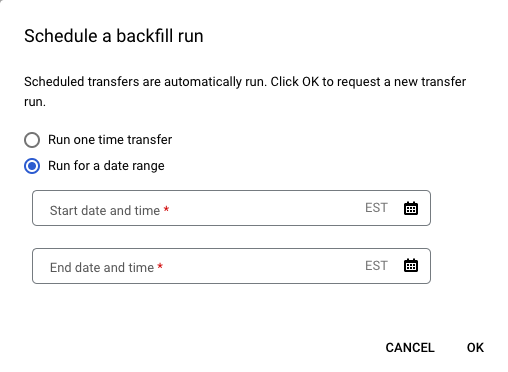
- Select Schedule Backfill
- Choose Run for a Date Range
- Set the start date to February 15, 2021 (earliest available month)
- Set the end date to the current date
- Submit the backfill request
Step 5: Enable Carbon Footprint ingestion in Ternary
Once carbon data is available in BigQuery, access must be configured in Ternary.
- Navigate to Admin → Clouds
- Edit the existing Google Cloud integration associated with the billing account
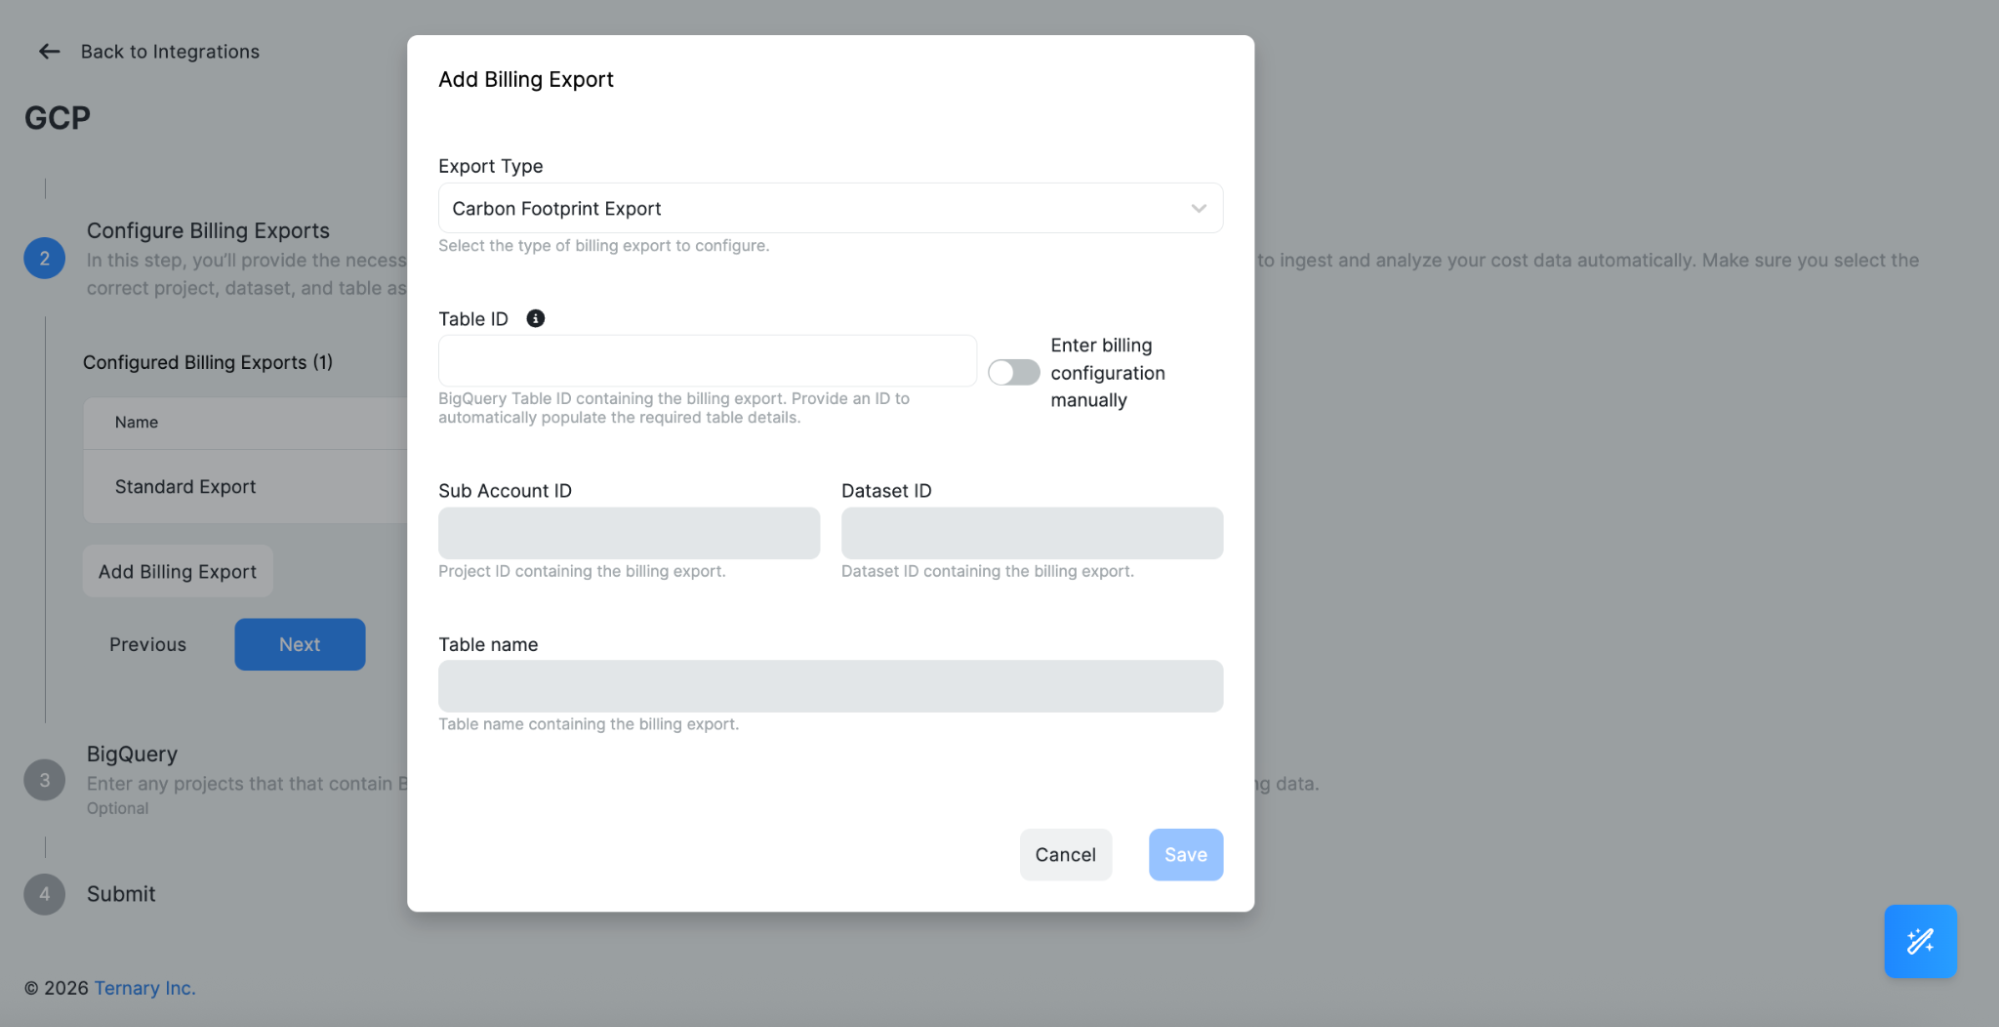
- Navigate to step 2: Configure Billing Exports and select Add Billing Export. Then Select Carbon Footprint Export as the Export Type.
- Provide the required configuration and then submit.
- Enter Table ID (typically carbon_footprint) to automatically populate fields
Or enter billing configuration manually including Sub Account ID, Dataset ID, and Table name.
Step 6: Build Carbon Impact reports in Ternary
After ingestion is enabled, carbon data becomes available in the Reporting Engine.
To create reports:
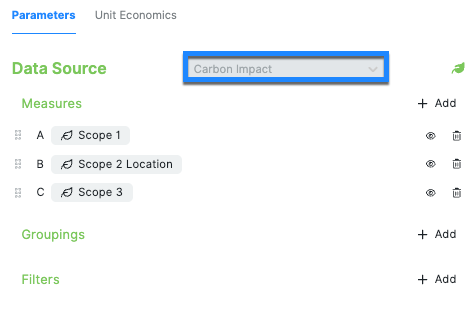
- Select Carbon Impact as the data source
- Choose the relevant emission measures
- Group and filter data by supported dimensions such as service or project
This enables analysis of emissions alongside cost and usage data within the same reporting workflows.

Example of a Carbon Impact of emissions by Service in GCP
FAQ
1. Where can documentation on Google Cloud carbon footprint methodology be found?
Google Cloud’s official documentation on carbon footprint data and methodology is available here.
2. Why is carbon impact reporting limited to monthly granularity?
According to Google Cloud, Carbon Footprint data is calculated using hourly emission factors but is exported and reported at a monthly level. Due to this limitation, carbon impact reports in Ternary support monthly granularity only. To ensure sufficient data points, the default date range is set to year-to-date, though larger date ranges can be selected based on the backfilled data window.
Updated 6 months ago