Case Management
Ternary Case Management enables engineering to investigate anomalies and take action on optimization opportunities.
Overview
Have you ever come across an interesting data point in your cloud bill and wished there was an easier way to collaborate with your team on it? Look no further than Ternary Case Management.
Case Management extends Ternary's industry leading collaboration functionality beyond discrete events like recommendations and alerts to other areas of the platform, allowing you to quickly create a case and collaborate with others to track and analyze any data points you find in your cloud bill. In this article, we'll take a closer look at Case Management's capabilities and show you how to create your first case, helping you coordinate your cloud cost analysis efforts.
Accessing Ternary Case Management
Throughout the application you can initiate a case wherever you see a paper & pencil icon with "Case Mgmt" in the top toolbar.
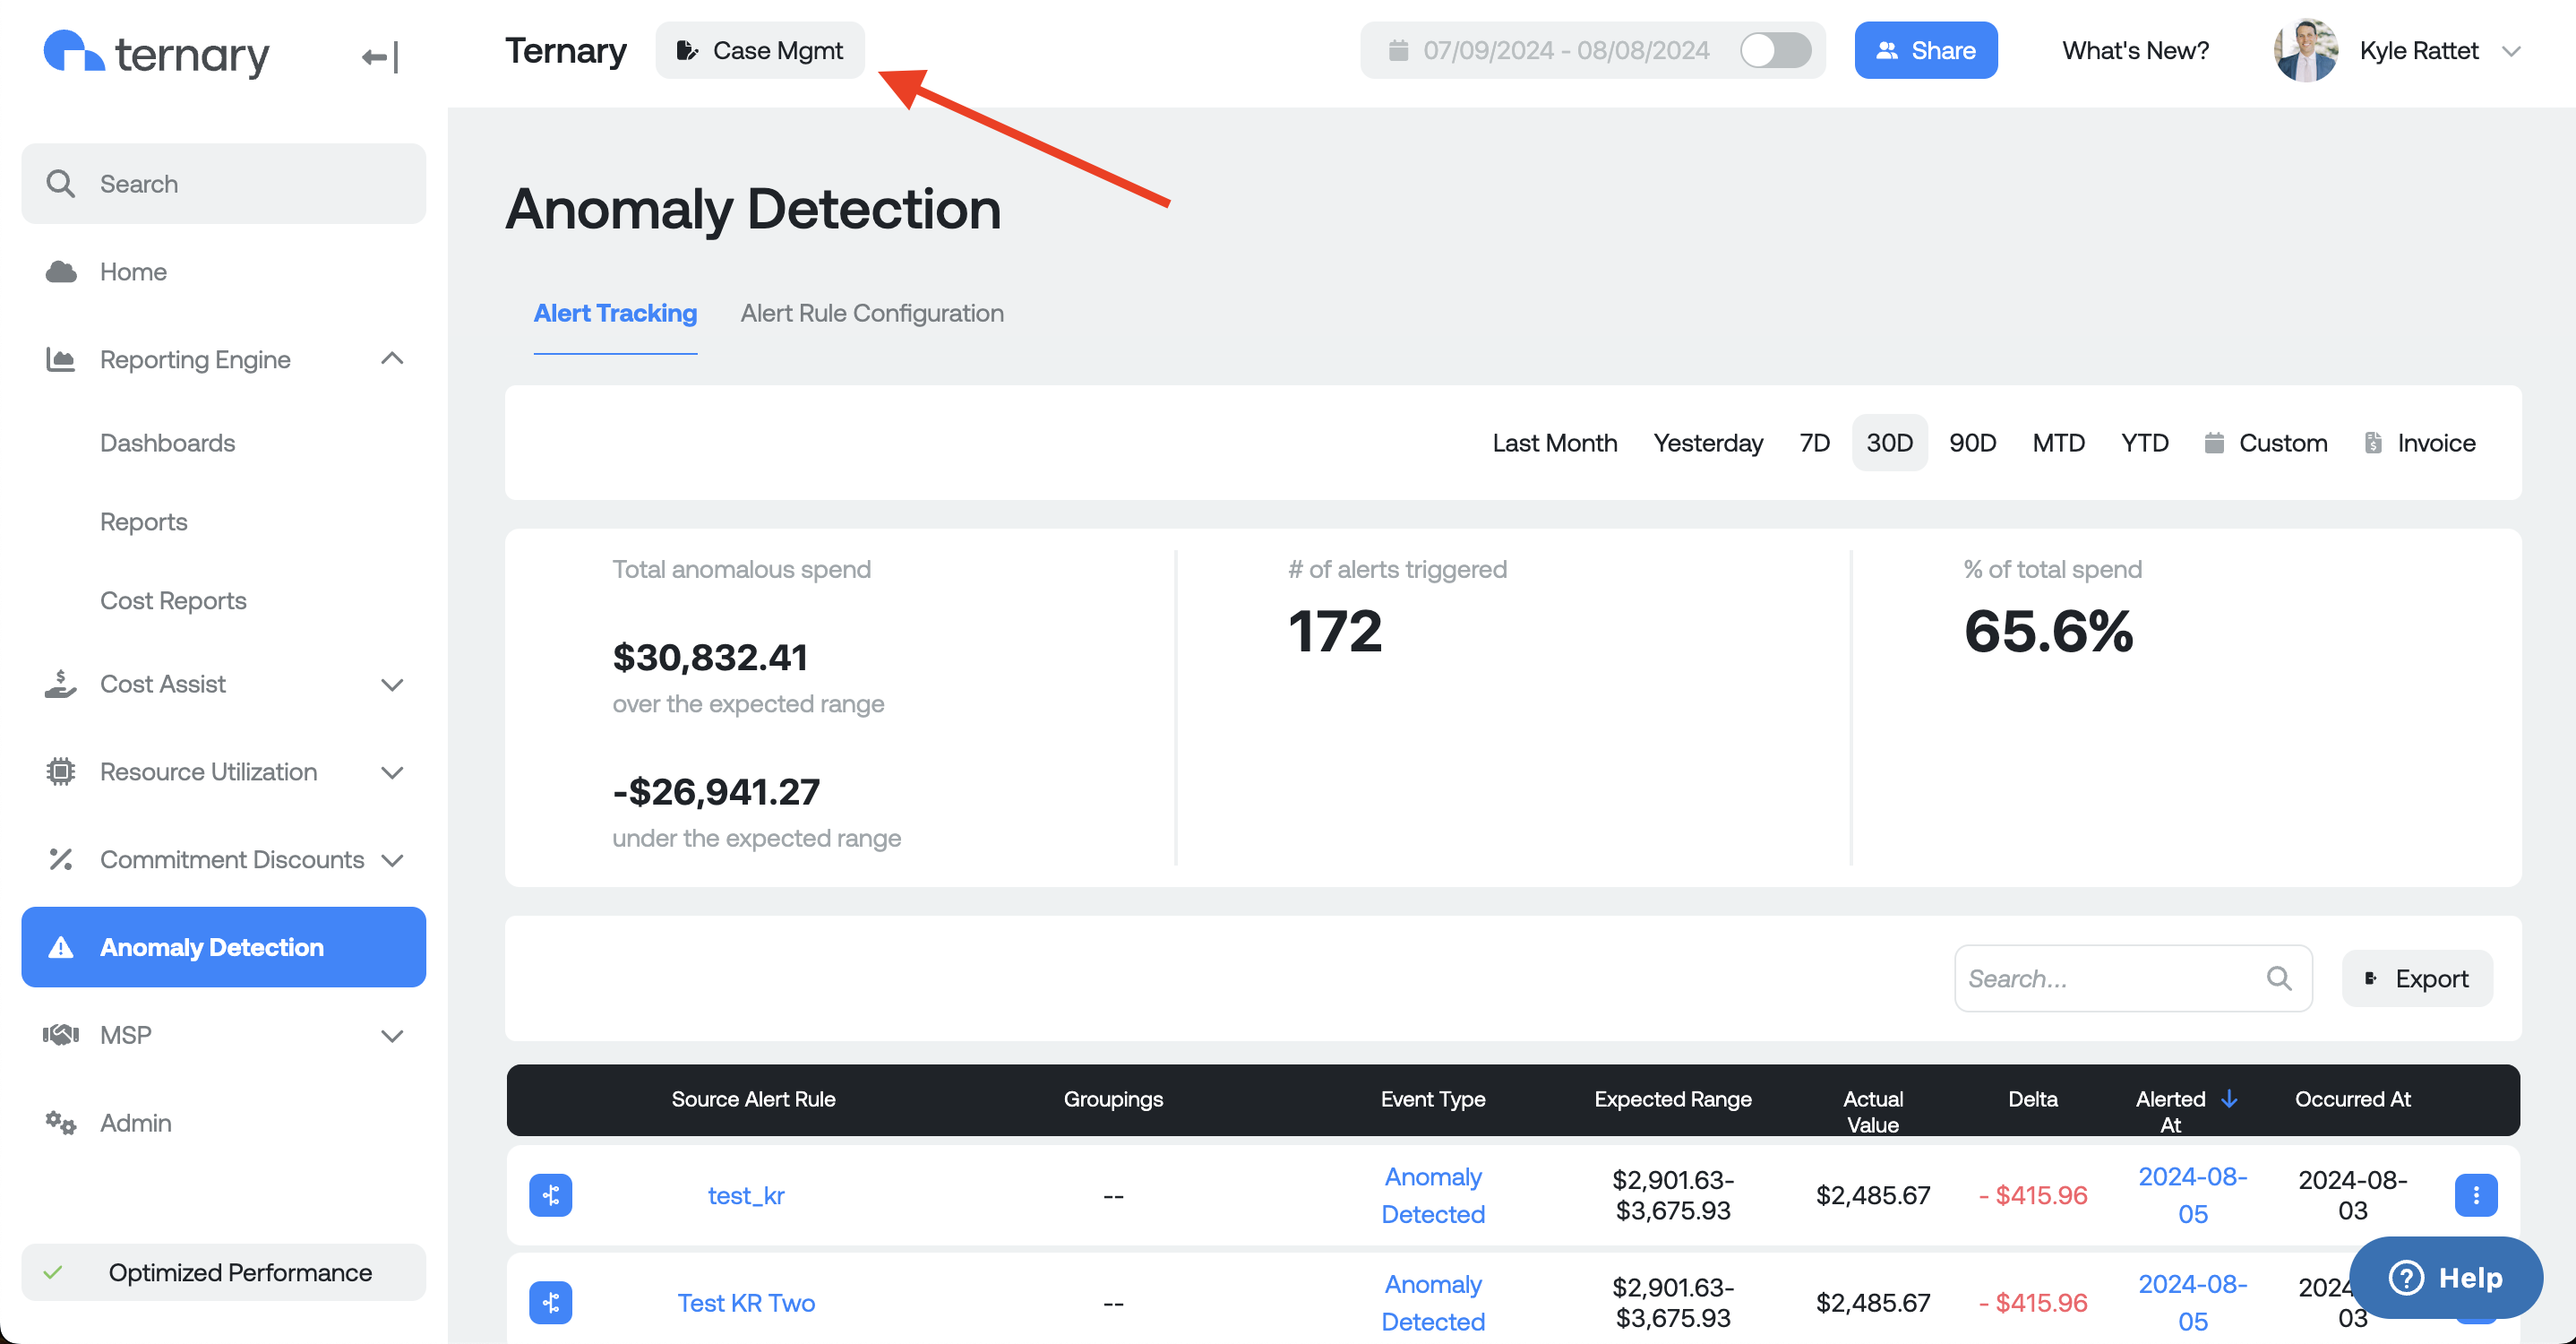
Click the button to open up a side drawer with configurable case details.
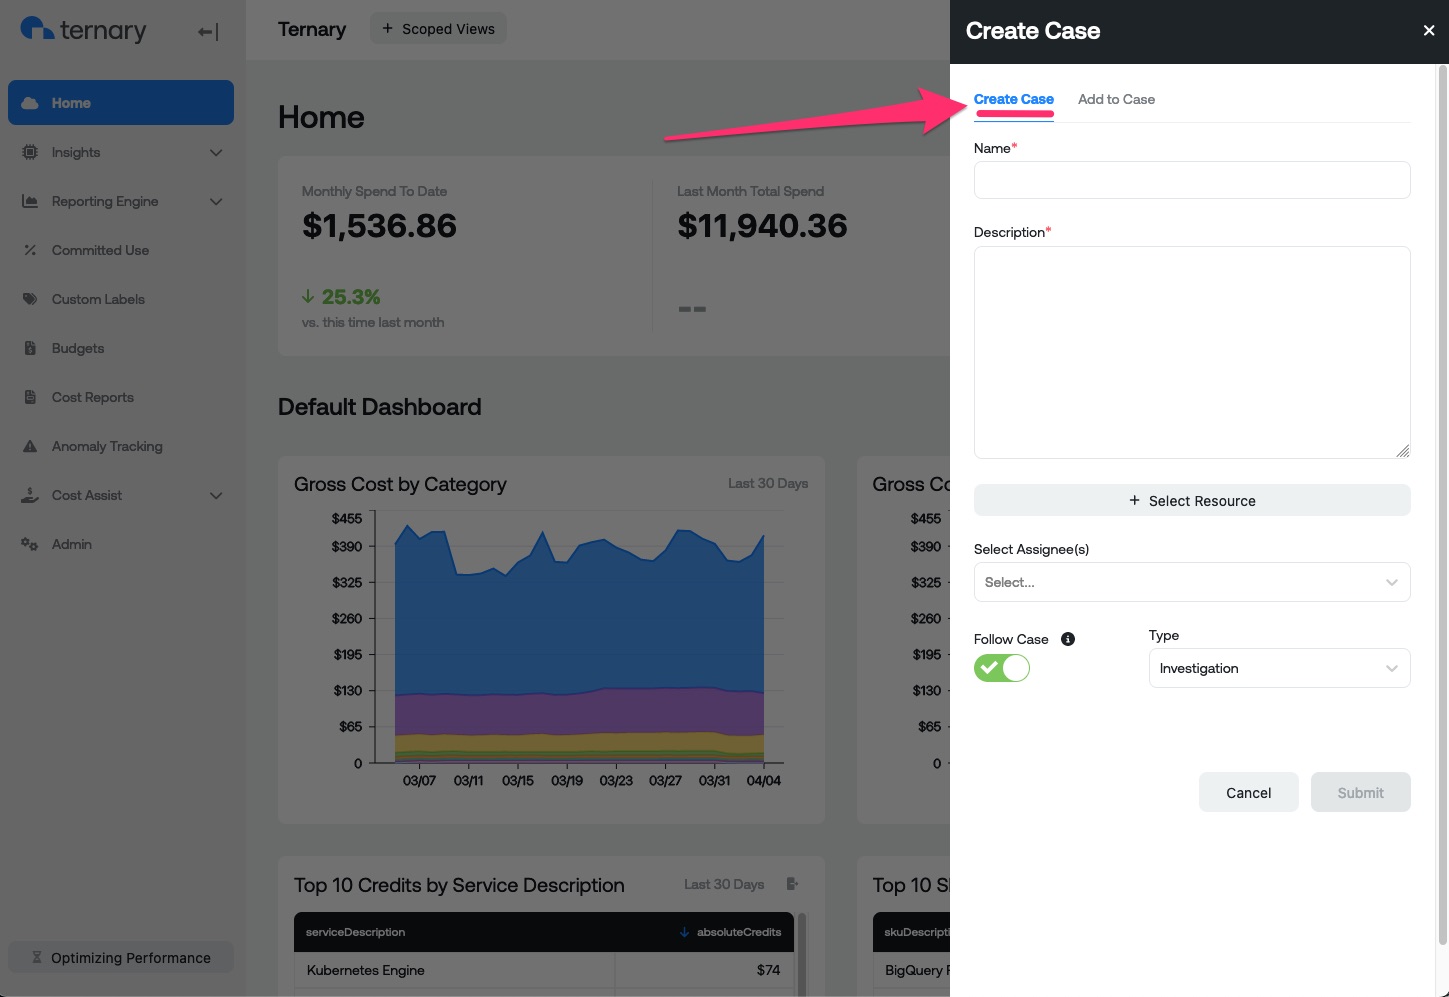
From the side drawer you can choose to create a new case or add additional information to an existing case.
Create a Case
Select “Create Case” from the top bar, you will need to fill out the name and description fields with details of the case you wish to create. Once you have entered your details, click the “+select resource” box. This will hide the customization drawer and allow you to select one of your dashboard widgets. Note: Only one resource can be selected upon creation, additional resources can be added to the case later.
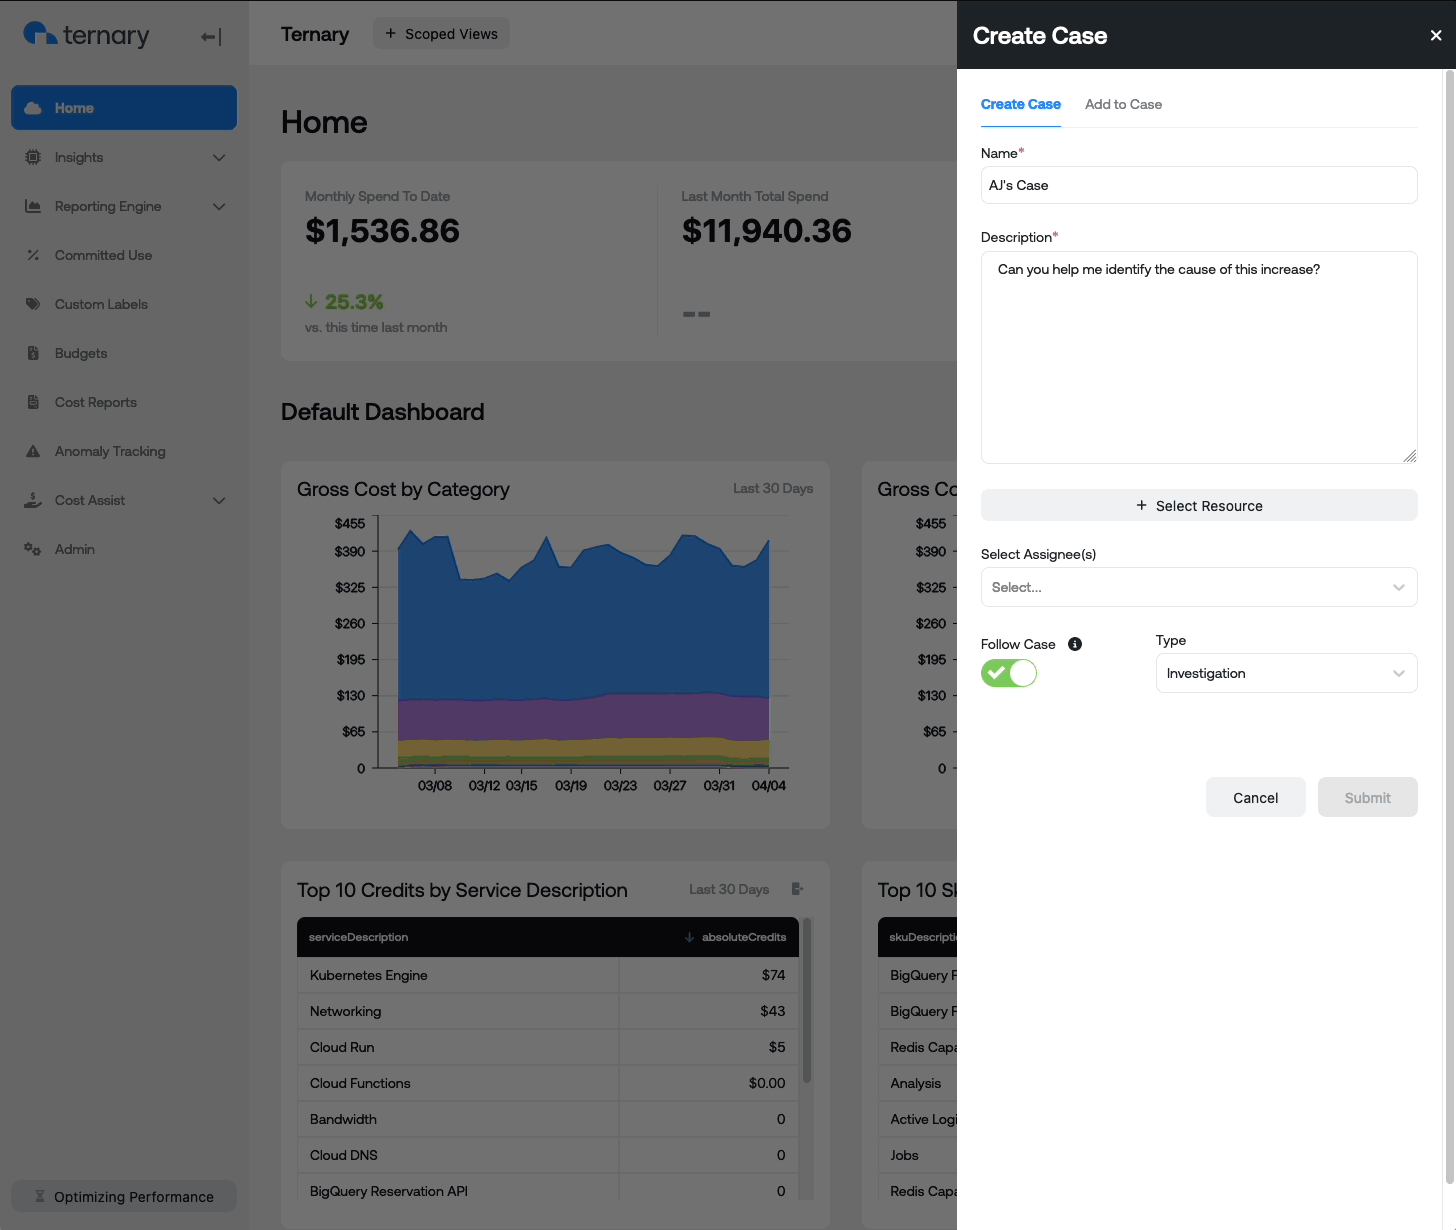
Next choose who you want to be assigned to the case, one or more users can be designated from the drop down list. An assigned user will be notified via email and automatically added to any case updates (users can disable notifications if desired).
As the case creator will be added to email notifications for any changes to the case by default, if you do not want to receive notifications, you can uncheck the green icon named “Follow Case” (you can adjust this setting later)
The last step is to label this case as either an Investigation, Optimization, or Task. Once you are finished, click “Submit” to create the case. You will receive a green confirmation bar on the top of your screen upon successful creation.
Add to Case
If you would like to add another widget to an existing case, select the “Add to Case” option from the top bar.
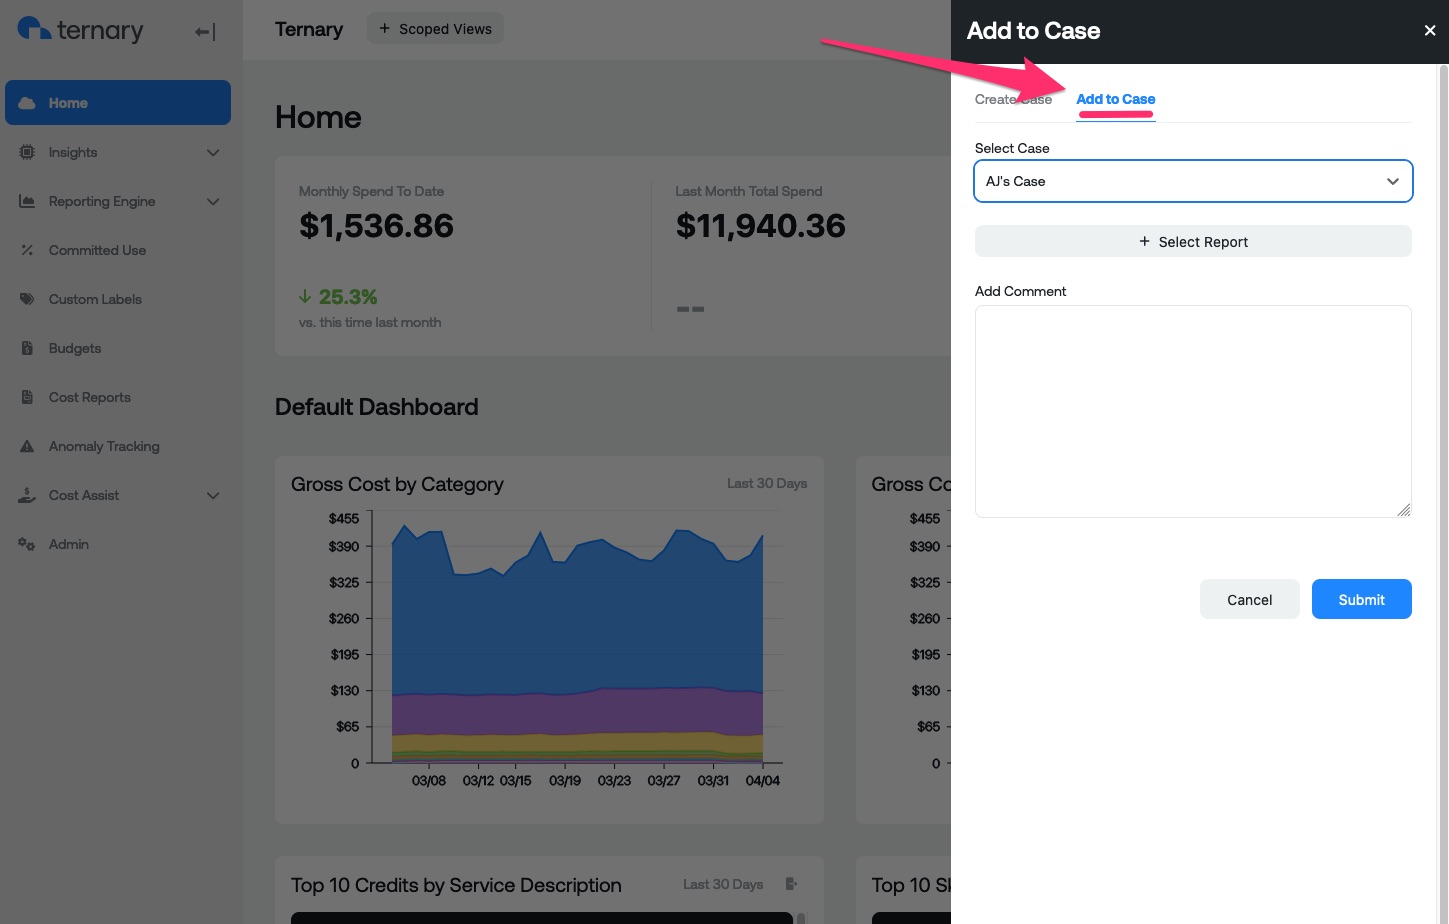
Click the “Select Case” drop-down and choose the name of the case you want to add another report to. Next click the “+ Select Resource” button and choose your desired widget.
The last step is an optional text box where you can provide more details around the data you have chosen to add.
Once you are finished, click “Submit” to add the new information to the case.
Ternary Case Management Page
You can find a detailed list of all existing cases on the Case Management page. This is found in the primary, left-hand navigation beneath Anomaly Detection.
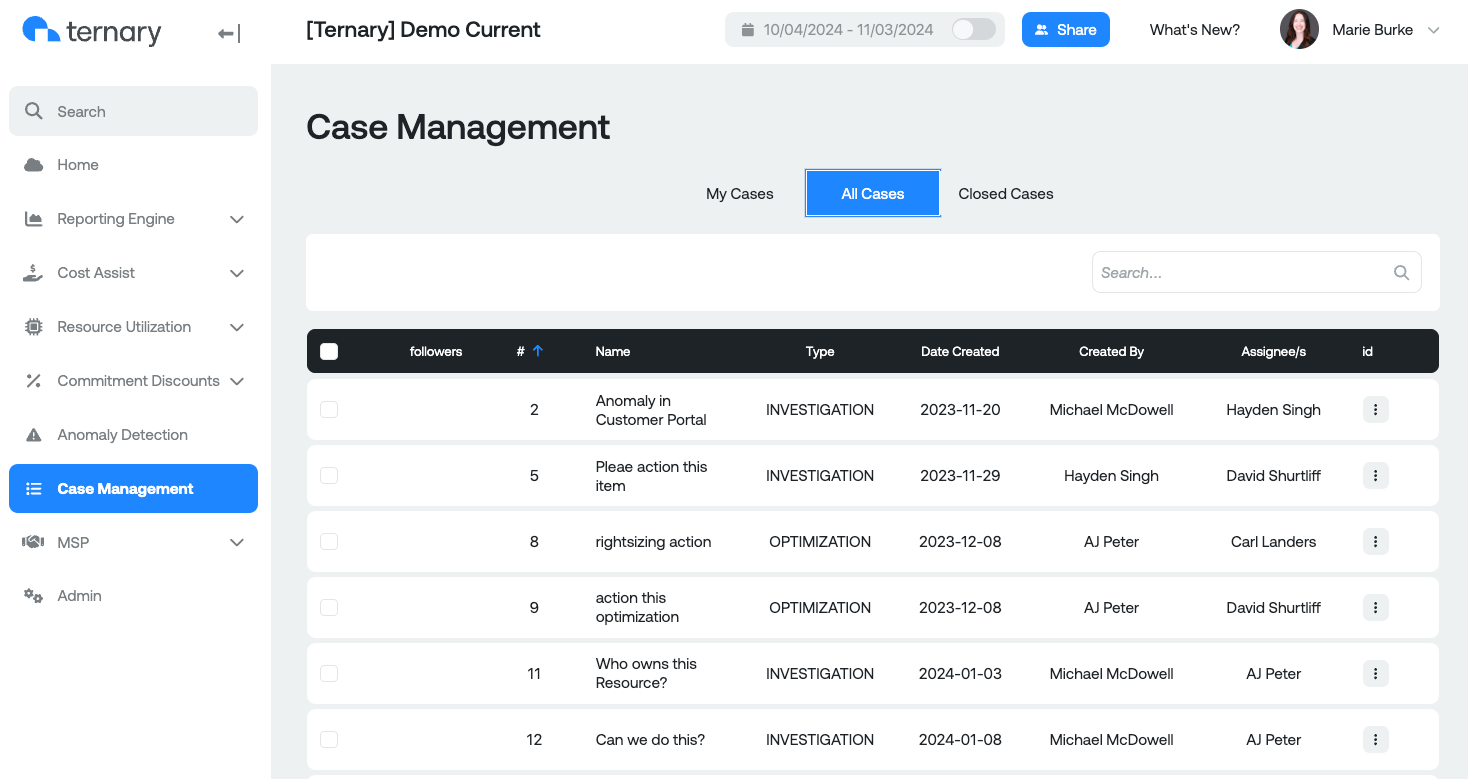
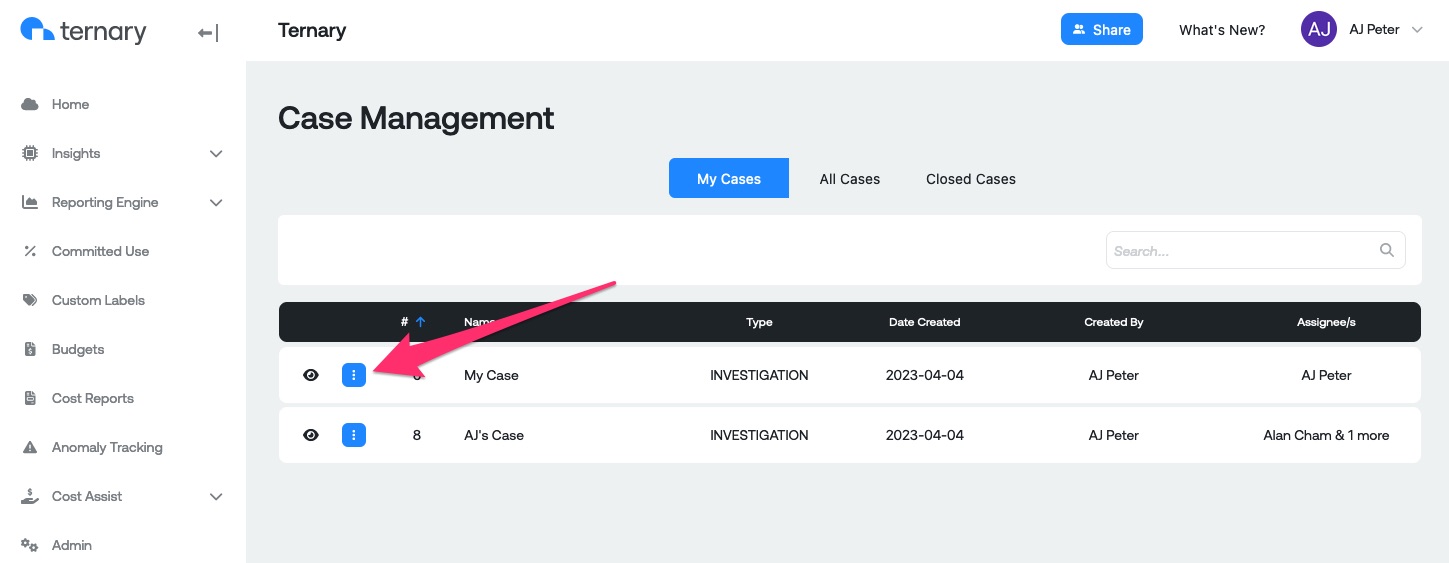
On the Case Management page you have three view options:
- My Cases
- All Cases
- Closed Cases

For each of the choices you will see a table below which shows you if you are following the case, the case number, name, type, date created, creator and the assignee's. You can quickly change the sort order of any column by clicking the column name.
To view a case, click the blue button on the left of the case number, then select “View Case” from the pop up menu.
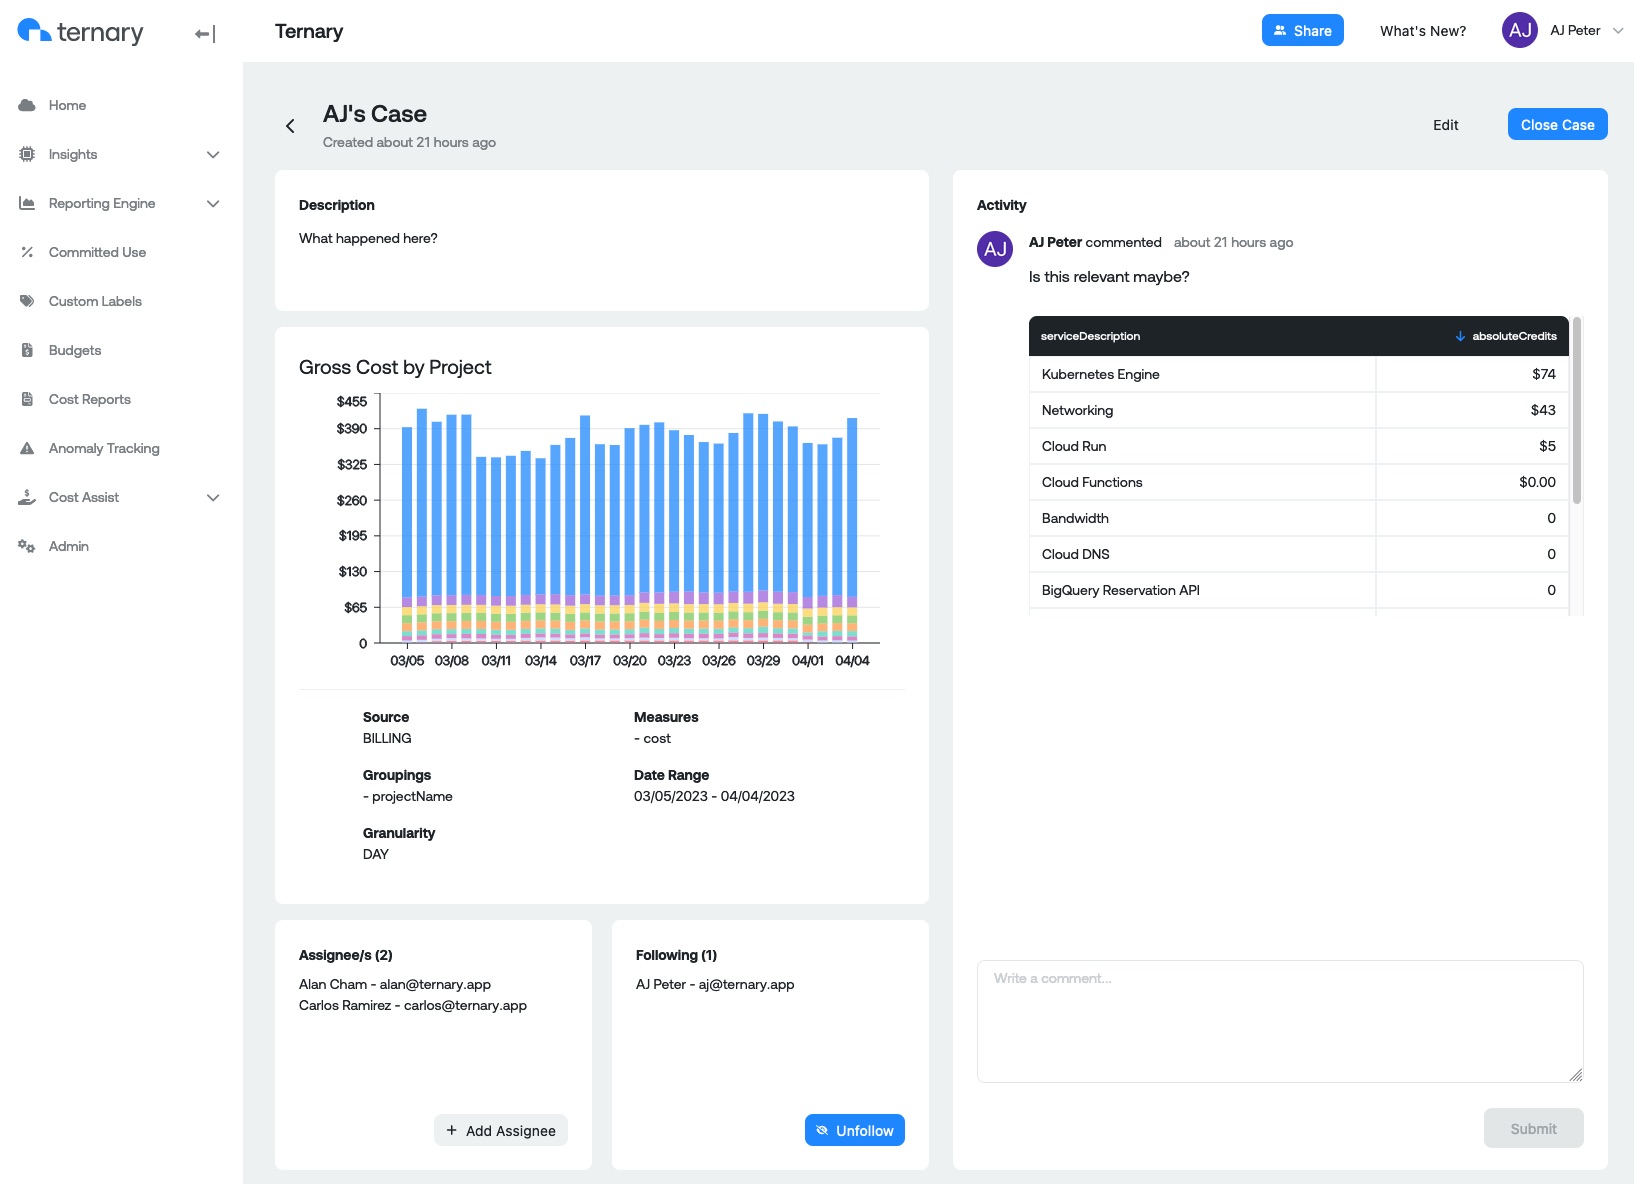
Case View
When viewing a case, you will see the description, initial widget, assignee's, followers and the activity.
From this view you can add/remove assignee's or followers, edit the case name or description, add comments or close the case.
Updated 9 months ago