Oracle Cloud Infrastructure
Learn how to gain cost visibility and discover optimizations for your Oracle Cloud Infrastructure (OCI) environment with Ternary.
The Oracle Cloud Infrastructure integration allows Ternary to access OCI cost and usage reports to provide cost visibility and optimization insights. To enable this integration, Ternary requires read access to the OCI cost and usage reporting data generated within the Oracle tenancy. This guide explains how to configure that access by creating a service user, assigning the required permissions, and enabling cost and usage reporting in Oracle Cloud. Oracle Cloud administrator permissions are required to complete these steps.
Managed Service Providers configuring OCI should begin with the MSP billing configuration documentation.
How is the Oracle integration configured in Ternary
Download the OCI public key from Ternary
Open the Admin page in Ternary and locate the OCI Public Key section. Select Download to retrieve the PEM file that Ternary uses to authenticate when accessing Oracle Cloud cost and usage reports.
This key is generated specifically for the Ternary tenant and is not shared across other Ternary environments.

Step 2: Configure an Oracle Cloud user
Create a dedicated service user in Oracle Cloud that Ternary will use to access cost and usage reports.
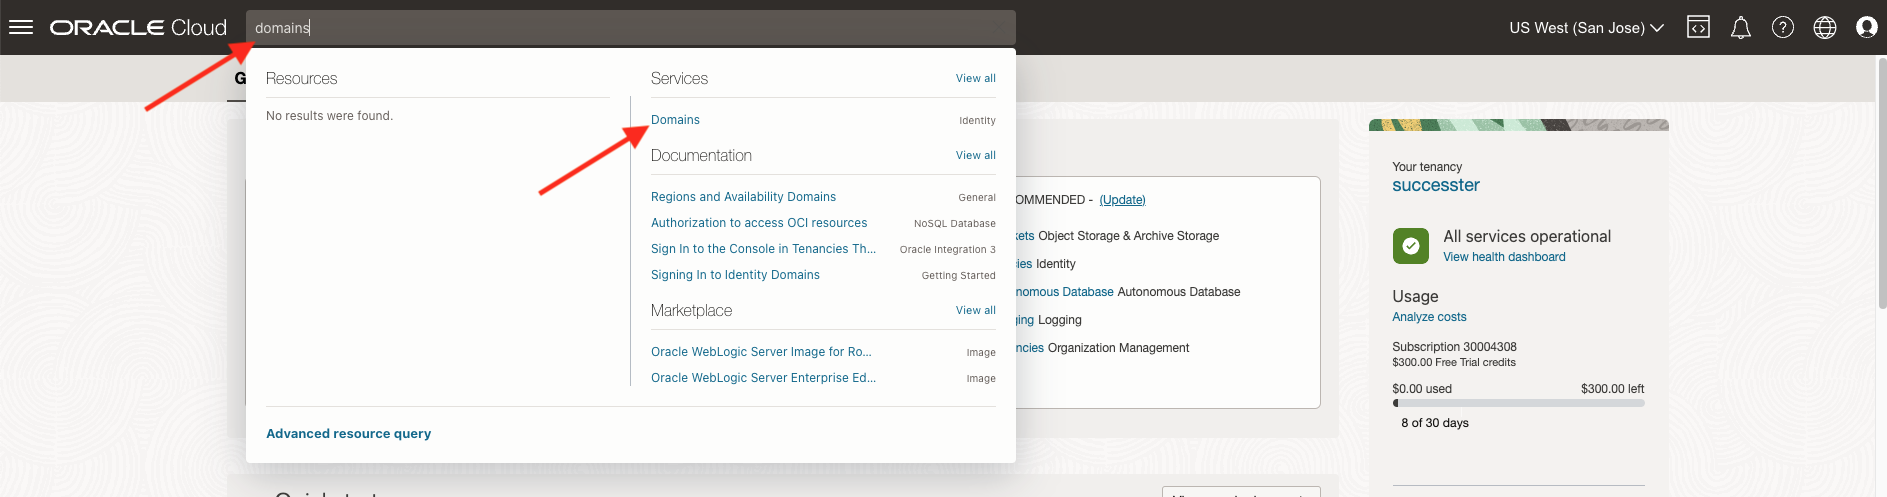
- Sign in to the OCI Console and navigate to Identity → Domains.
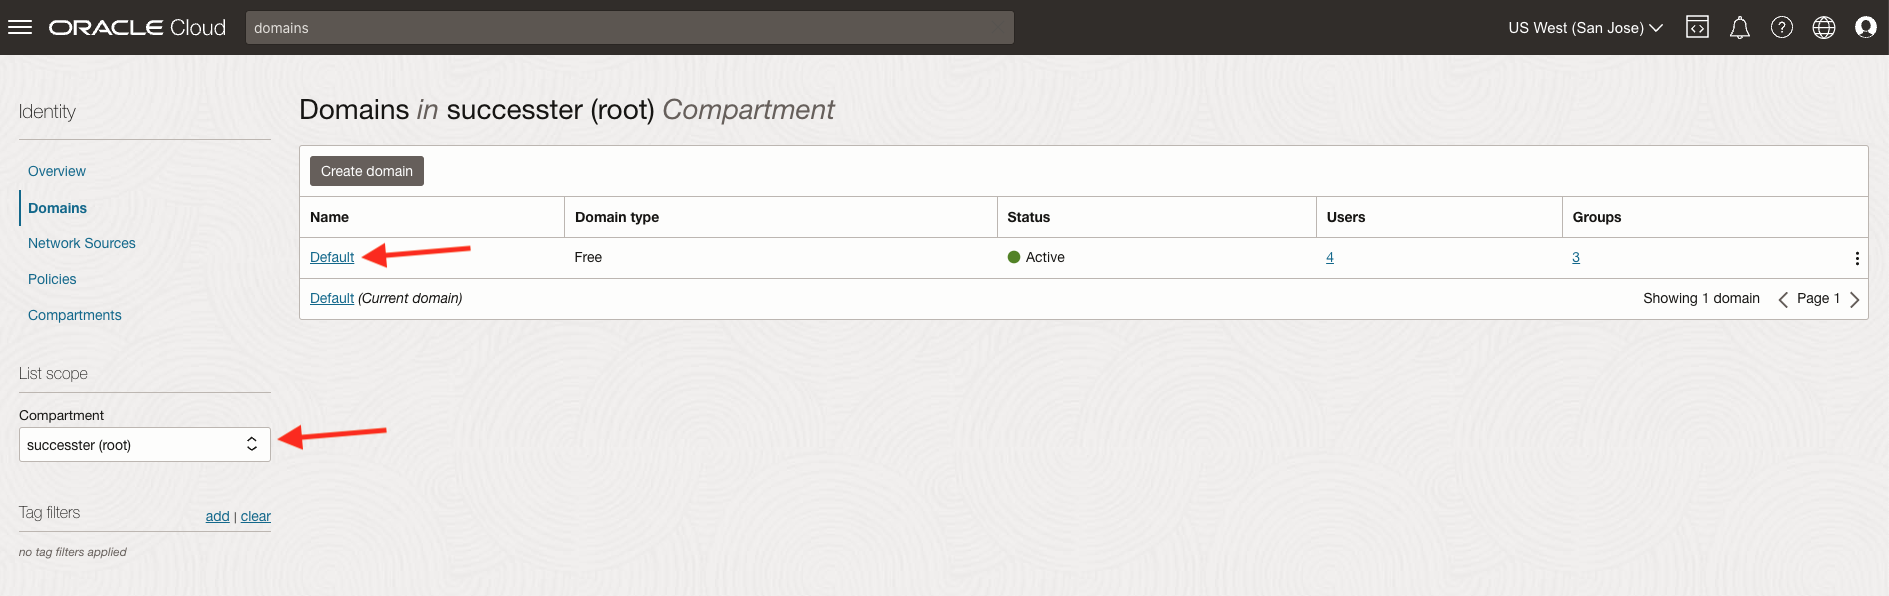
- Select the domain where the Ternary service user will be created.
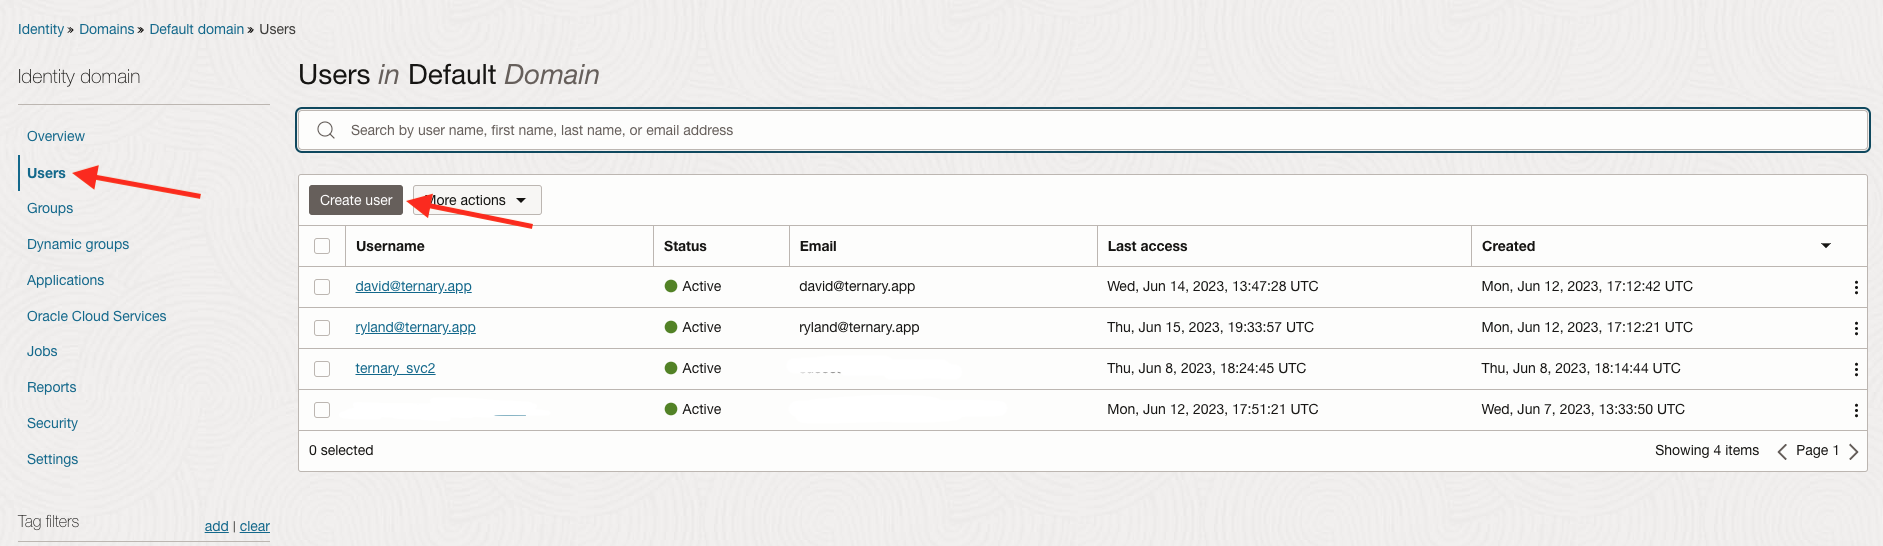
- Open Users from the left navigation menu and select Create User.
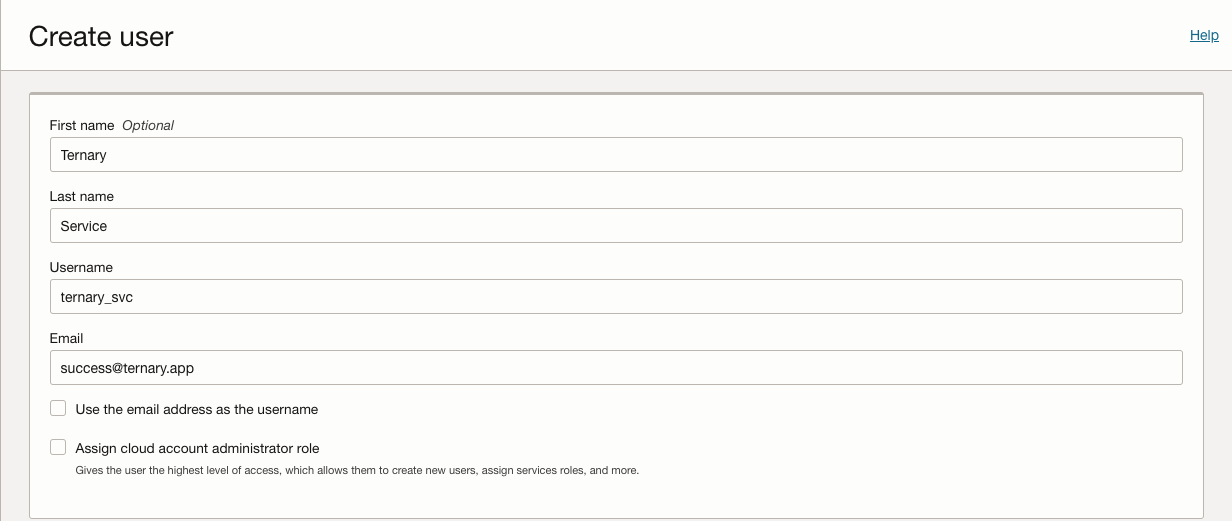
Enter the details for the Ternary service user. The following values are commonly used for clarity within cloud administration teams:
- First Name: Ternary
- Last Name: Service
- Username: ternary_svc
- Email: [email protected]
These values are recommendations for identification purposes only. Any naming convention or email address that aligns with internal policies can be used.
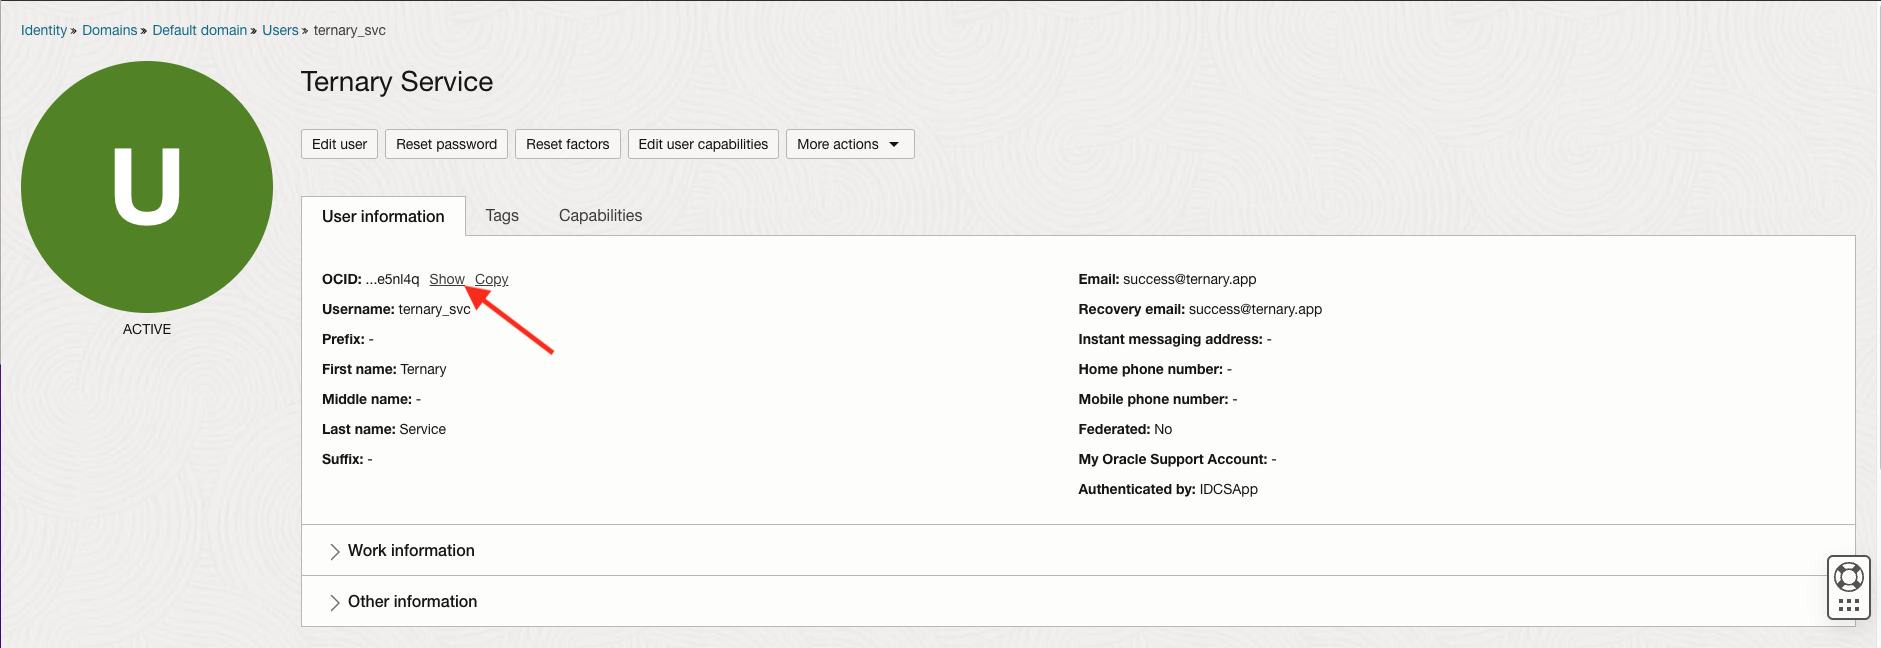
After the user is created, the OCI user profile displays a unique identifier called the OCID. Select Show to reveal the full OCID value and copy the entire string. This value begins with ocid1.user and will be required later when completing the integration configuration in Ternary.
While on the user page, configure key based authentication for the service user.
- Scroll to the bottom of the page.
- Select API Keys from the left navigation menu.
- Select Add API Key.
- Upload the PEM file downloaded from the Ternary Admin page by selecting Choose public key file or dragging the file into the upload field.
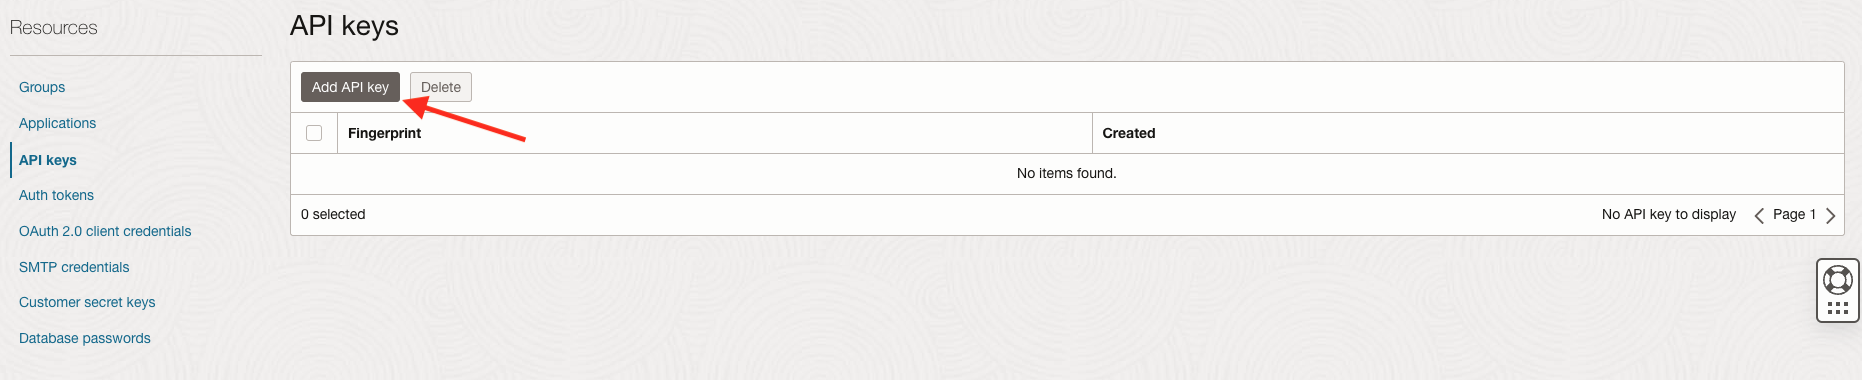
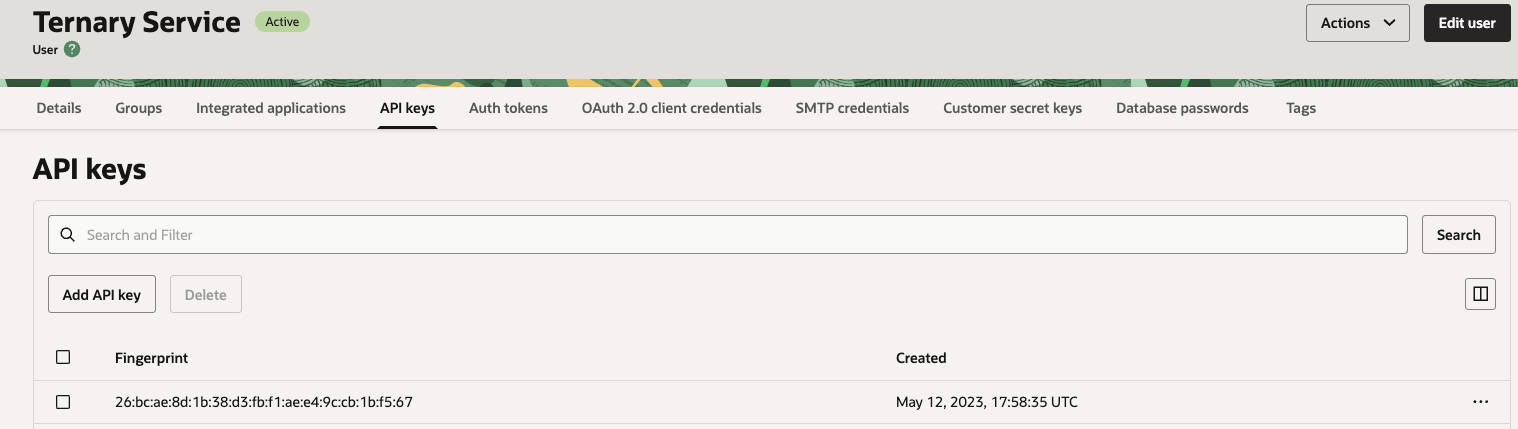
If the upload is successful, the key appears in the list under API keys, showing details such as the fingerprint and creation timestamp. Select Add to complete the key configuration.
Step 3: Configure the Bill Readers group
Create a group that grants the Ternary service user access to Oracle Cloud cost and usage reports.
- Navigate to Identity → Domains → (selected domain) in the OCI Console.
- Open Groups from the left navigation menu.
- Select Create Group.
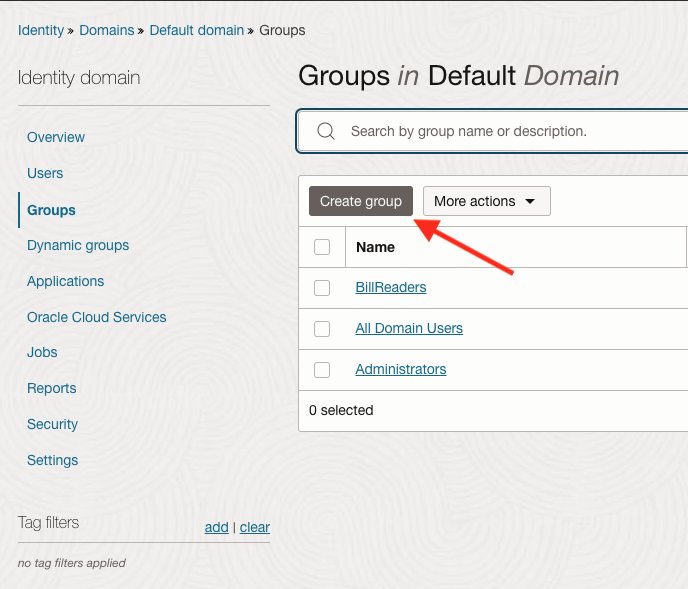
Name the group BillReaders or use a similar naming convention used within the organization.
Add the previously created Ternary service user to the group during group creation. Select Create to complete the process. The group name should be retained for use in a later configuration step.
Step 4: Enable Cost and Usage Reports
Enable Oracle Cloud cost and usage reports and configure access so Ternary can read the generated report files.
If cost and usage reports are already enabled in the tenancy, this step can be skipped. This can be verified from the Exports configuration page in Oracle Cloud. If the page displays downloadable CSV files, cost and usage reporting is already active.
Even when reports are already enabled, the policy that governs access to the exported reports must include the group created earlier so that Ternary can read the files.
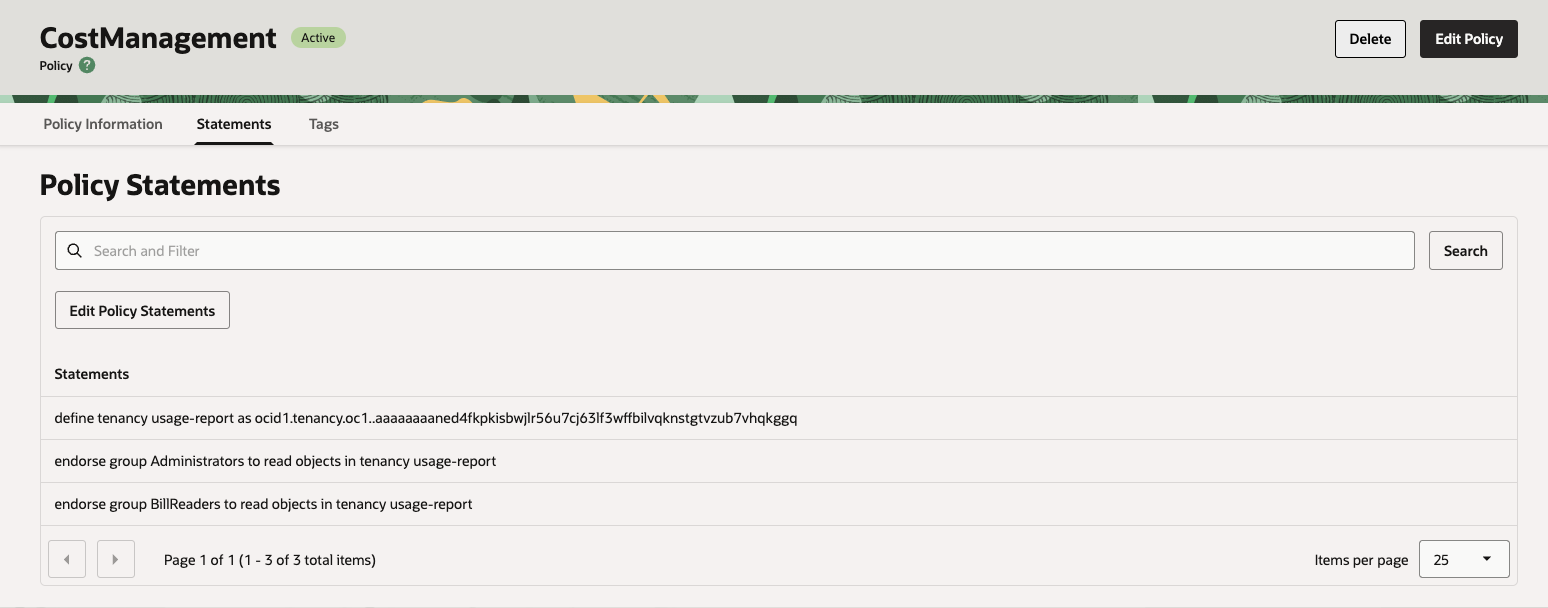
Cost and usage reports are enabled through a policy created within the Oracle compartment. Use the policy creation interface in the OCI console and copy the two required policy statements referenced in the Oracle documentation.
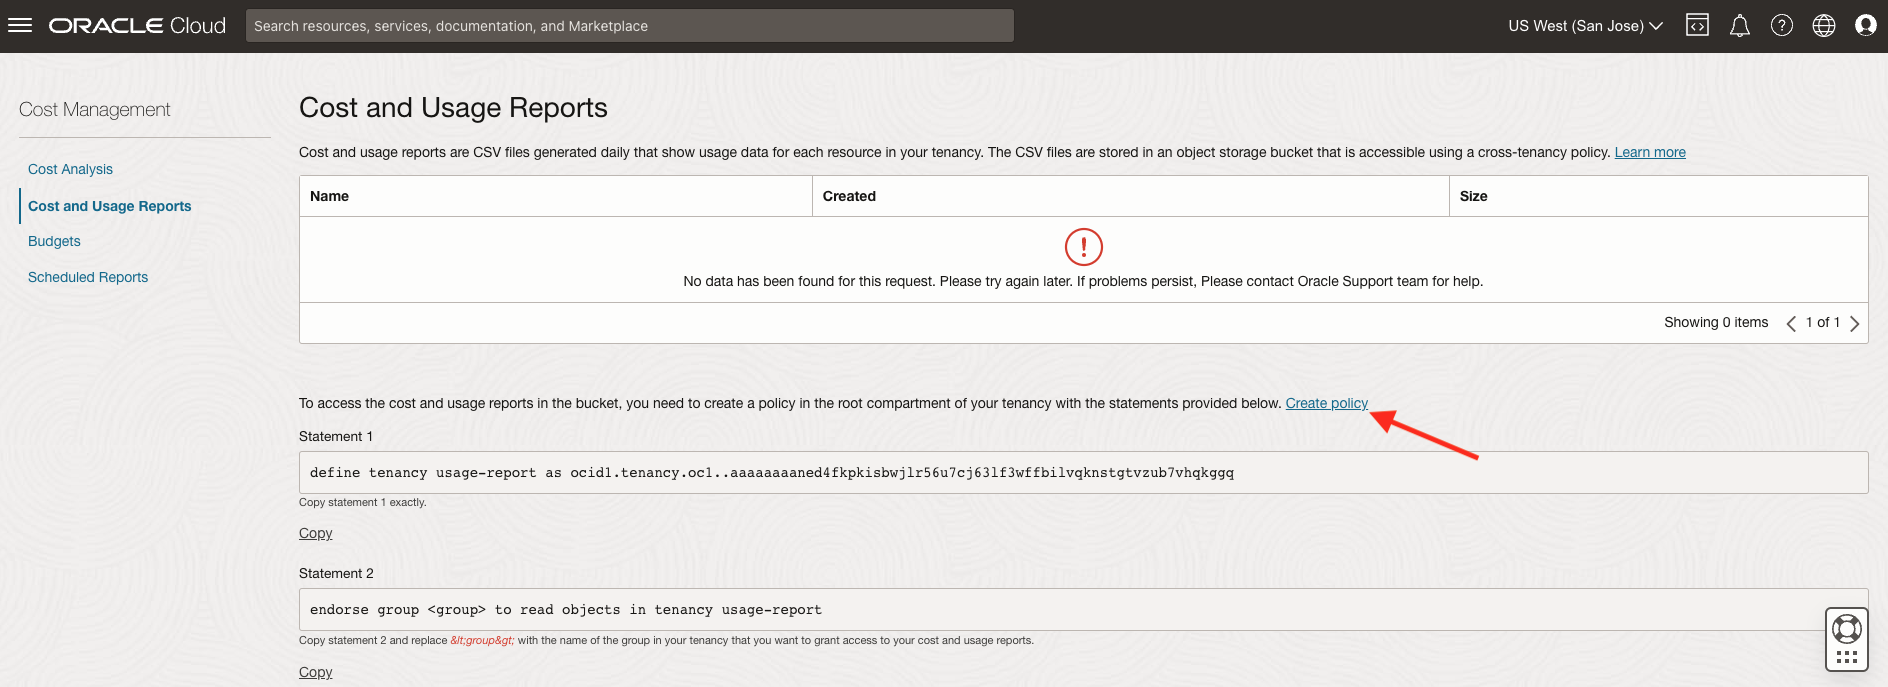
Create a new policy with the following configuration:
- Policy name: CostManagement
- Enable Show manual editor
- Paste Statement 1 on line 1 and Statement 2 on the next line.
- In Statement 2, replace
<group>with the group name created in the previous step. For example, BillReaders. - Select Create to save the policy.
Step 5: Retrieve tenancy ID and home region
The final information required for the integration is the Tenancy OCID and the Home Region of the OCI tenancy.
- Open the Tenancy Details page in the Oracle Cloud console. The profile page displays an OCID value associated with the tenancy.
- Select Show to reveal the full identifier and copy the entire string. The value begins with
ocid1.tenancyand ends with a long unique identifier. - The Home Region must also be recorded. Oracle regions must be supplied using the machine readable region identifier. In this example, US West (San Jose) has an identifier of:
us-sanjose-1
If the identifier for the home region is unknown, refer to the Oracle Cloud region reference documentation to obtain the correct region code.
Step 6: Enter Oracle Cloud configuration in Ternary
After collecting the required OCI identifiers, complete the integration configuration in Ternary.
- Open the Admin page in Ternary.
- Select “Create New Integration”.
- Choose Create Oracle Cloud.
Enter the following values in the configuration form:
- Service User OCID: The OCID of the service user created in Step 2.
- Tenancy OCID: The tenancy OCID retrieved in Step 5.
- Tenancy Region: The machine readable identifier for the tenancy home region retrieved in Step 5.
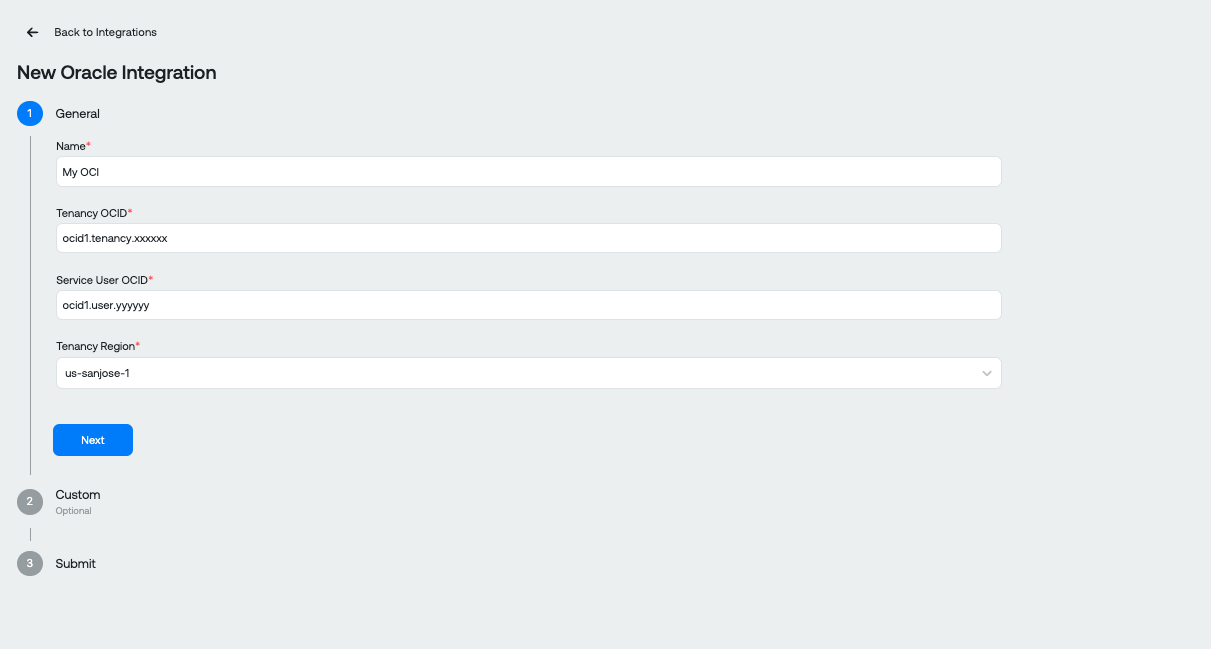
After entering the values, select Submit to validate the connection profile.
If the configuration is successful, a new entry appears in the Integrations table showing the Oracle Cloud integration. The status column highlights the newly created configuration.
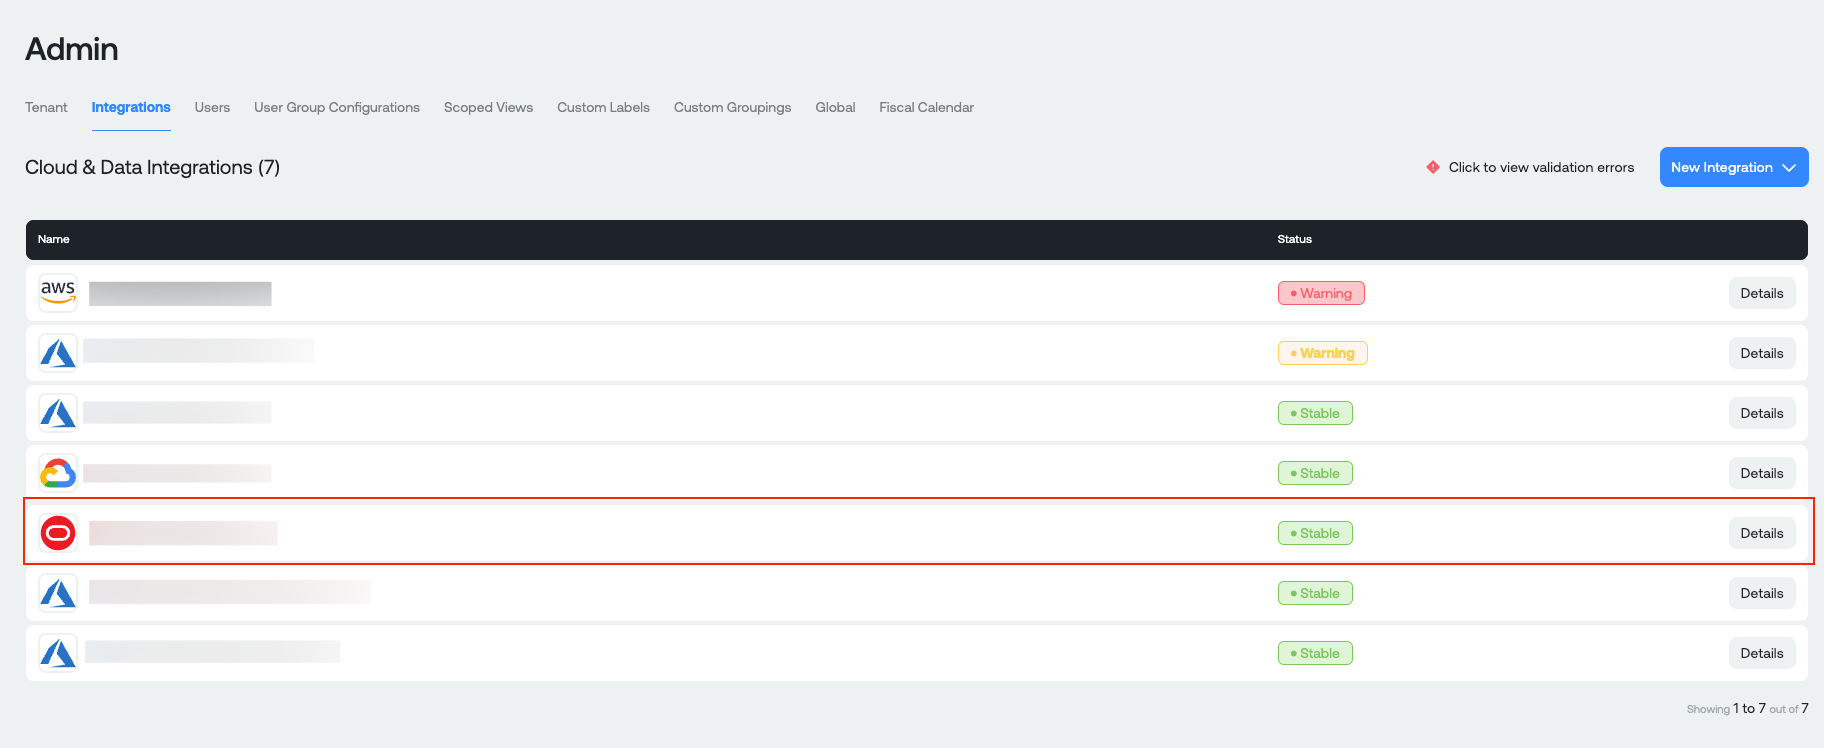
Select Details in the configuration entry to view additional information about the integration status.
Updated 3 months ago