Custom Labels
Overview of Custom Labels
Custom Labels in Ternary allow you to create new, business-relevant labels for your cloud cost data by leveraging existing metadata (such as cloud provider tags/labels or other attributes). This helps your organization slice and dice billing data in ways that mirror how you run the business. In practice, Custom Labels enable you to:
- Define relationships between business units and cloud costs: For example, map projects or accounts to cost centers or teams.
- Tie cloud resources to business operations: Assign labels that represent environments, departments, or any custom category important to your finance or engineering teams.
By applying Custom Labels, you can view and filter cloud costs based on business dimensions that may not exist in the raw billing data. This adds meaningful context to cost reports and dashboards, improving transparency and accountability.
What’s new in v2?
- Support for creating entirely new label dimensions from any existing label (including outputs of other custom labels).
- Multiple creation methods (from pre-built templates for common use cases to bulk CSV uploads and full manual configuration).
- More powerful matching options (wildcard pattern matching, regex, etc.) now fully available in the UI (previously API-only).
- Ability to combine multiple conditions in a single rule and assign multiple output labels per rule, simplifying complex mappings.
- Performance improvements: new labels typically become available in under an hour (often minutes for small datasets).
- A revamped user interface with draft & publish workflow, making it easy for both technical and non-technical users to create and manage custom label rules.
Key Concepts
Before diving into how to create custom labels, it’s important to understand the basic components of a Custom Label rule and the requirements for label names:
-
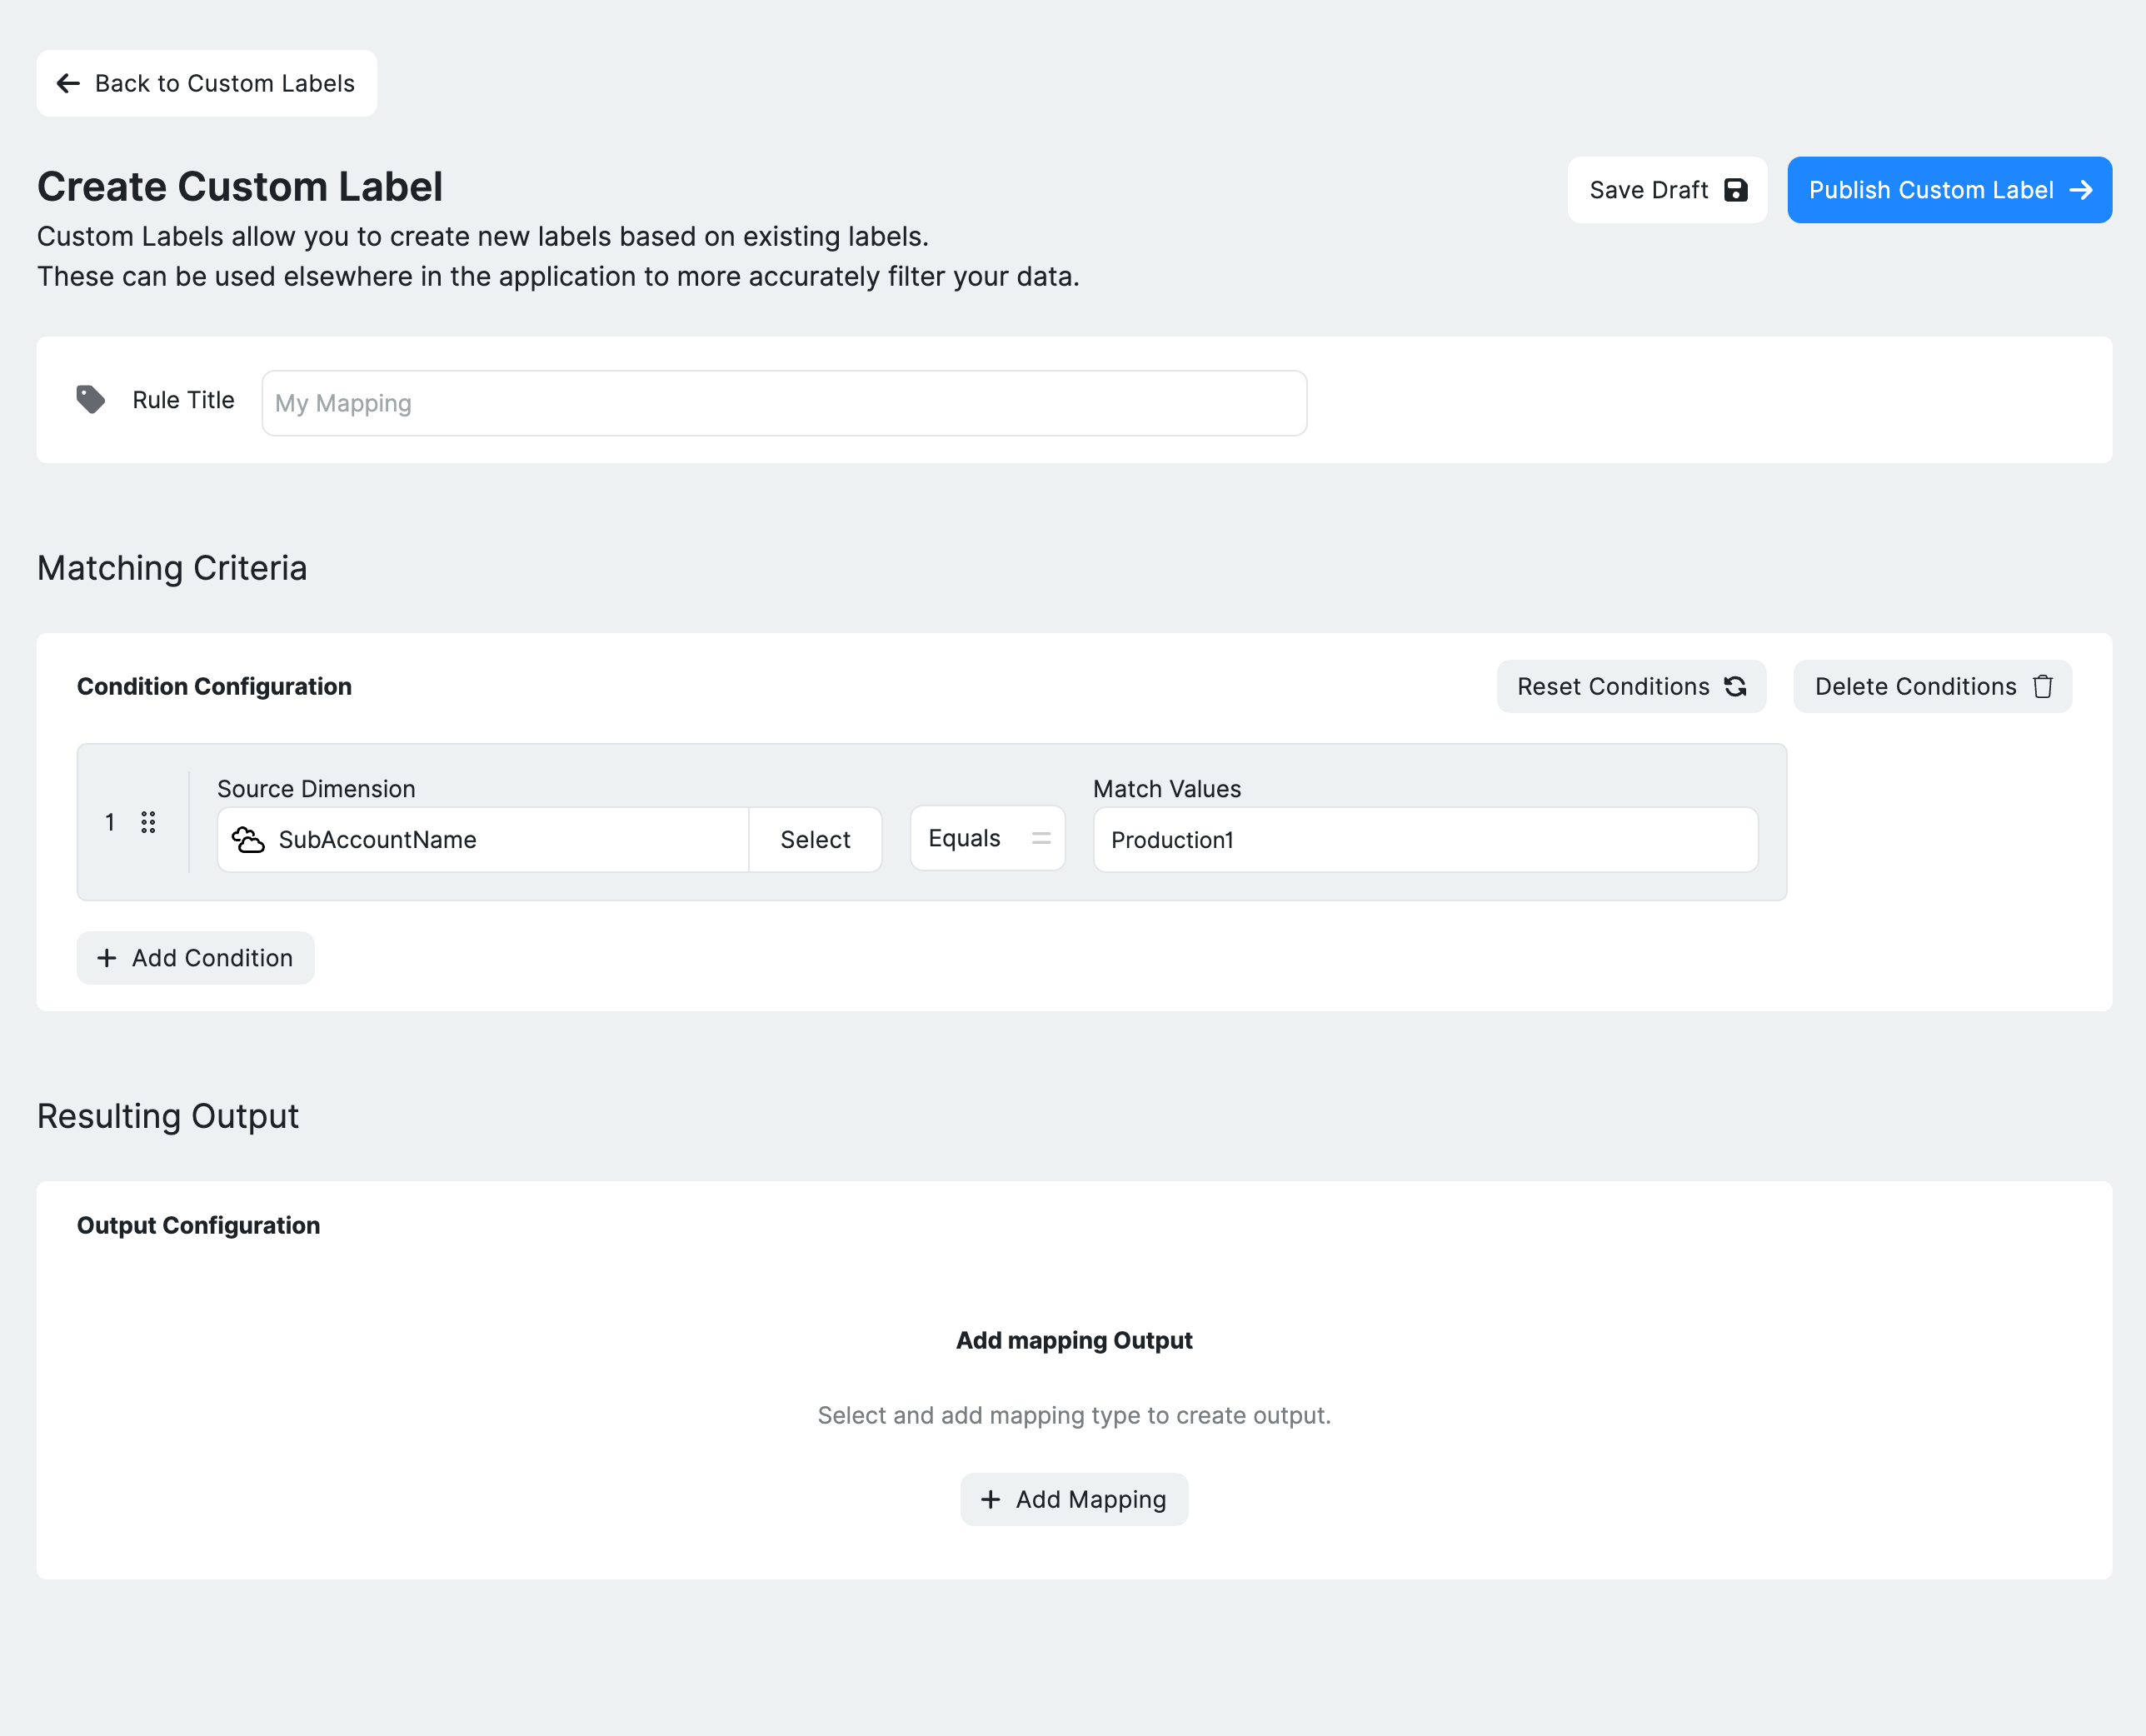
Rule Title: Each custom label rule can be given a descriptive name. This is not a label key itself, but a name to identify the rule’s purpose (e.g. “Map Projects to Cost Centers”). We recommend choosing a name that clearly indicates what the rule does, especially as you may create many rules over time.
-
Conditions (Input Filters): Conditions specify which cost line items the rule will apply to. A condition is typically of the form: Existing Key an attribute from the billing data operator value/pattern. All conditions in a rule must be satisfied (logical AND/OR) for the rule to fire. You can add multiple conditions to target a very specific subset of data (for example, Account equals X and Region equals Y).
-
Existing Label Key: This is the source field you want to evaluate. Ternary automatically ingests various keys from your cloud provider bills (such as project tags, resource labels, project IDs, account IDs, etc.). You can also choose an existing Custom Label key from a previously created rule – v2 supports chaining rules by using outputs of one as inputs to another. When entering a key name, type it exactly as it appears in the data to ensure it’s recognized.
-
Operator: The comparison type to use for matching the key’s value. v2 supports several operators:
- equals – Match the exact string value.
- pattern / wildcard match – A flexible match where
*can substitute for any sequence of characters. For example,env*would matchenv,env-prod, orenviornment. - regex matches – Match using a full regular expression pattern.
- is set – Check that the key exists and has a value.
Note: You can also negate conditions by choosing the appropriate operator.
-
Value/Pattern: The value to compare against, or a pattern if using wildcard/regex. For “equals” you can select one or multiple values. For pattern or regex, provide the desired pattern. For “is set”, no value is needed.
-
-
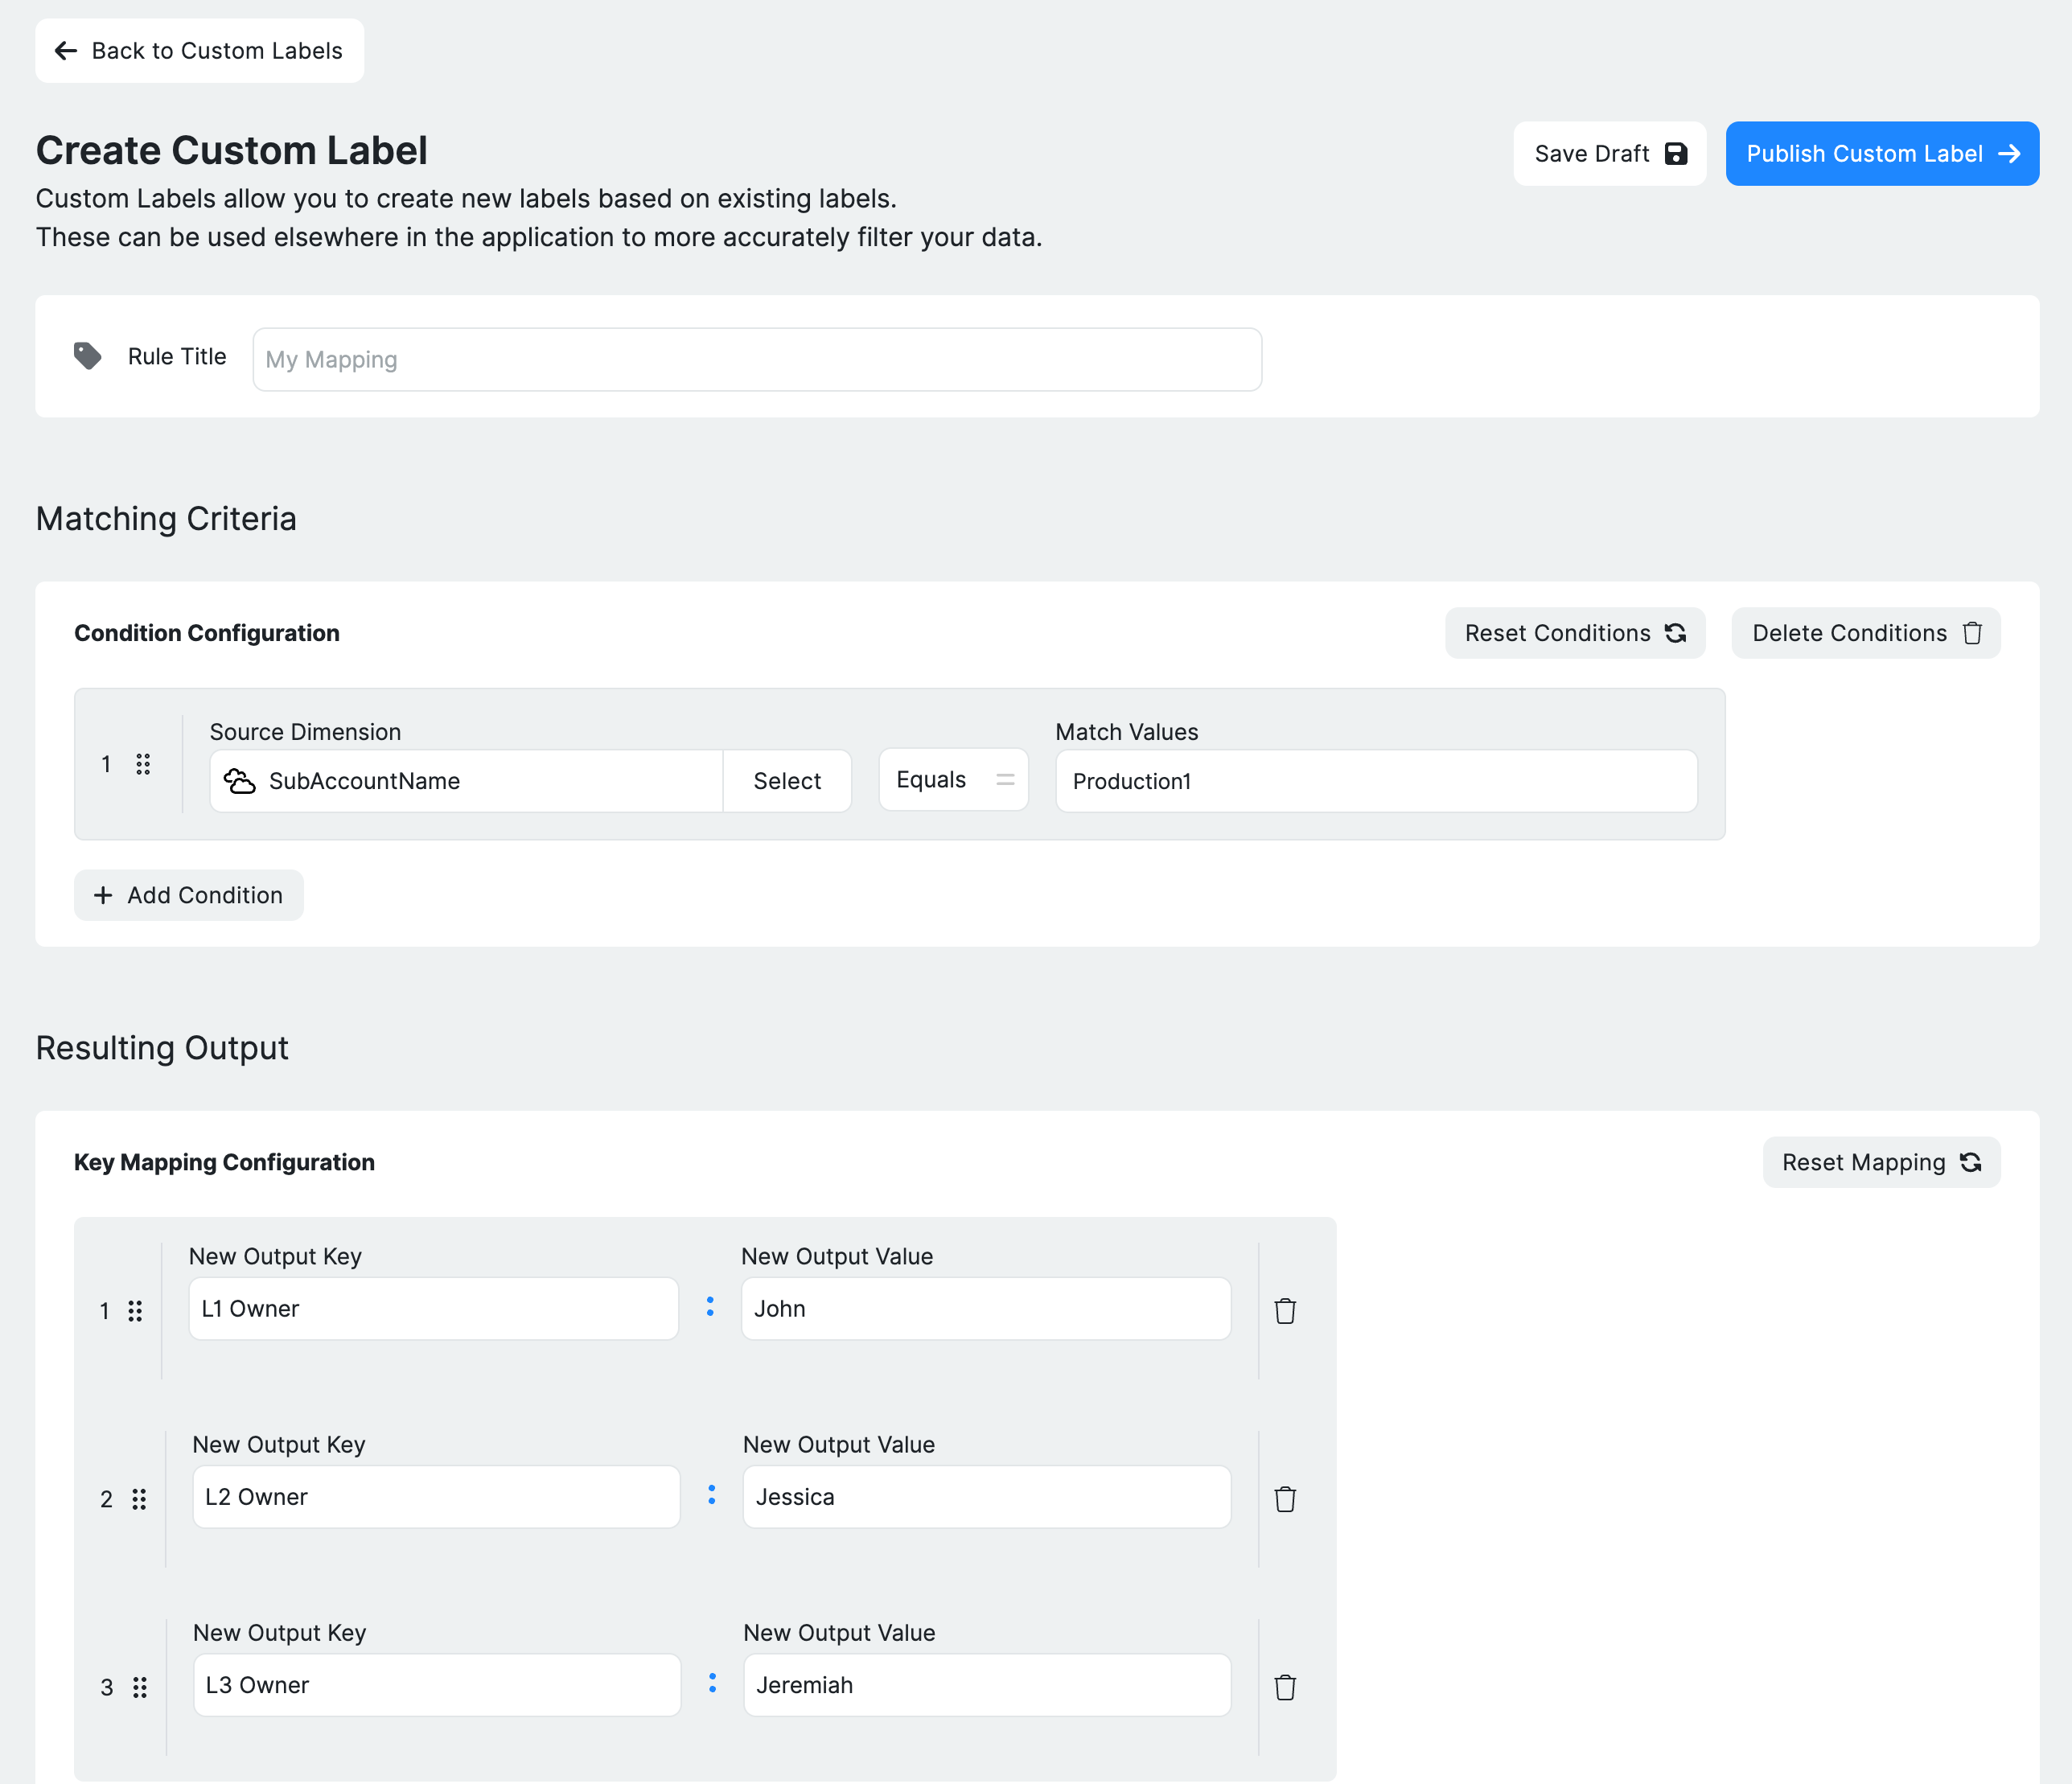
Outputs (New Labels to Assign): The outputs define which new labels will be added to any cost items that meet the conditions. A single rule can add multiple custom labels to those items at once. You have two modes for specifying outputs:
- Direct Assignment: Define a New Custom Label Key and the New Custom Label Value for all matching items. You can add multiple outputs in this fashion.
- Conditional Mapping: Allows the output value to vary based on the original value of some existing field. You will select an existing key to inspect and provide a mapping of its values to new output values.
-
Draft vs. Published: v2 introduces the ability to save a Custom Label rule as a draft before making it active. When you create or edit a rule, you can choose to Save as Draft or Publish it.
-
Processing and Propagation: Once a rule is published, Ternary will apply it to your billing data. This process typically takes a few hours but could be longer. After processing completes, the newly added labels become available throughout the platform.
Methods for Creating Custom Labels (v2)
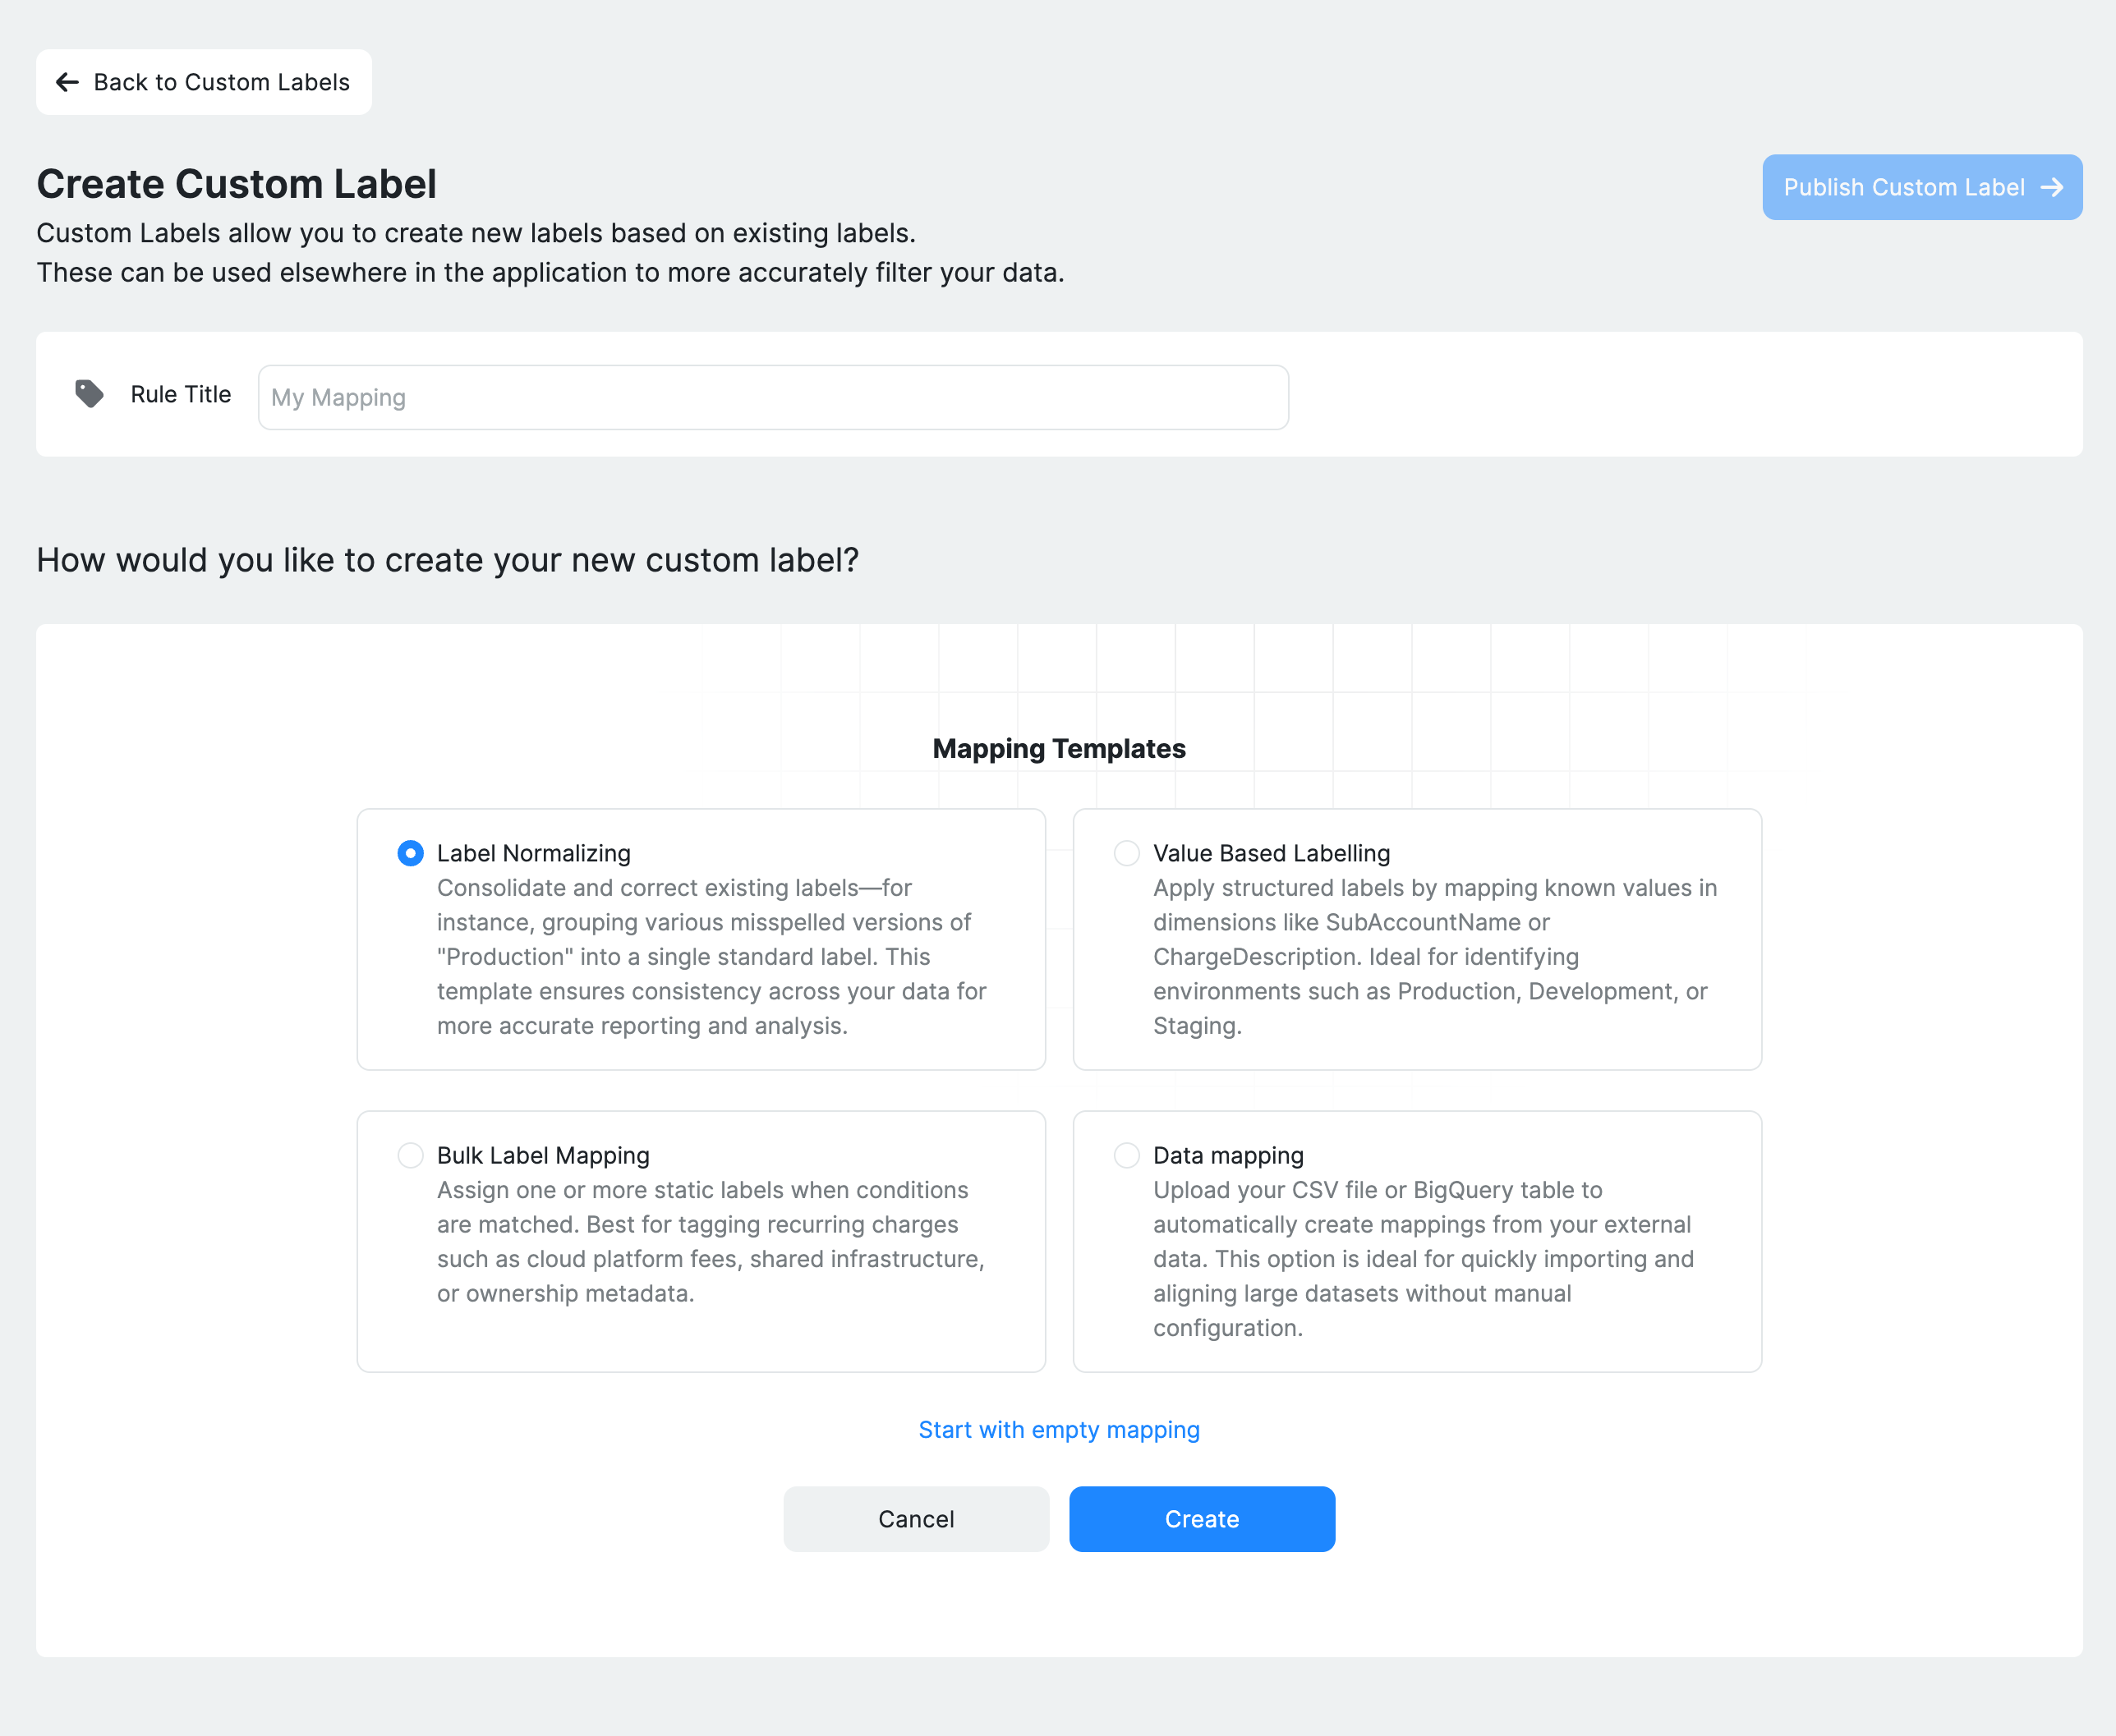
1. Using Pre-Built Templates
Templates provide a guided way to set up typical label types without starting from scratch.
- Go to Custom Labels and click “New Custom Label”.
- Choose a template (e.g., “Normalize Environment Labels”).
- Fill in or adjust the placeholders.
- Review and publish.
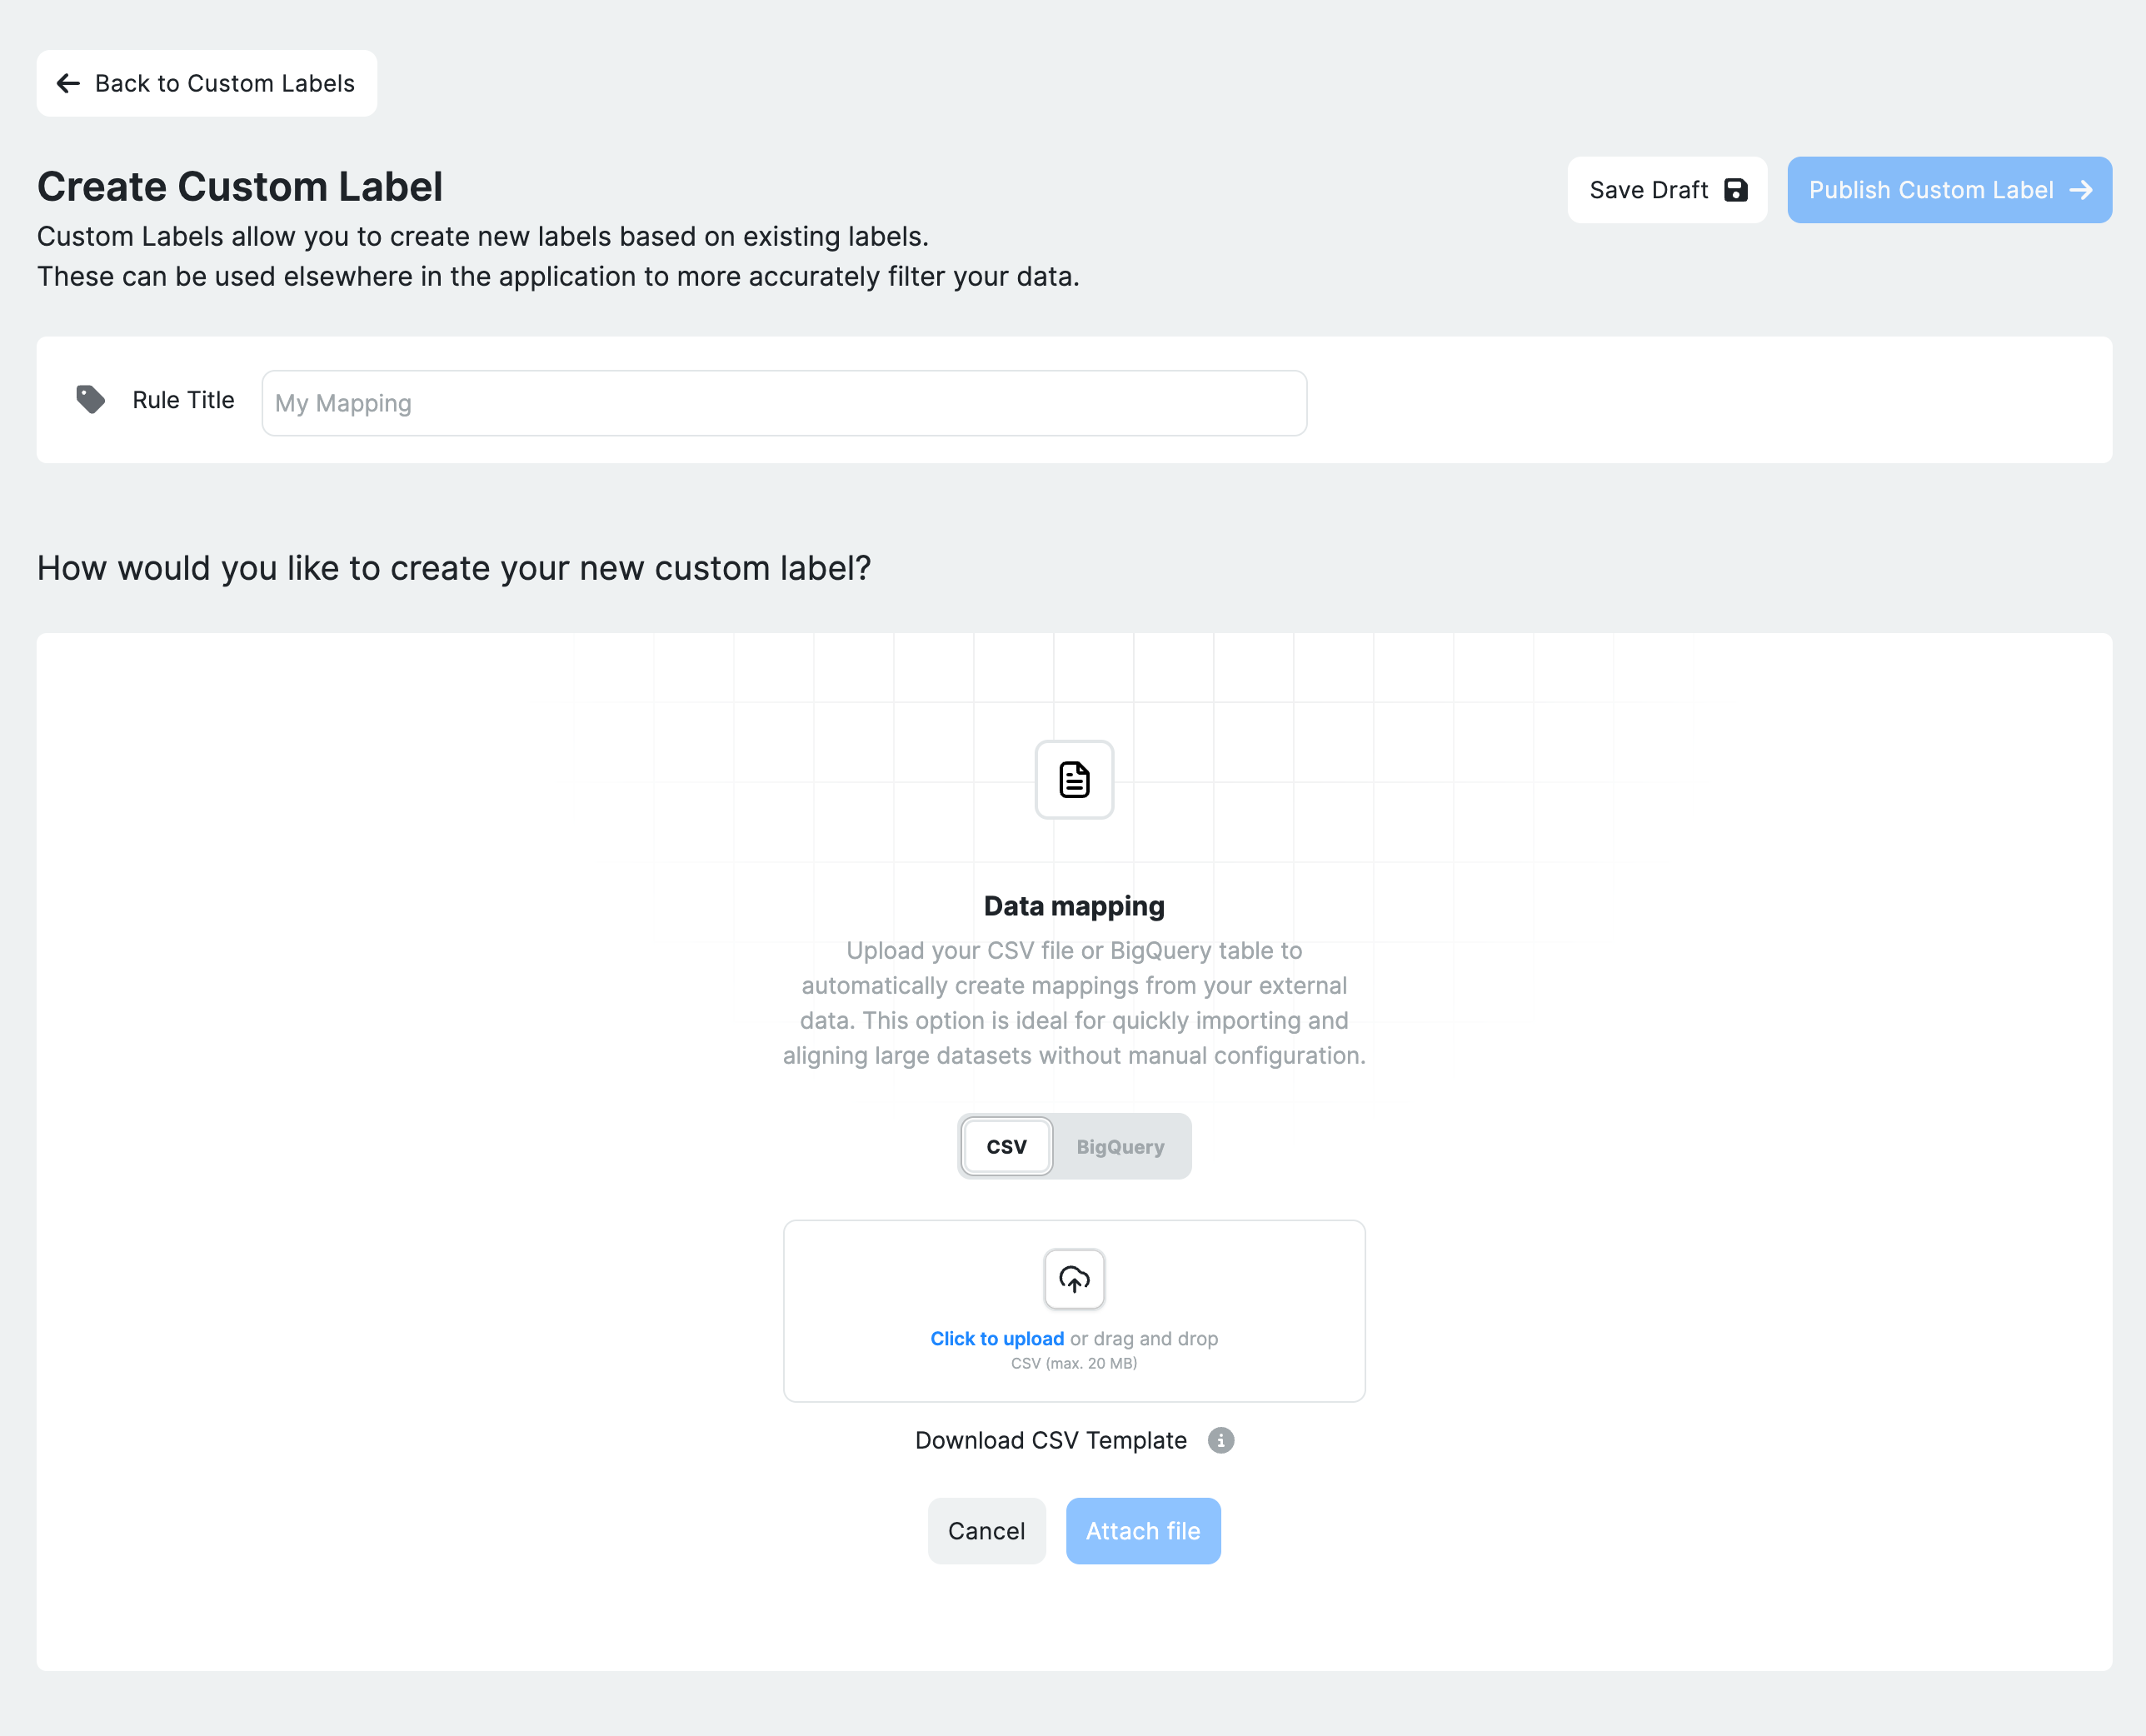
2. Data Mapping
How to use Data Mapping:
- Prepare a CSV file with mapping data or bigquery table (an example template is available on the data mapping template page).
- Select the “CSV” or “BigQuery” option in the UI.
- Upload and validate the file. You will see a preview of the data displayed before publishing, if any errors are found a relevant message will be provided on what needs to be changed before the data can be loaded.
- Submit and let the system process your labels.
3. Creating a Custom Label Rule from Scratch (Manual Setup)
- Click “New Custom Label”, start with a blank rule.
- Enter a Rule Title.
- Add Condition(s) using keys, operators, and values.
- Define Outputs via direct assignment or mapping.
- Review the rule summary.
- Save Draft or Publish.
Using Custom Labels in Reports and Dashboards
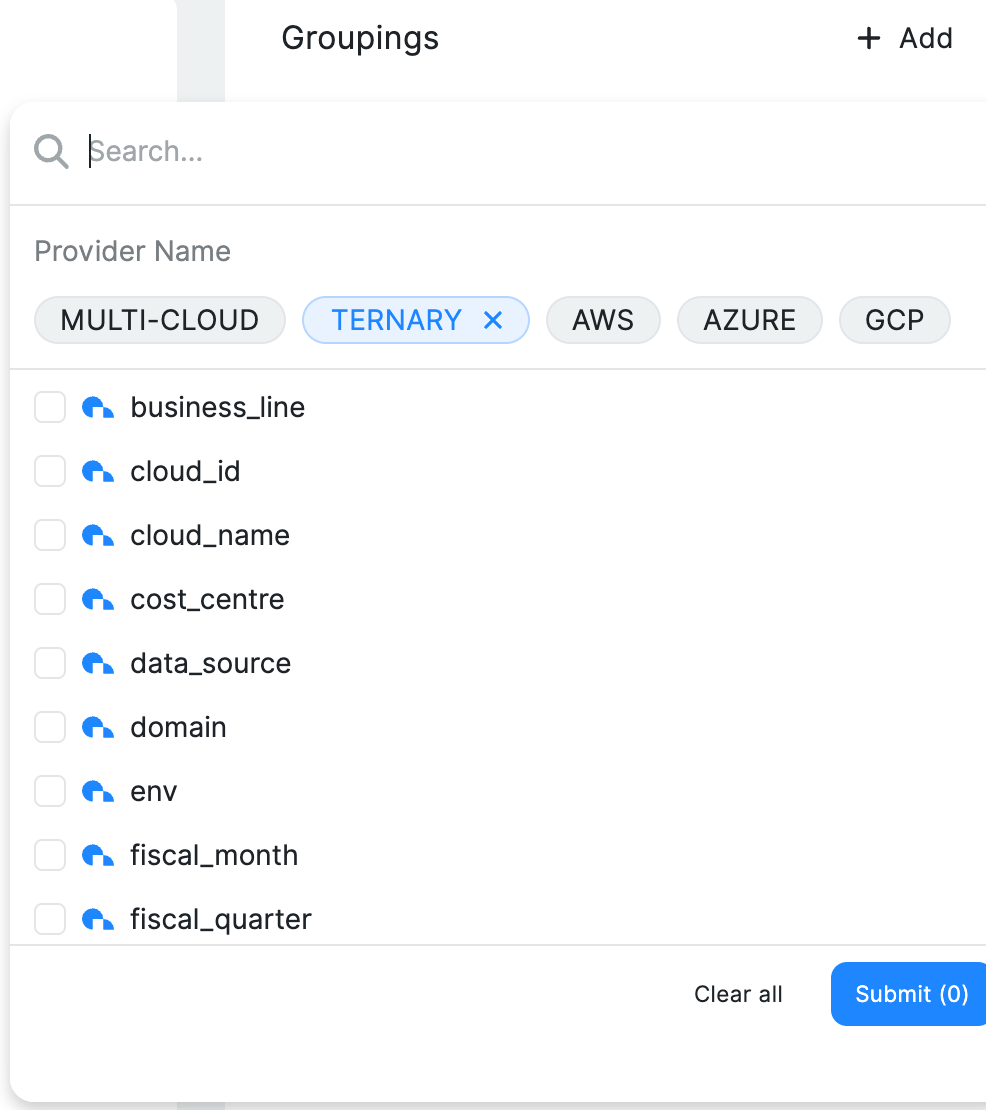
Custom labels will be shown in the grouping selectors across the application. You can quickly search for them by name or use the quick-filter pill named "Ternary" which will list all custom labels you have created.
Managing and Editing Custom Labels
- Viewing Rules: See all rules in the Custom Labels admin page.
- Editing a Rule: Click edit to change the logic, then republish.
- Deleting a Rule: Removes the label completely from Ternary.
- Execution Order: A custom label which is built by referencing output from another custom label is called a "chained label", the execution order of these matter. Chained custom labels will be automatically identified and sorted into a the upper section of the custom label management page where you are able to drag to adjust the order in which they are processed.
Updated about 5 hours ago