Snowflake
Our Snowflake integration provides detailed Snowflake billing data and warehouse insights to give you a comprehensive understanding of your usage and costs.
With this feature, you can gain a granular view of your Snowflake expenses, helping you track and manage your costs more effectively. Complimenting the billing data, our Warehouse Insights feature offers deep analytics of your Snowflake warehouse operations, providing actionable insights for better decision-making and optimization.

Prerequisites:
- Account with an Owner role in Ternary
- The default ACCOUNTADMIN role in Snowflake or if you will use a different role, you can follow the GRANT IMPROVED PRIVILEGES example documented here to provide your preferred role access to the special Snowflake database.
- The Snowflake accounts need to have _ORGADMIN _enabled even if the ORGADMIN role itself is not the role that will be used in Ternary. Documentation for enabling ORGADMIN can be found here
Step 0 - If your organization would like to use a custom role
- In Snowflake, create a custom role. You can name it anything you'd like but save the name as you will be inputting it into Ternary when you configure Snowflake in the Ternary platform
-
In Snowflake Cloud, use a worksheet to run: GRANT IMPORTED PRIVILEGES ON DATABASE SNOWFLAKE TO ROLE <name of custom role you created>
- Snowflake documentation: https://docs.snowflake.com/en/sql-reference/account-usage#enabling-the-snowflake-database-usage-for-other-roles
Step 1 - Required Information to gather from Snowflake
You will need to gather 6 required pieces of information to complete the configuration in Ternary.
- Snowflake Organization Name - Finding the name of your organization documentation here
- Account Name (For all Snowflake accounts you'd like Ternary to ingest) - Finding a list of your Snowflake accounts documentation here
- Role Name (This is either the ACCOUNTADMIN default role or a custom role you configure as discussed in the pre-requisites section above)
- Warehouse Name - Finding the name of the warehouses you'd like to ingest into Ternary can be found here
- Username
- Password
Step 2 - Configuration in Ternary
Once you have gathered the necessary details from Snowflake, you can begin configuring the integration in Ternary by following the below steps:
- Navigate and login to your Ternary instance at https://my.ternary.app
- Access Admin page from left hand navigation menu
- Select "Clouds" tab
- Click "New Cloud" and select Snowflake
- Provide the Cloud Name (this can be anything you would like and will be how it is displayed in Ternary when using the cloudName dimension) and the Organization Name you gathered in Step 1
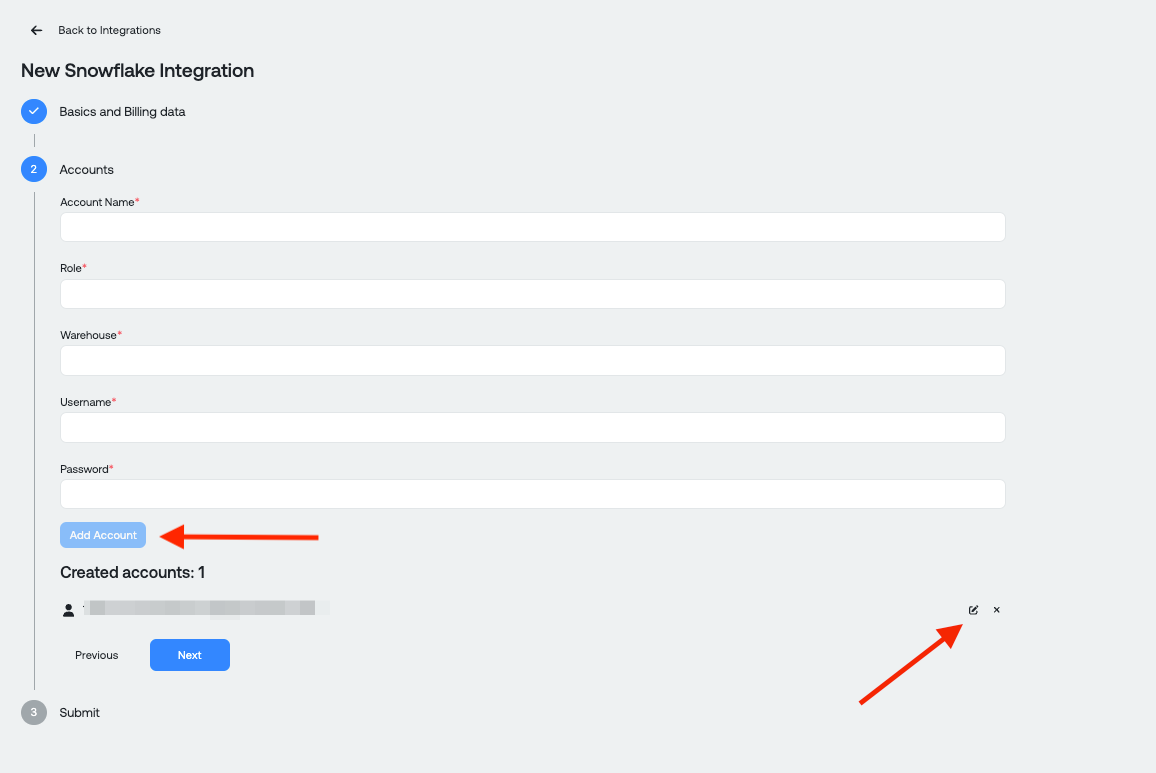
- Navigate to Account 1, to configure the first account and supply the the following information you gathered in Step 1: Account Name, Role, Warehouse, Username and Password
- If you'd like to add a second account, select Add Account to add additional Snowflake accounts.
- Click Submit
Step 3 - Viewing Snowflake data in Ternary
Once you have successfully configured the integration, it may take up to 24 hours for Snowflake cost data and the query history to populate in Ternary. Once the data has been populated you can view the data using the steps below:
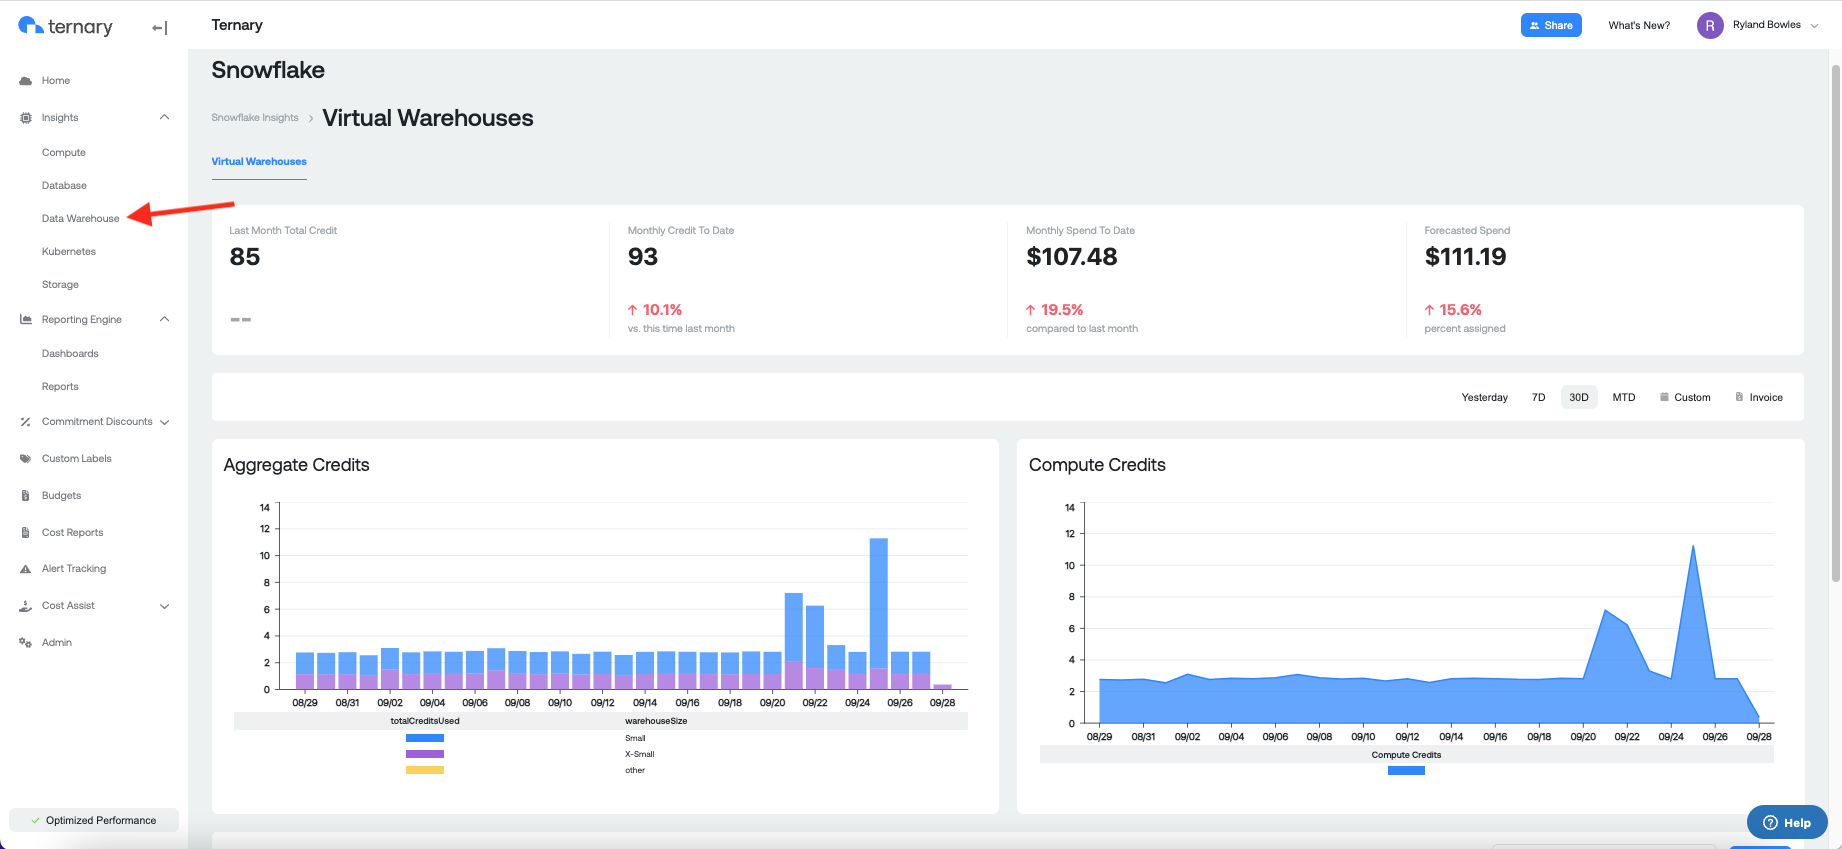
- Navigate to Insights from lefthand navigation menu -> Data Warehouse page
- Select Snowflake
- You will see an overview of your Virtual Warehouse usage and the query history in the table below
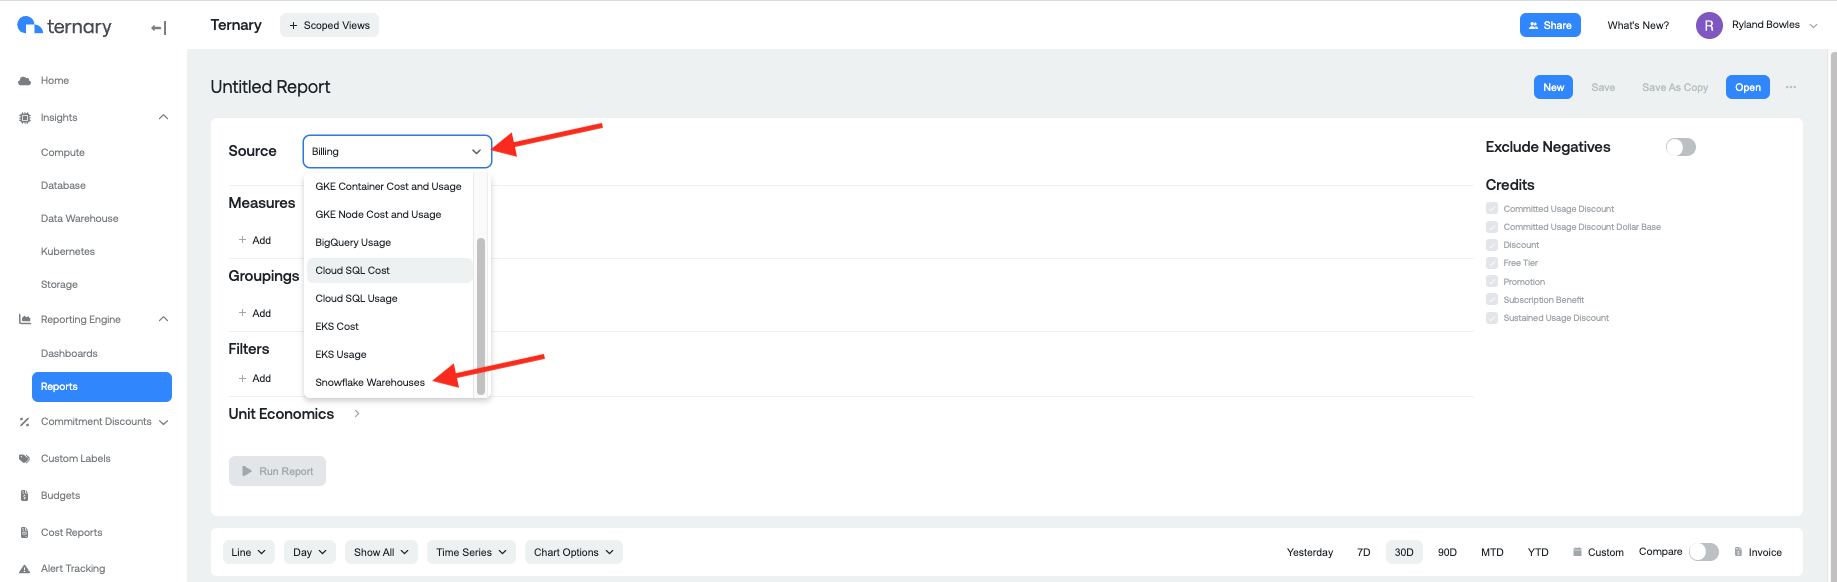
You can also use the Ternary Reporting Engine to build reports to monitor your Snowflake usage and spend or create custom Dashboards based on your Snowflake usage.
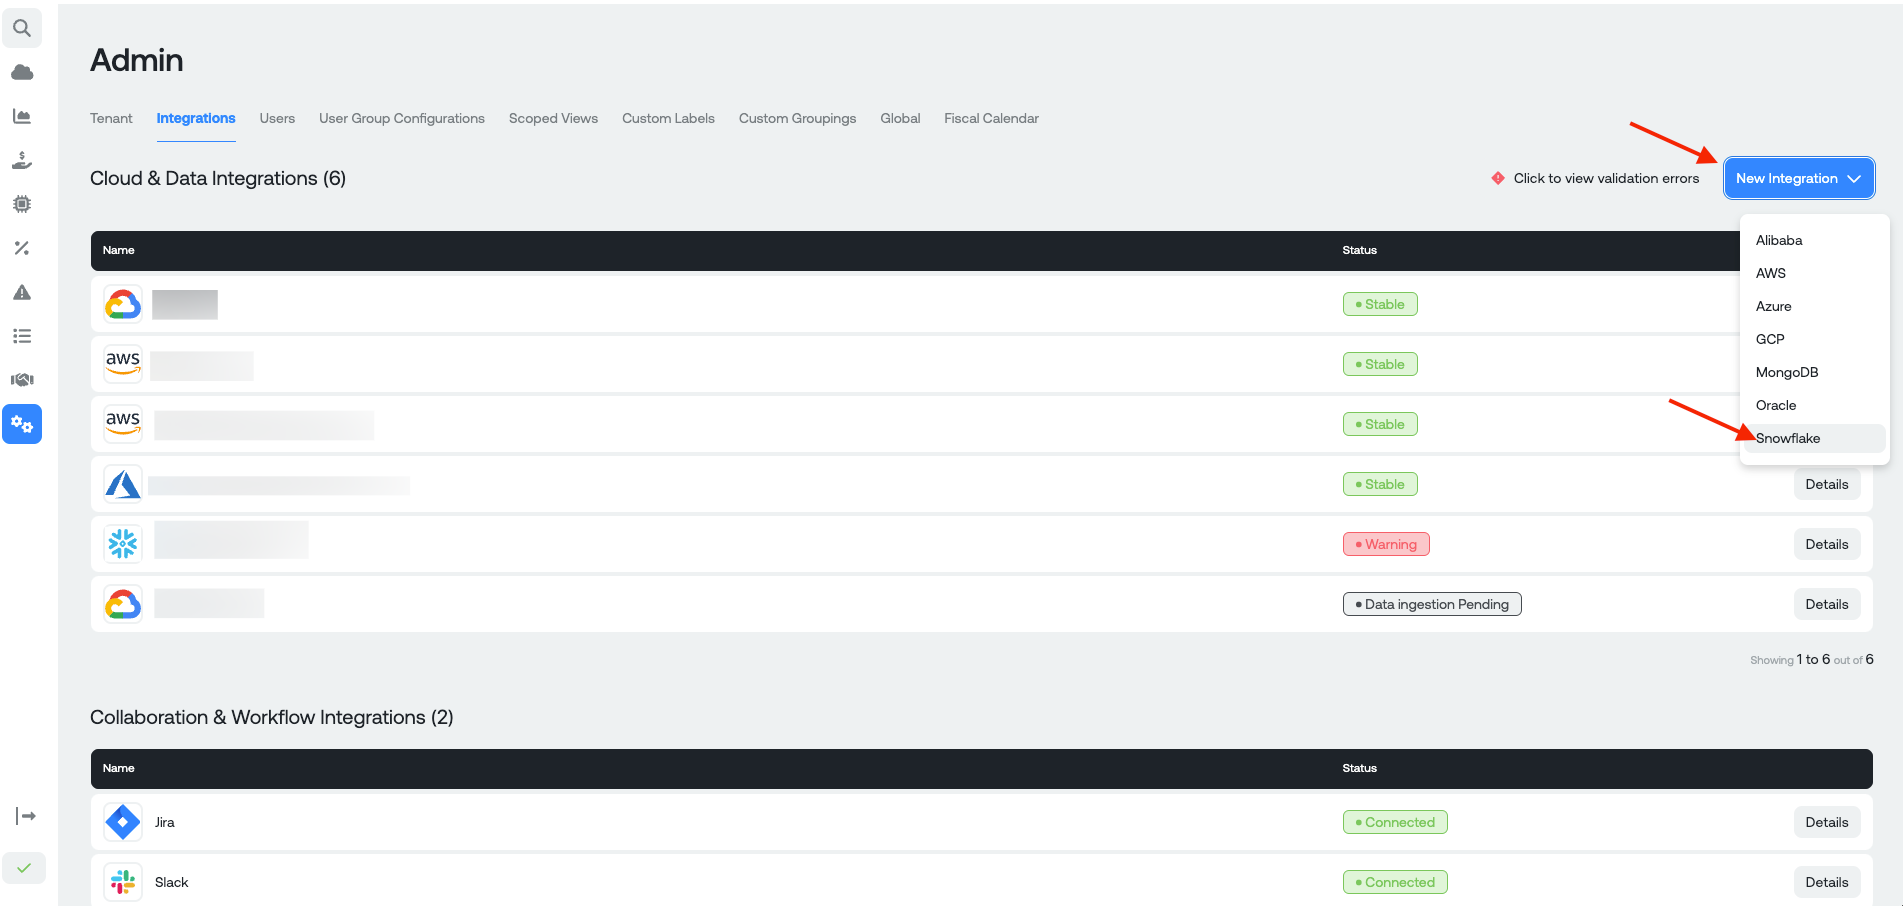
Configuration Steps in Ternary:
Navigating to New Cloud -> Snowflake
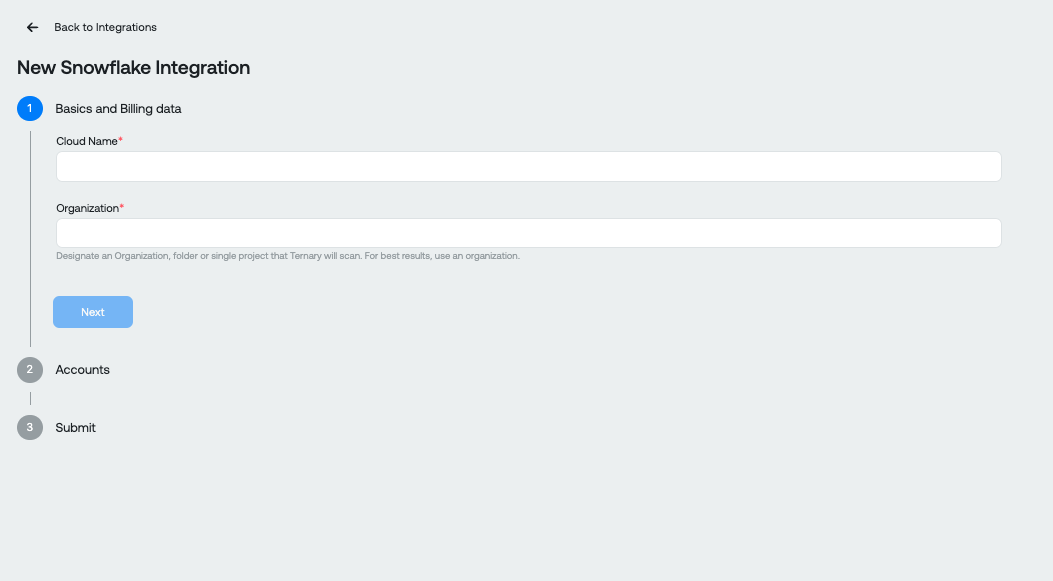
Basic Information (Cloud Name is what will be displayed in Ternary and Organization Name is your Snowflake Organization)
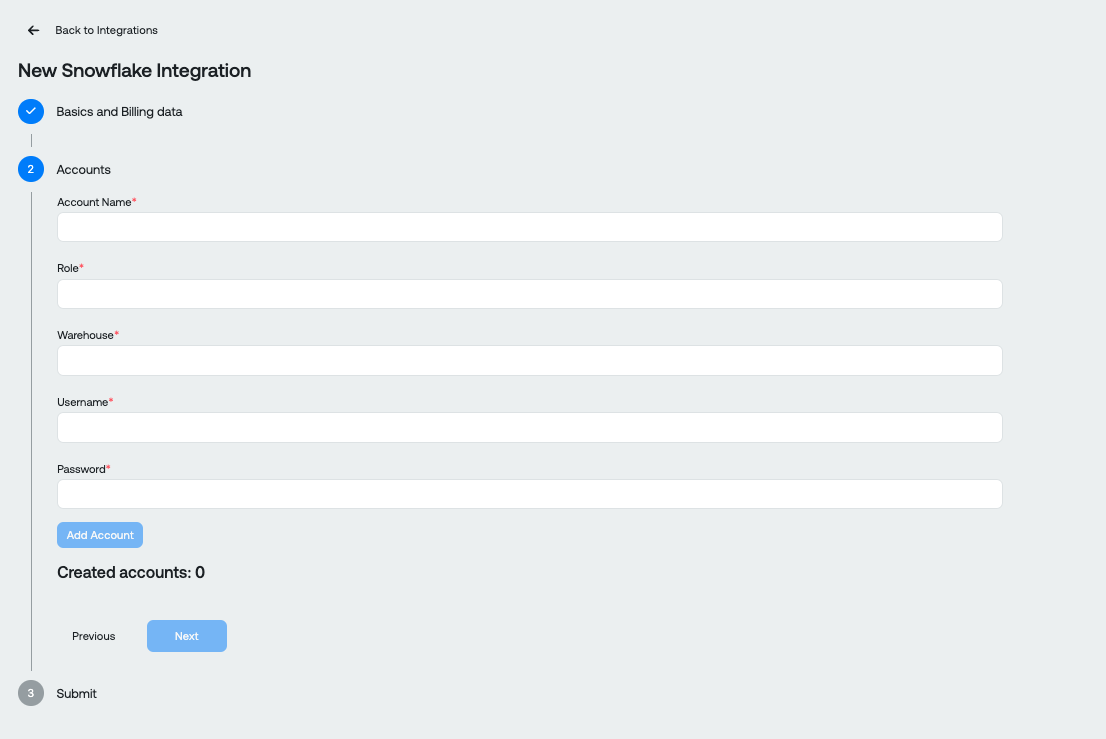
Adding a Snowflake Account (all these fields are from Snowflake):
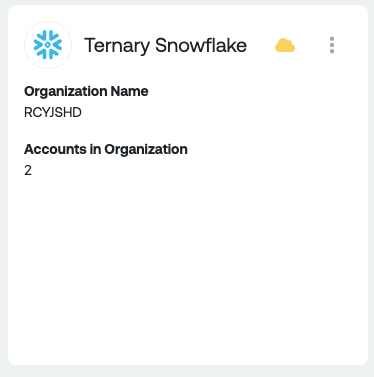
Successfully configured Snowflake integration:
Editing or Adding another Snowflake Account:
Snowflake Insights Page:
Using Ternary Reporting Engine to analyze Snowflake cost and usage data:
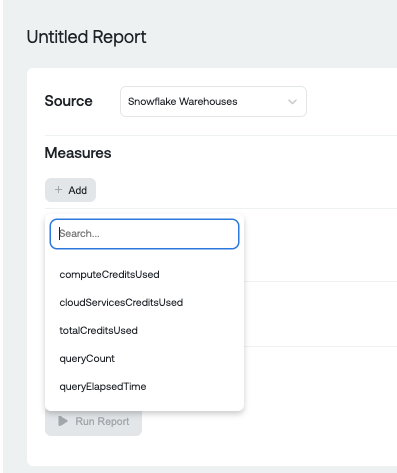
Snowflake Measures:
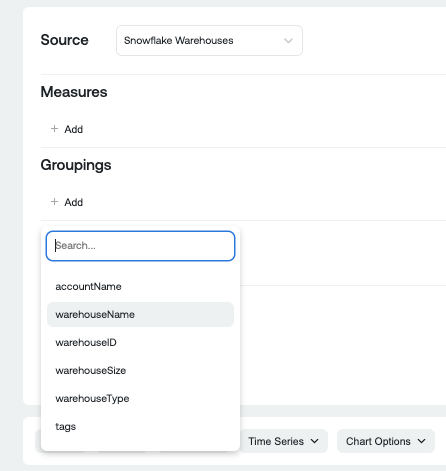
Snowflake Groupings:
Updated 7 days ago