Data Mapping
Learn how Data Mapping in Ternary creates custom labels at scale using CSV or BigQuery mappings to enrich billing data with structured label values.
Data Mapping allows custom labels to be created at scale by mapping existing billing dimensions to new output labels using a CSV file or a BigQuery table. This approach is designed for bulk enrichment scenarios where label values can be derived from structured reference data rather than manual rules.
Data Mapping supports creating one or more output labels from one or more input match keys in a single operation.
How does Data Mapping work?
Data Mapping uses a lookup-based approach where one or more input columns are matched against existing billing dimensions and one or more output columns are written as new custom label values. Each row represents a deterministic mapping from defined inputs to their corresponding outputs.
Here’s how you can create custom labels with data mapping:
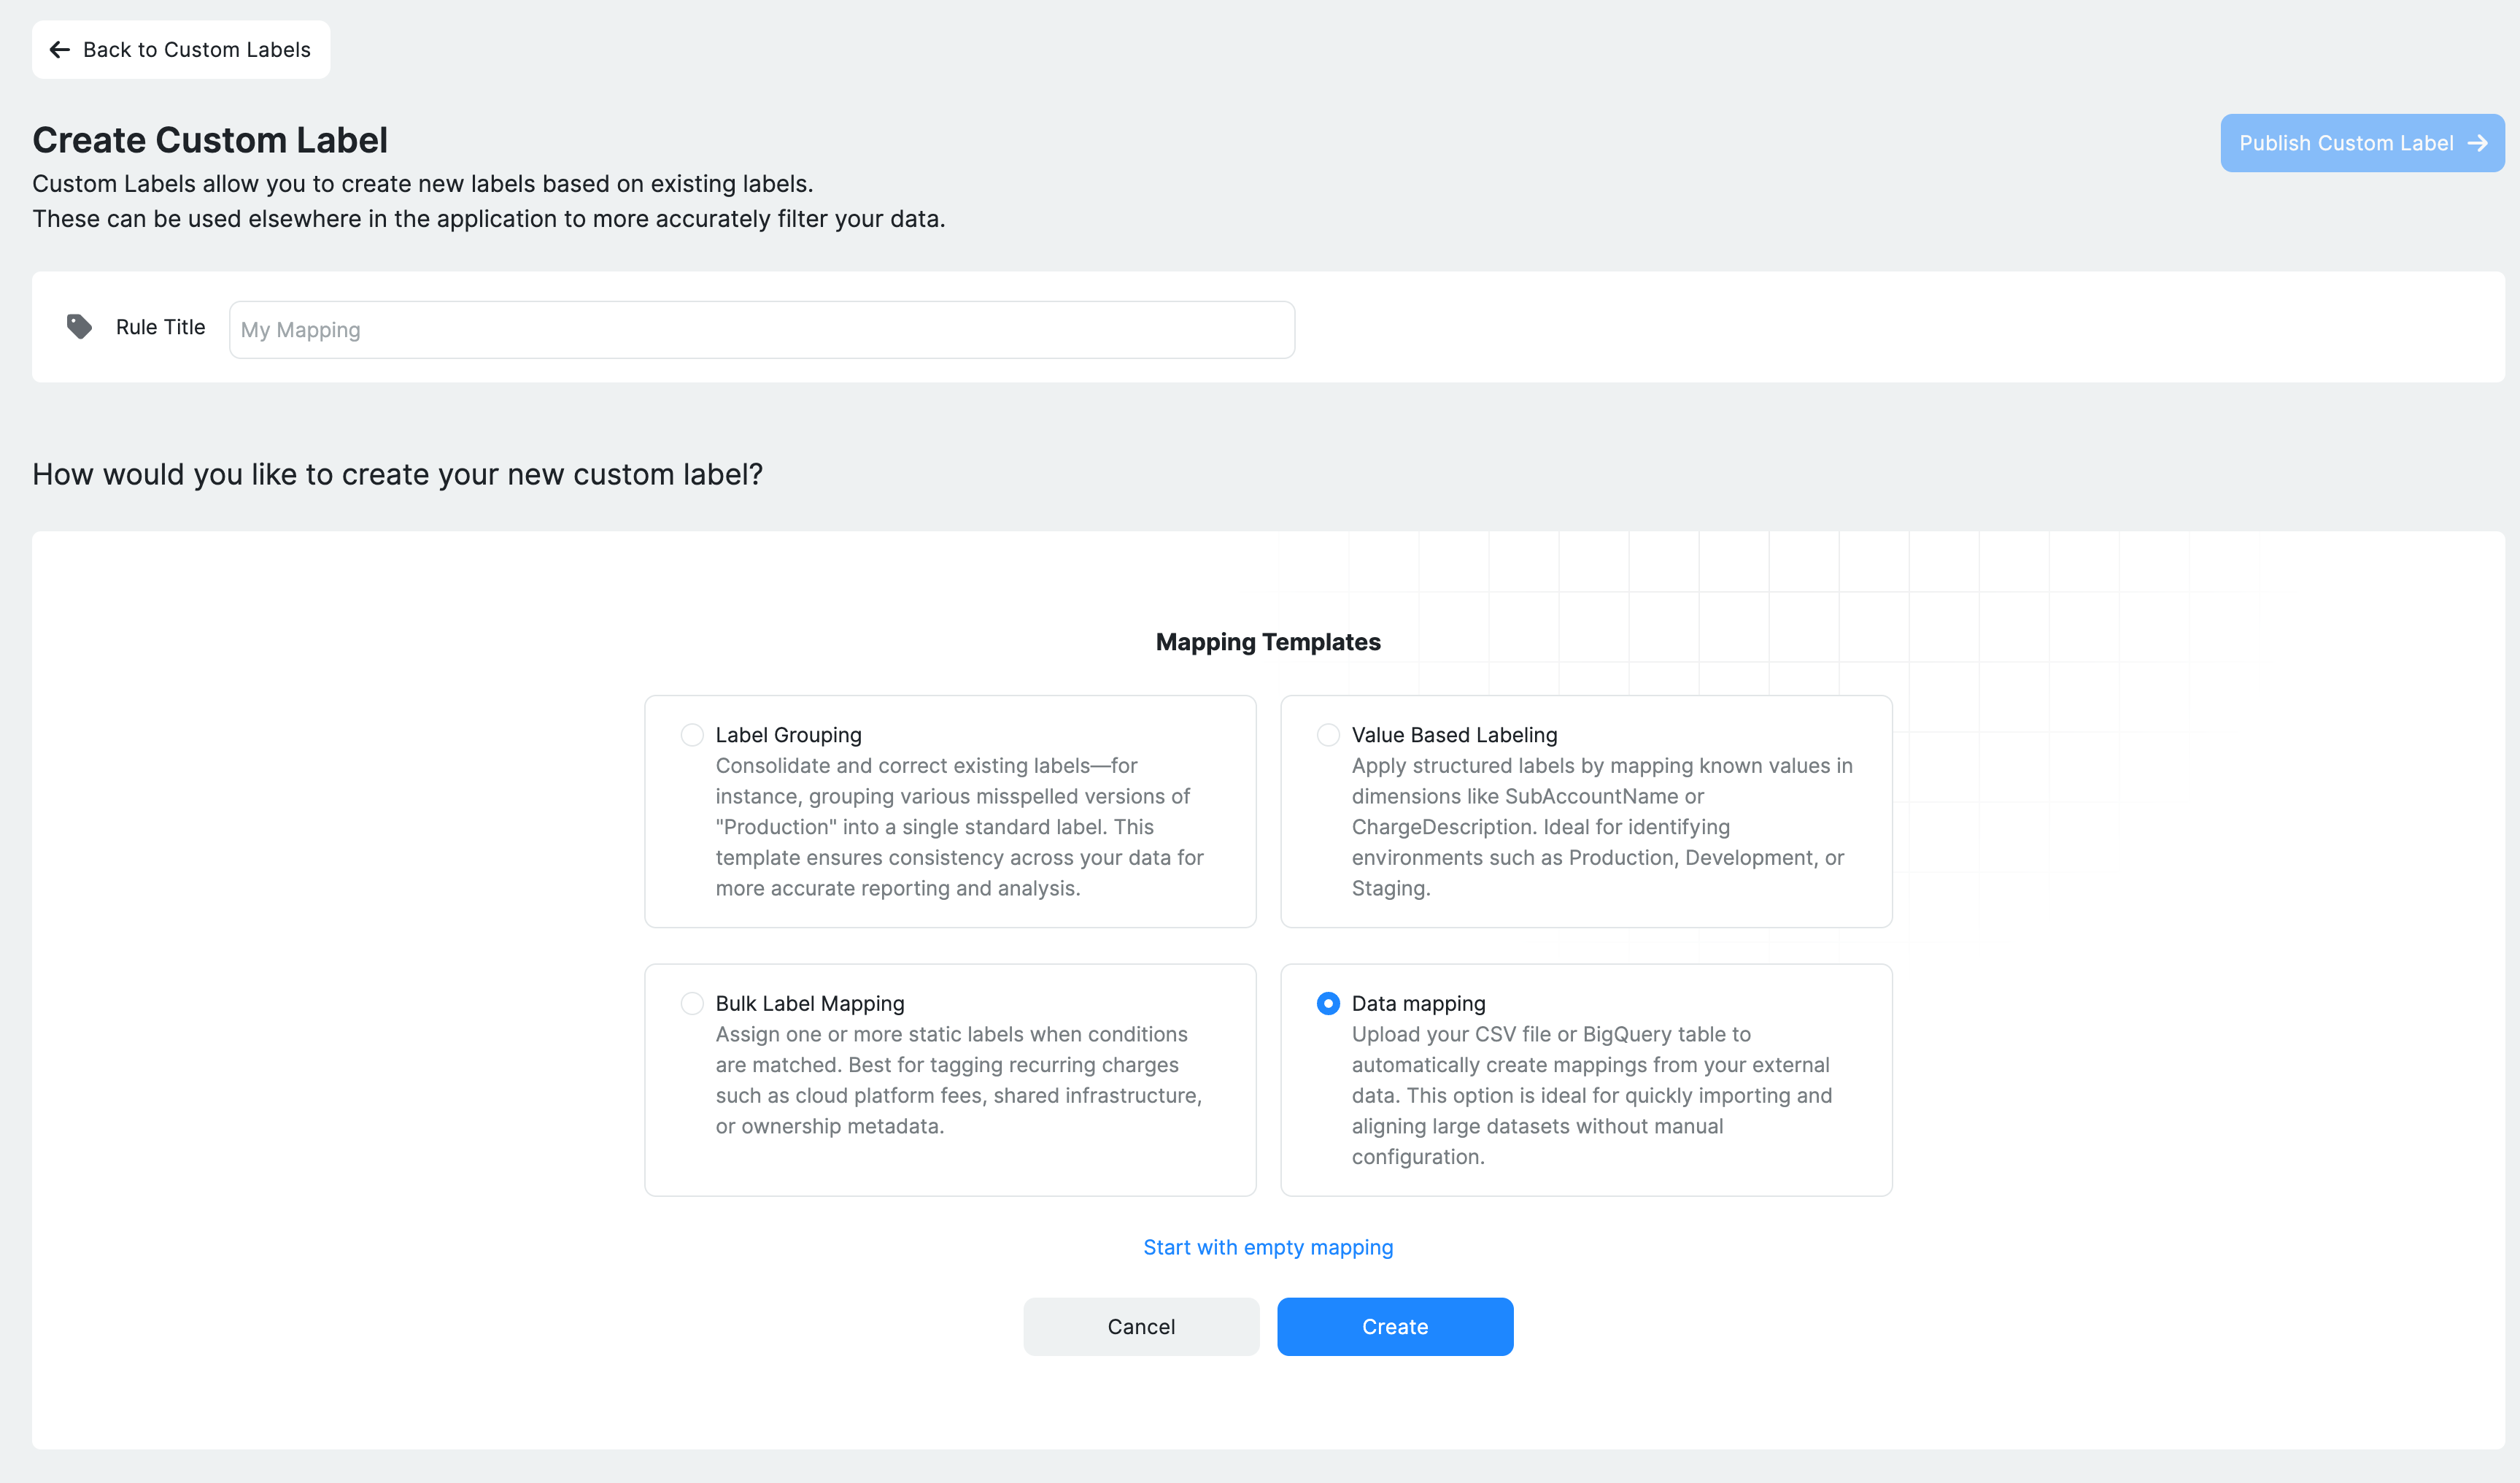
Step 1: Create a new Data Mapping label
- Navigate to Admin → Custom Labels → Create Custom Label.
- Enter a Rule Title that clearly describes the mapping purpose (for example, Map Projects to Business Units).
- Select Data Mapping as the label creation template.
- Choose the data source as a CSV file, or a BigQuery table using its fully qualified path.
- Attach the file or table reference.
- Select Save Draft to store the configuration before publishing.
Step 2: Prepare the mapping file
The mapping file must follow a strict structure.
Supported formats
- CSV file (maximum size: 20 MB)
- BigQuery table
Required structure
- The first column is required and represents the primary input key (for example, BillingAccountName or AccountID).
- All remaining columns are treated as output labels.
- Column headers are used as label keys.
Example
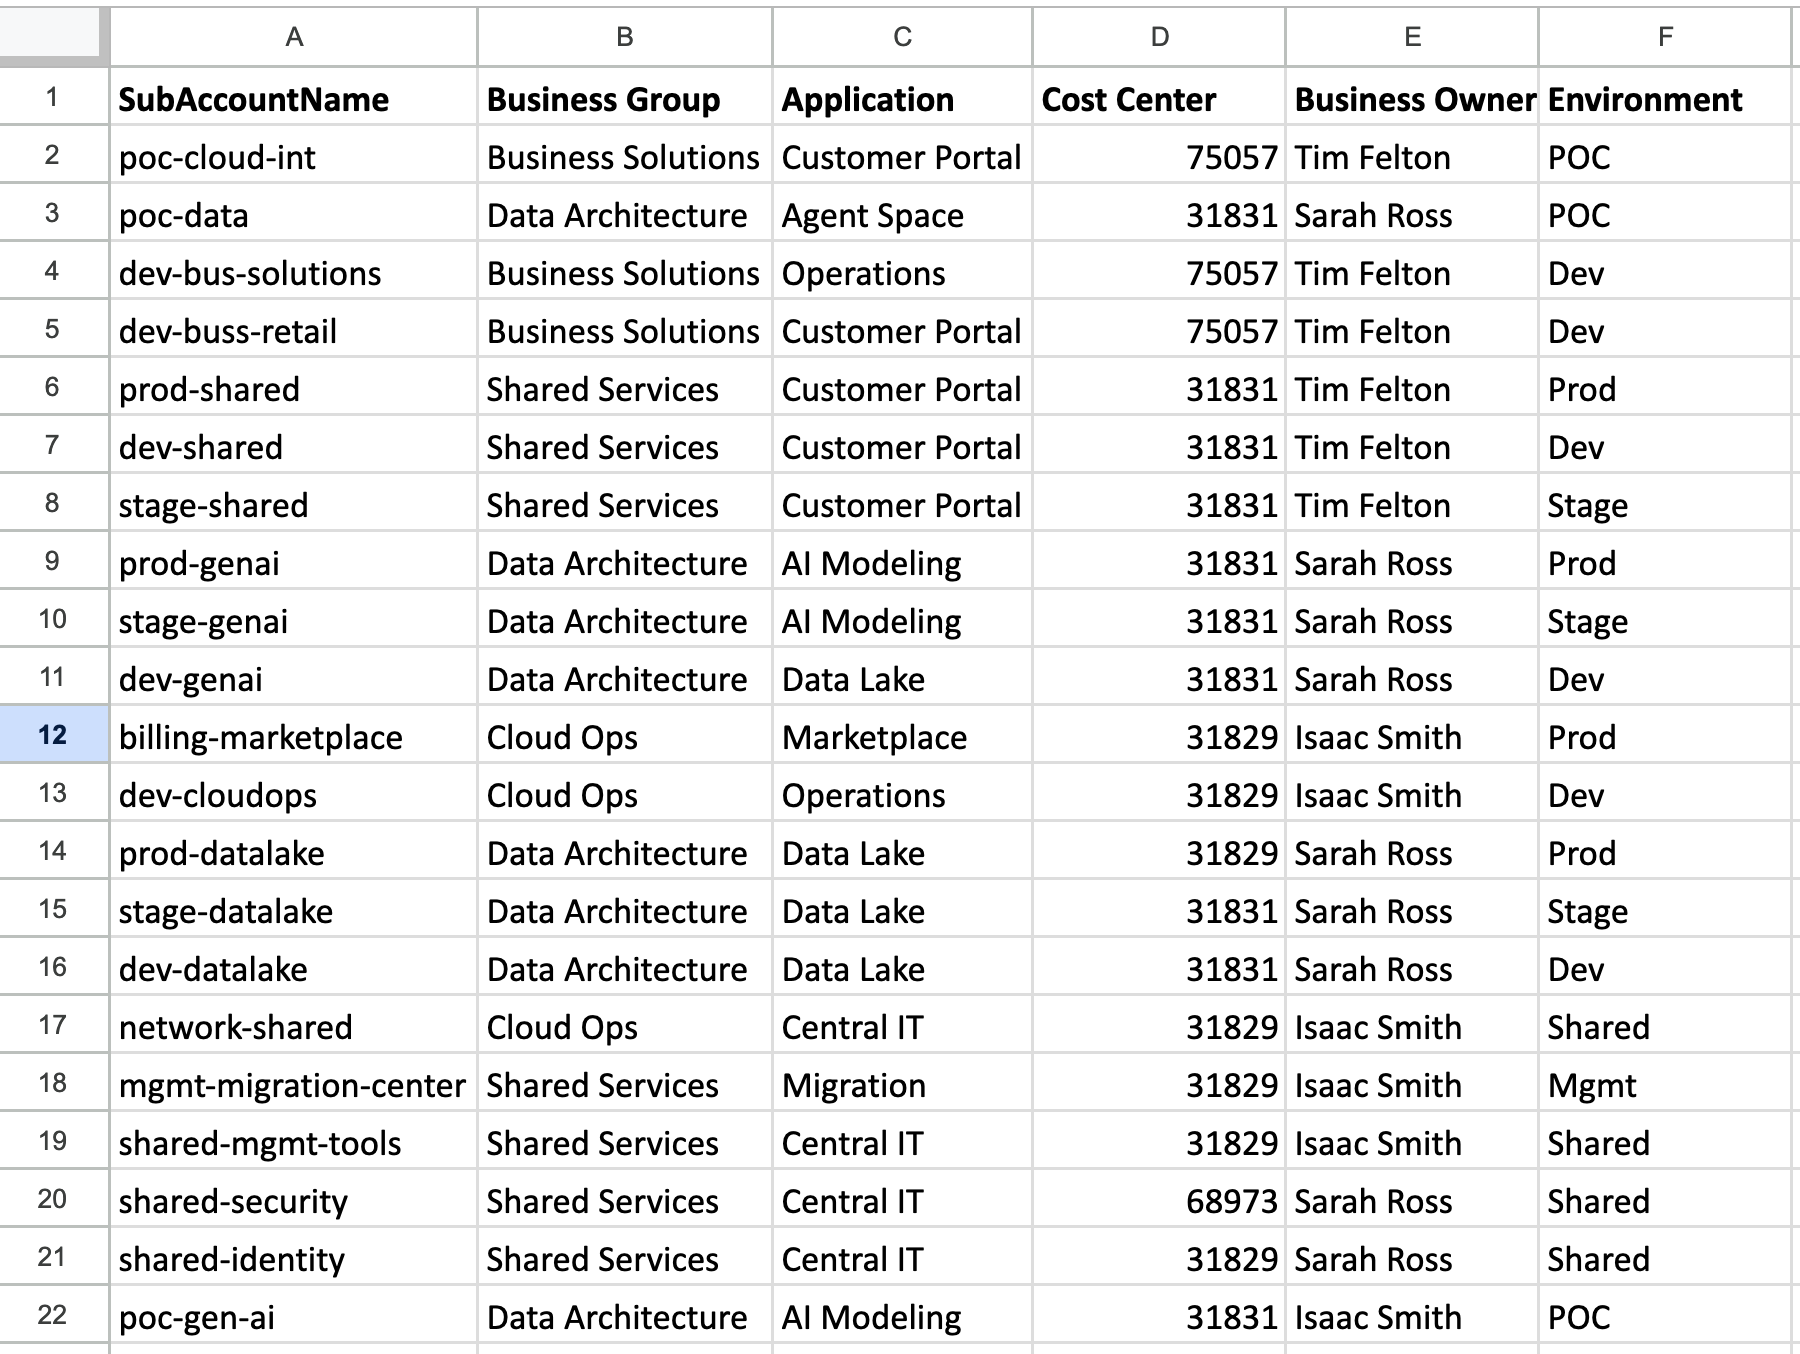
Each row defines how a specific input value maps to one or more output label values.
Step 3: Configure mappings in the preview screen
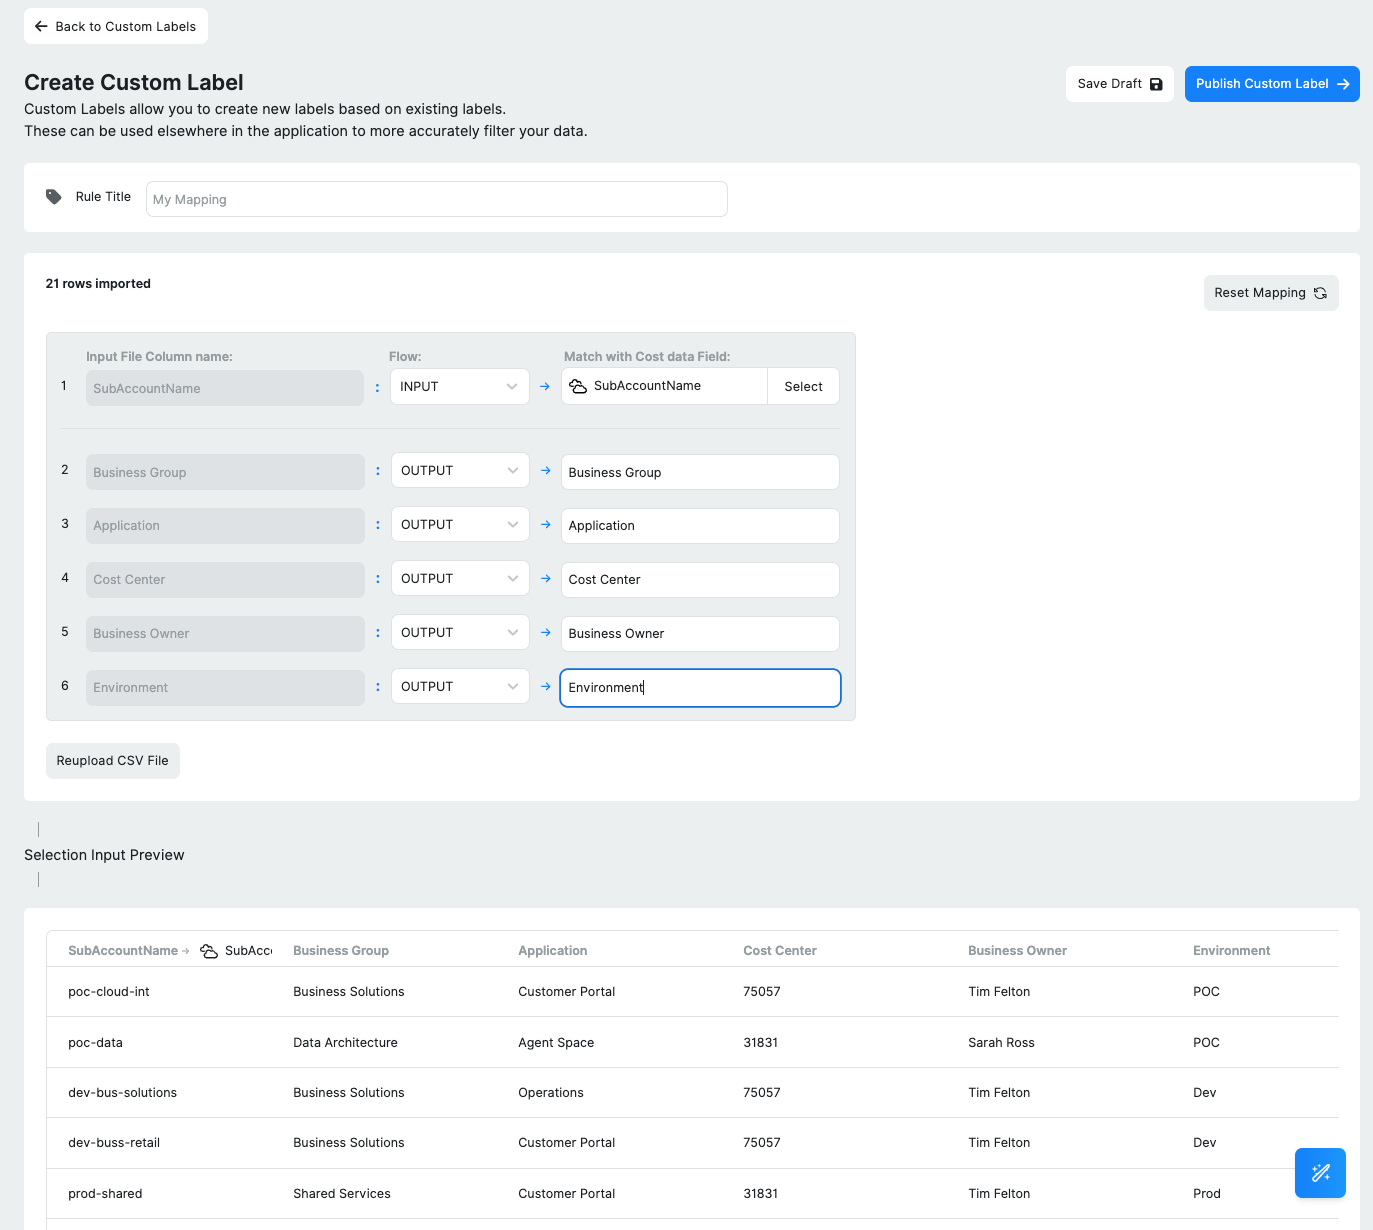
Once the file is attached, the mapping preview screen is used to define how file columns translate into billing data and custom labels. This step controls how input values are matched and how output labels are generated.
- File column listing: All column headers from the uploaded CSV or referenced BigQuery table are displayed.
- Flow selection: Each column is explicitly marked as an INPUT (lookup key) or OUTPUT (label to be written).
- Cost field matching: INPUT columns are mapped to existing billing dimensions, such as BillingAccountName or Project ID, to define how rows are matched.
- Preview table: A live preview shows how each input row will resolve into output label values.
- Input validation preview: Displays sample rows with the selected mappings applied, allowing verification that input values align correctly with billing data.
- Output confirmation: Confirms which columns will be written as new custom label keys and which rows will produce label values.
In a typical configuration, the first input column represents the primary billing match key, while one or more output columns define the labels to be applied when a match is found.
Validation rules and constraints
Before publishing, the following validations are enforced:
- Input column headers must exactly match internal billing dimension names. Matching is case-sensitive.
- Input values must exactly match billing data values.
- Duplicate or conflicting input rows will block publishing.
- Blank output values are permitted and treated as no label assignment.
- Invalid file formats, hidden characters, or malformed headers will cause an error.
Updated 5 months ago